





This documentation describes the conversion of an "old-fashioned" H0 locomotive into a locomotive that can be electronically controlled by a smartphone app.
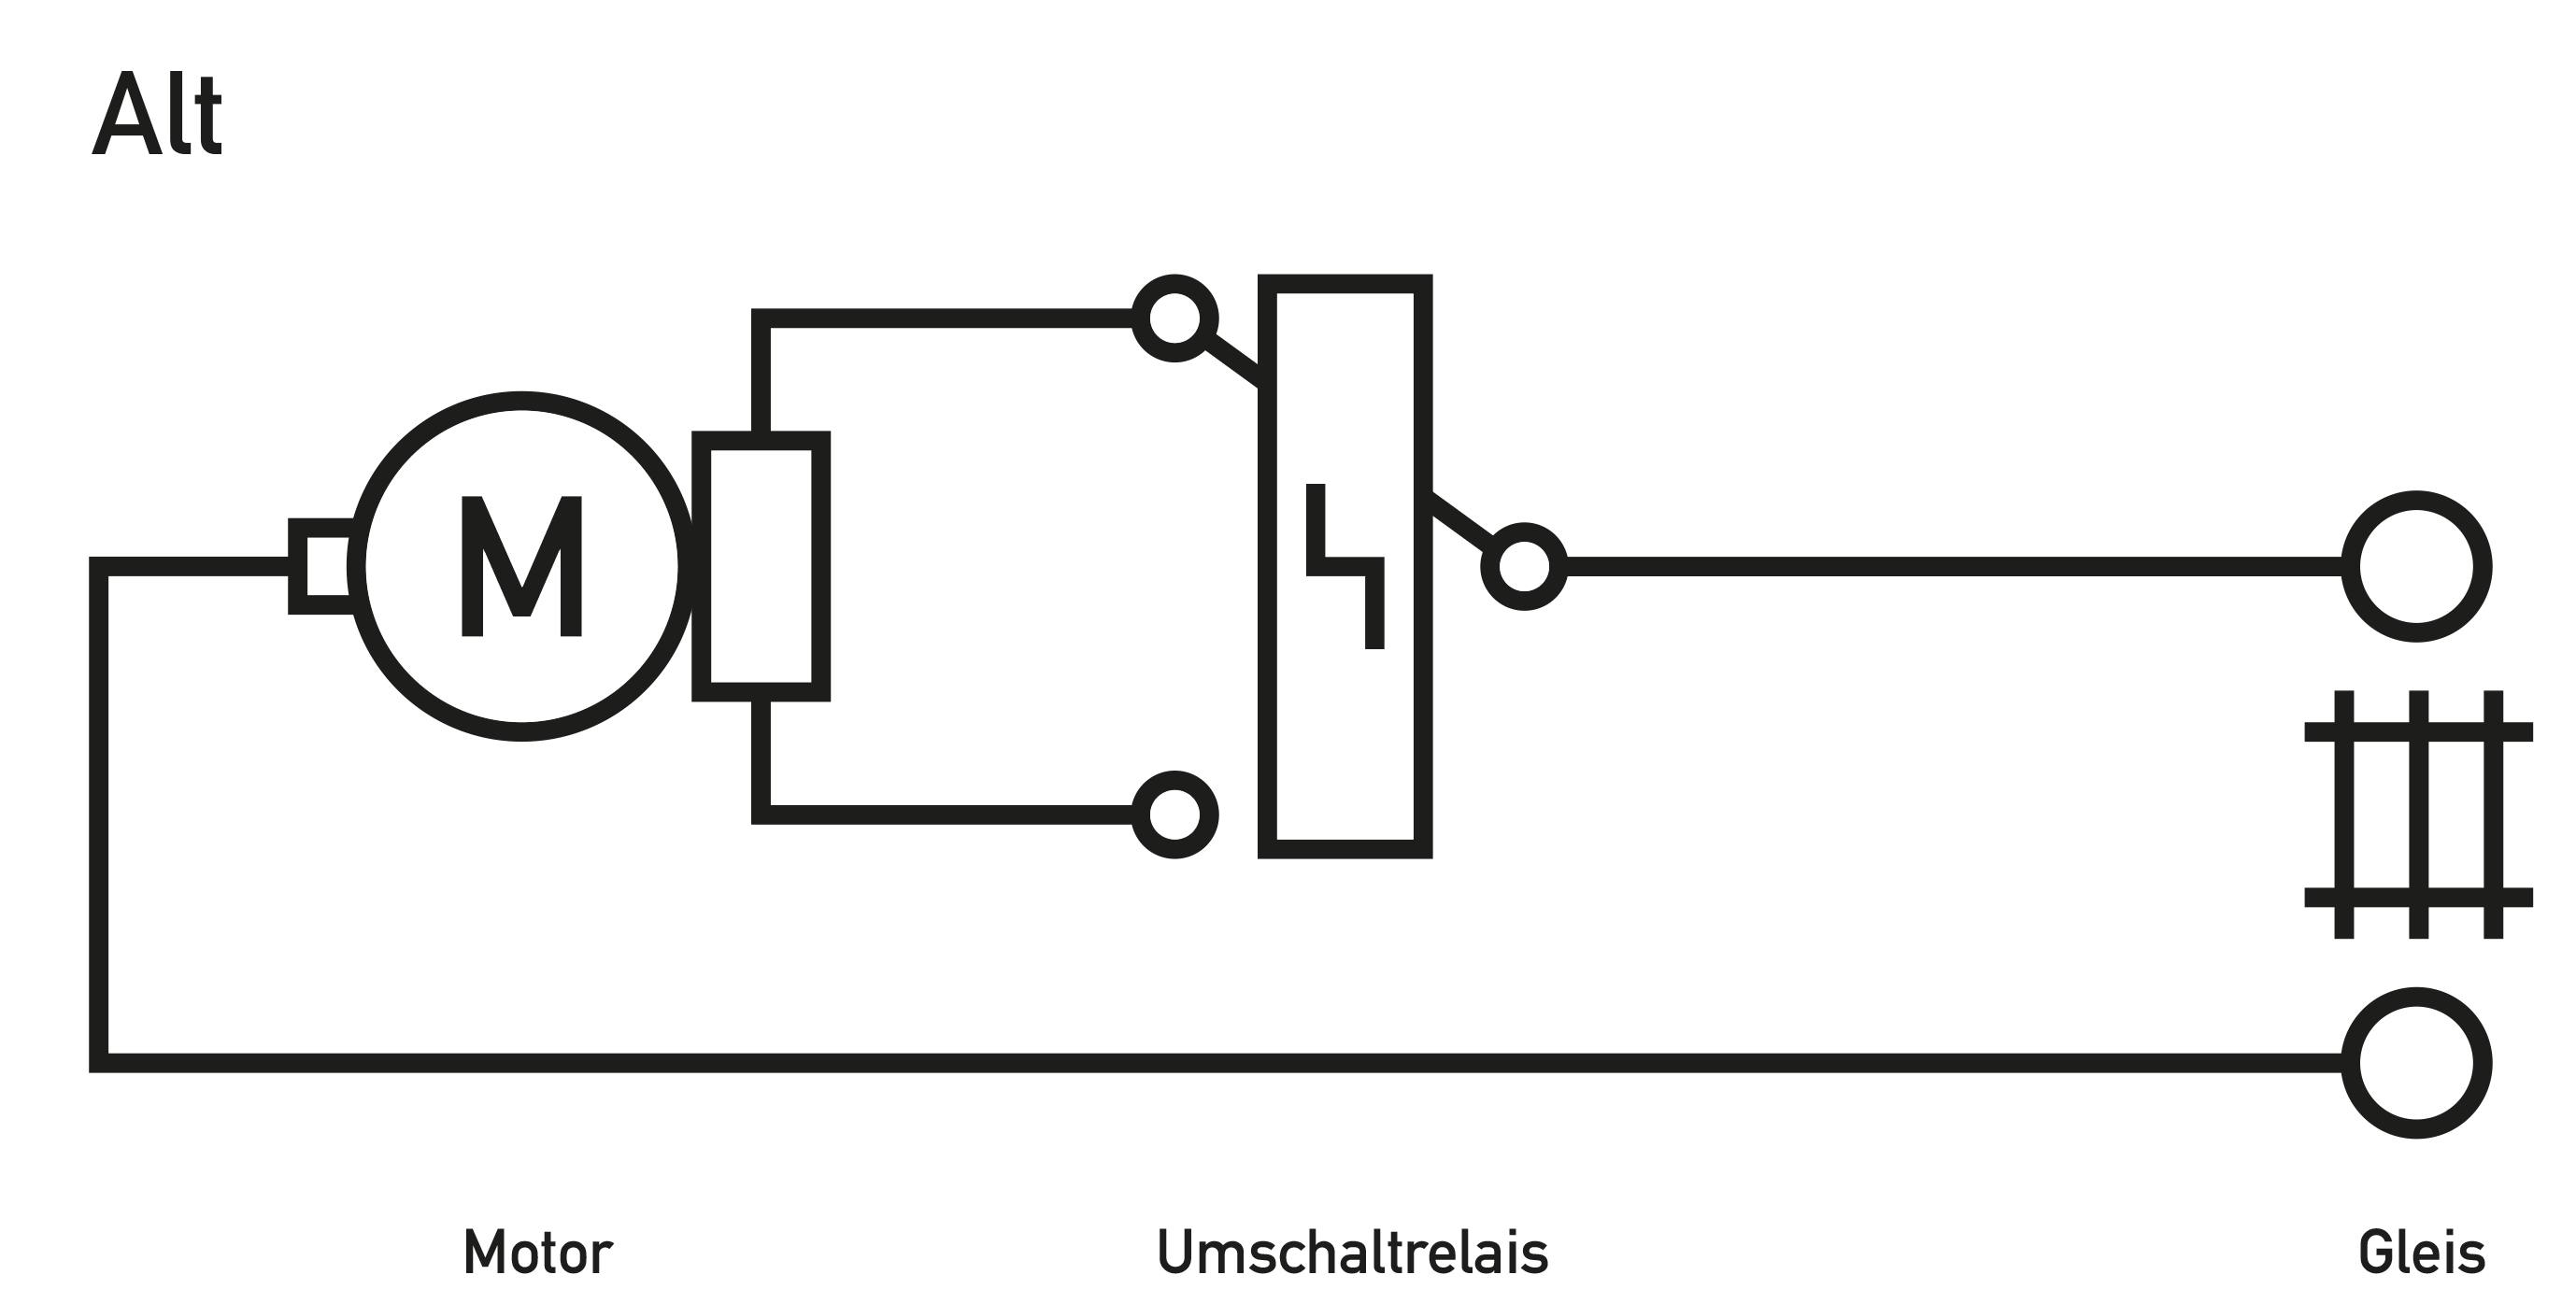
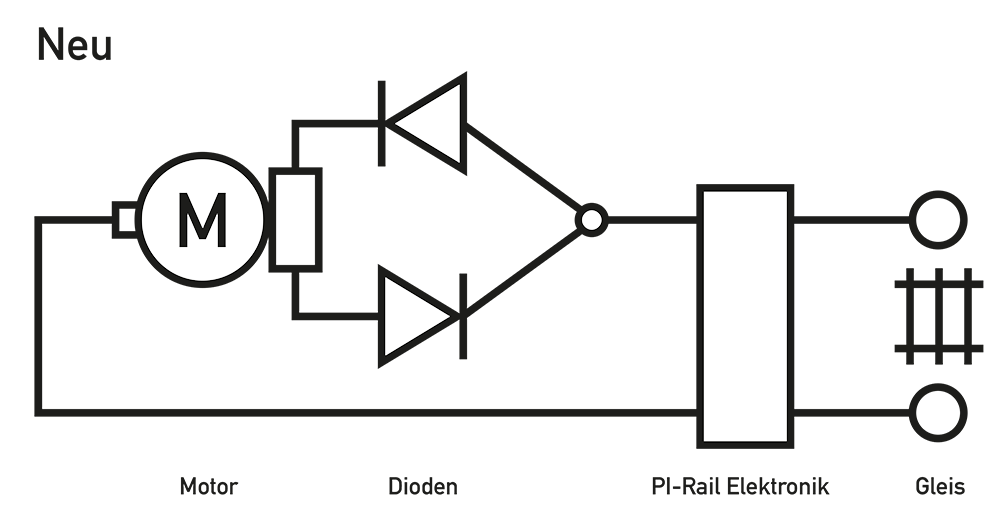
With an "old-fashioned" H0 locomotive, we mean a locomotive that is conventionally controlled analogously. The speed of the locomotive was controlled via the voltage applied to the track. In contrast, after the conversion, a constant supply voltage is applied to the tracks.
The electronics developed by CTC are installed and connected in the locomotive. The necessary control information is sent from the smartphone via WiFi to the CTC electronics, which then regulates the speed, direction, and lighting.
This documentation shows the conversion using a locomotive of the E103 series.
In the first step, the locomotive is partially disassembled. Components and wiring that are no longer necessary are removed.
In the second step, the CTC electronics are connected and installed in the locomotive.
In the third step, the electronics are put into operation. The locomotive with the installed electronics is connected via WiFi from the smartphone, and the functions are tested.
Finally, the locomotive is reassembled so that the housing is fully assembled again. The locomotive is then ready for use.
This description assumes that you have the appropriate tools and knowledge. Knowledge of electrical and electronic components is useful.
Soldering skills would be an advantage.
Important: This documentation was created before our decision regarding cable colors .
The cable colors in the photos do not correspond to this decision
Preparatory work and workspace
Electronic components are partially sensitive; an antistatic workspace is recommended.
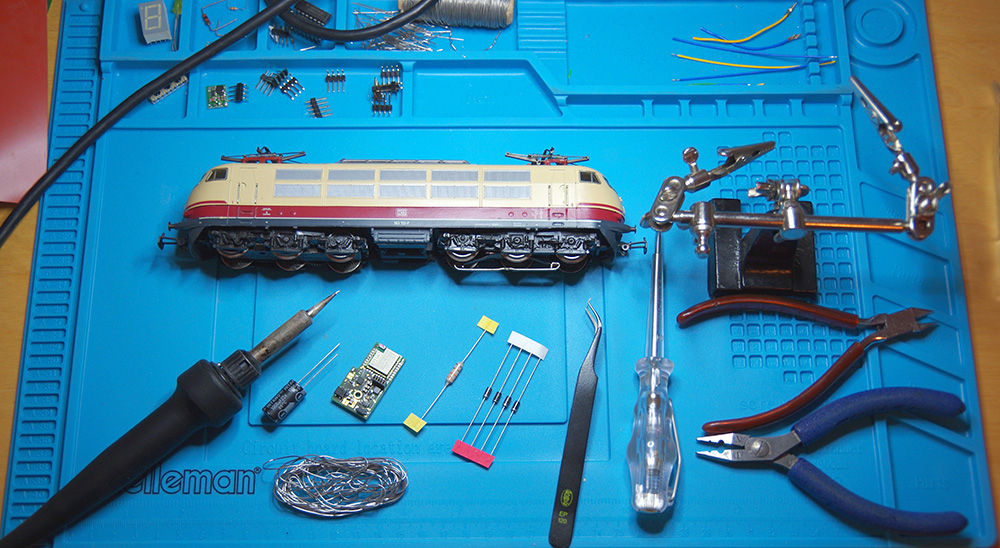
You will need the following tools:
- fine tweezers
- small side cutters
- electronics soldering iron (with a thin tip, e.g., 1mm)
- solder
- flux
The following components are required:
- CTC electronics
- 1 capacitor 1000uF 25V
- 4 diodes
- 1 choke
- insulated wires
Disassembling the locomotive
In this step, the housing is removed and the electrical components that are no longer needed are removed.
Housing disassembly
To disassemble the housing, it is necessary to loosen the appropriate housing screws. These can be found on the top or bottom of the locomotive, usually a little hidden so as not to disturb the external appearance.
An exploded view drawing of the locomotive, which you may be able to find on the internet, can be helpful.
In the case of the E103 locomotive shown, you will find the housing screws on the top of the housing, directly next to the current collectors for the overhead line.
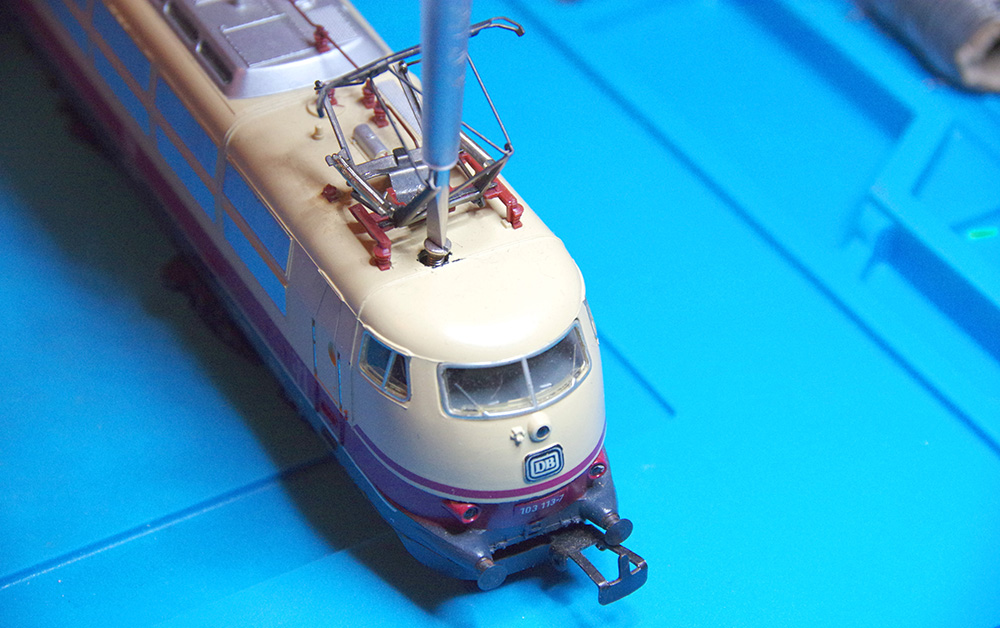
Loosen the housing screws, remove them, and place them in a safe location. You can now carefully lift the upper part of the housing upwards.
Be careful not to bend the roof current collectors and their supply lines inside the housing.
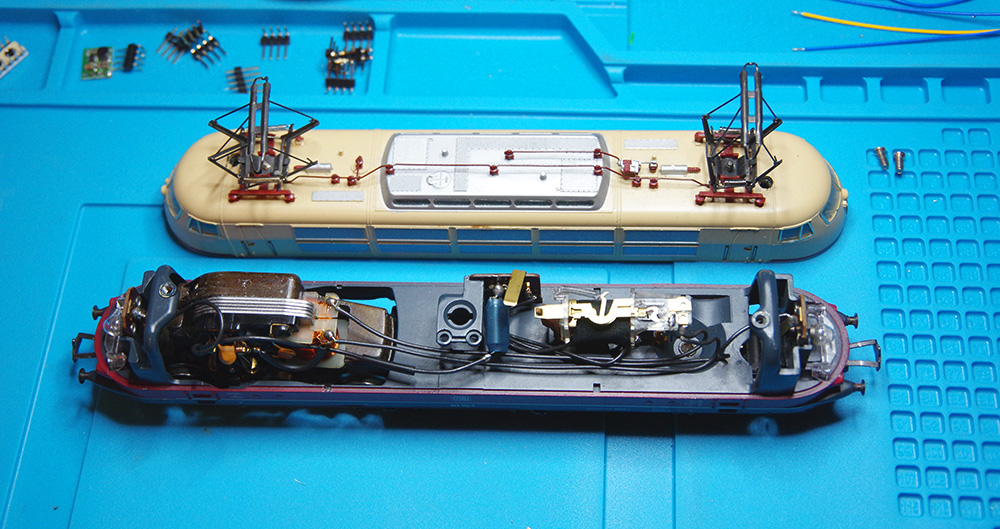
In the picture, you can see the upper and lower parts of the housing in front of you. The lower part of the housing carries the chassis with the motor, the direction switch, and the lighting.
In the next step, the components and wires that are no longer needed are removed.
Removing unnecessary components
The wires that are no longer needed are now removed, and the direction switch is dismantled.
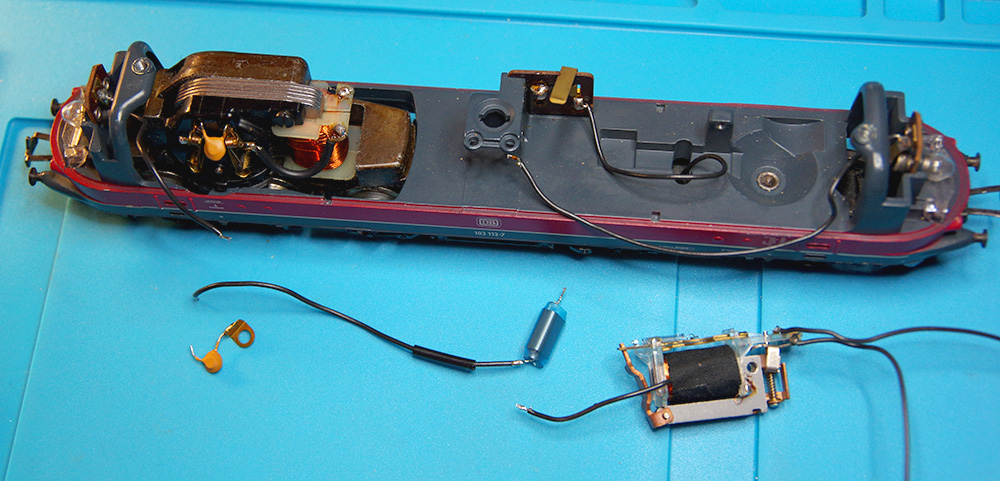
When looking from above at the lower part of the housing, the motor is on the left and the direction switch is on the right in the picture.
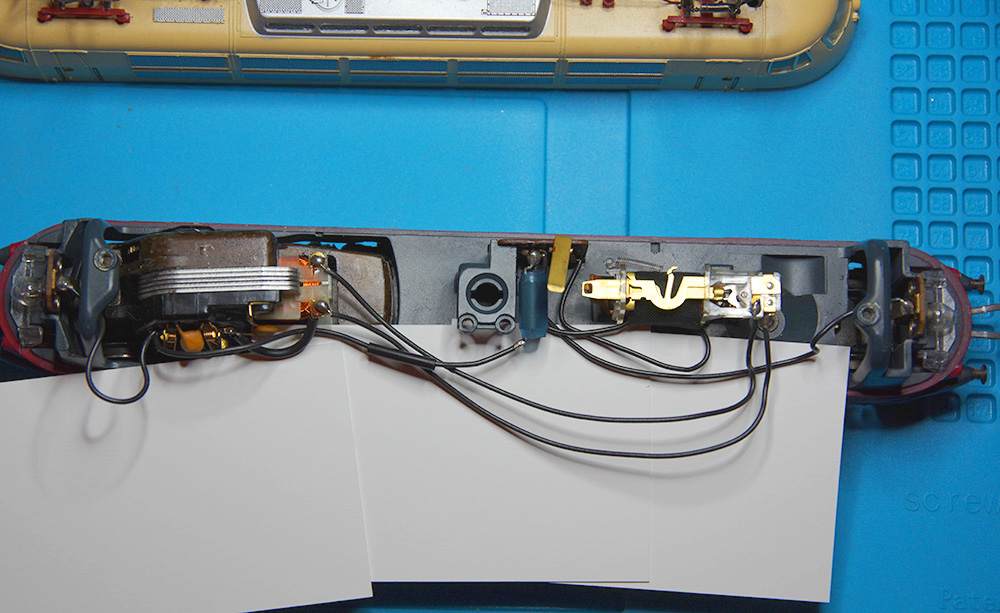
Three wires lead to the motor, two of which go to the clearly visible coils of the motor. These three wires connect the motor and the direction switch.
Loosen the mounting screw of the direction switch and remove it from the holder.
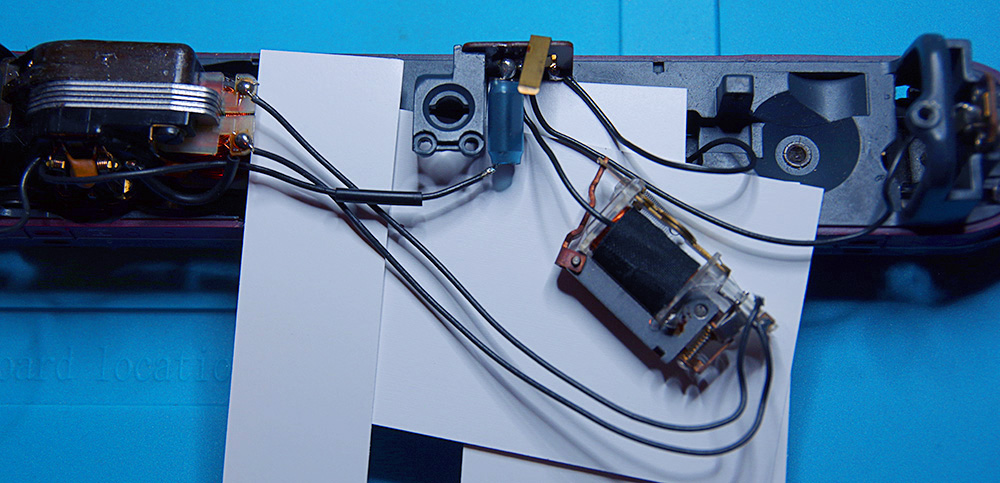
Remove the two wires on the motor on the side of the coils either by cutting them off or by desoldering them. Be careful not to damage the connection of the coil to the solder pad.
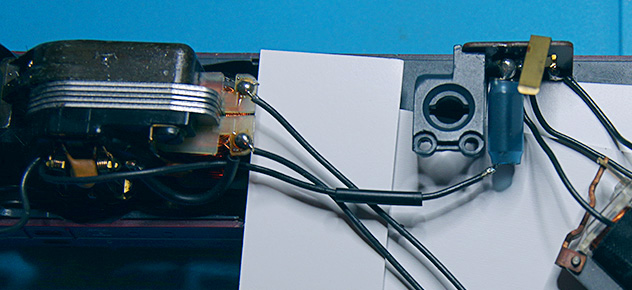
The third cable leads from the motor to the direction switch; this is also removed along with the interference suppression coil soldered to it. This cable will be reused later.
The motor is now ready for the installation of the components for digital control.
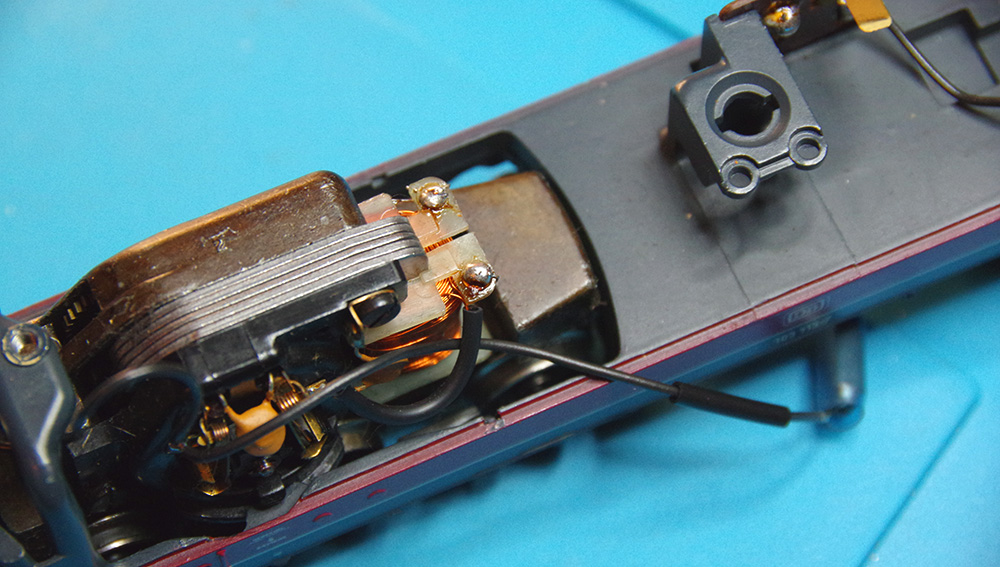
Furthermore, remove the two cables to the rear and front lighting devices. It is advisable to reuse the existing cables and initially bend them out of the way.
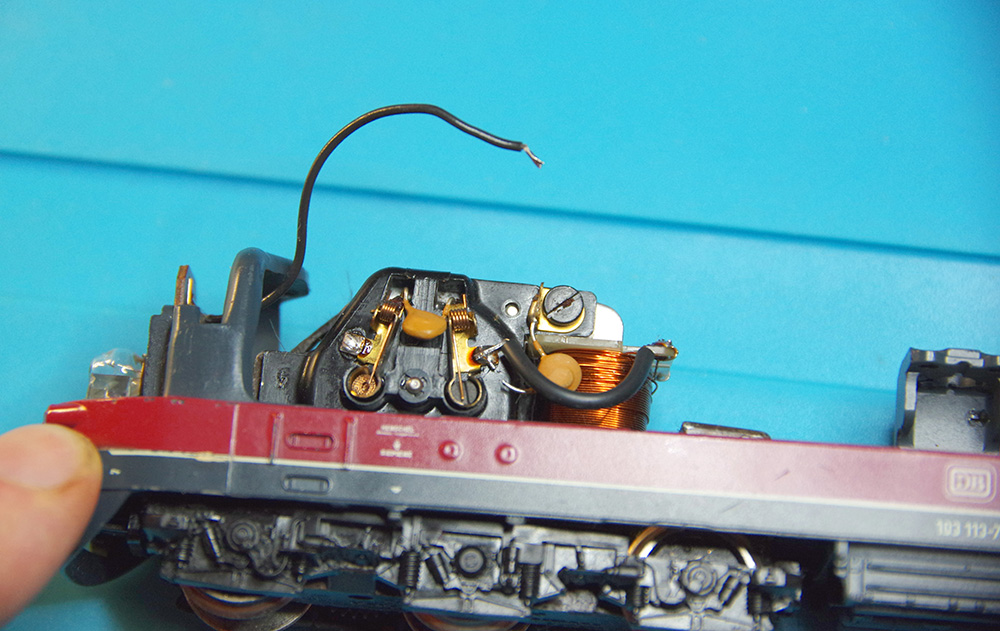
All essential components have been removed, and the chassis is ready for further assembly.
Wiring and integration of the CTC electronics
For the following steps, you will need:
- CTC electronics board
- 4 diodes
- 1 coil
- wires of various lengths
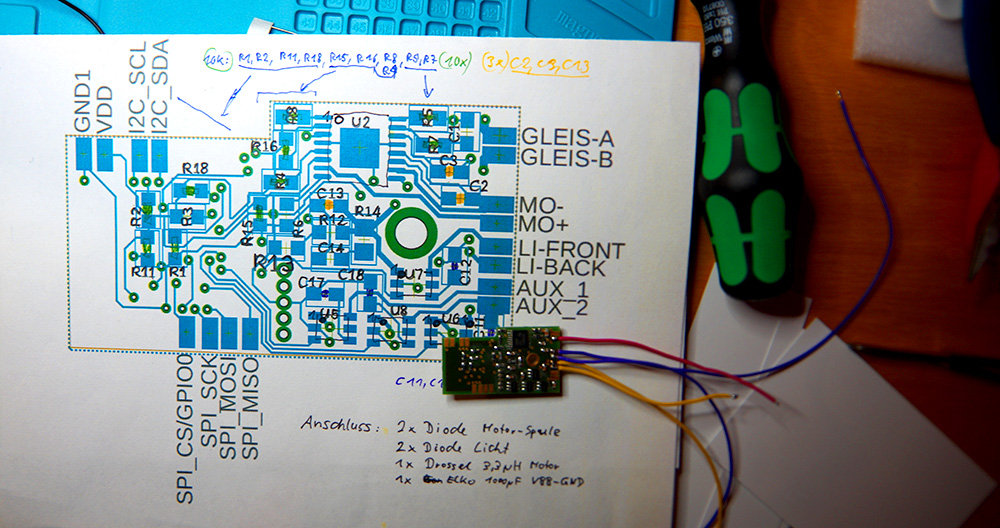
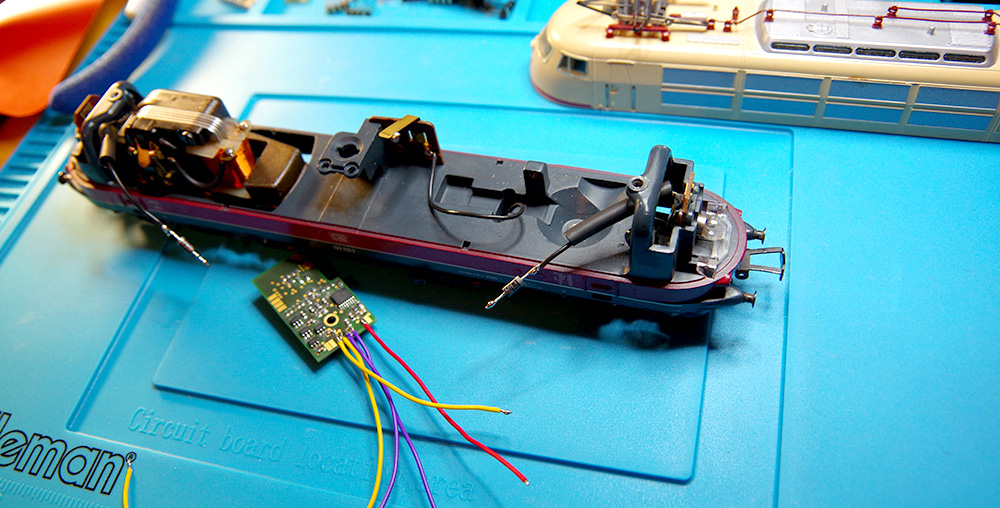
First, the wires must be cut to the appropriate length and soldered to the CTC electronics board.
When soldering to the board, make sure that the soldering time is sufficient but as short as possible. If you heat the solder pads for too long, there is a risk that they will detach from the board.
To estimate the lengths of the wires, place the board in the position of the former direction switch and measure for the following 5 wires:
| Track-B | Power supply from the track or overhead line |
| MO – | Motor wire 1 |
| MO + | Motor wire 2 |
| LI-Front | Front light |
| LI-Back | Rear light |
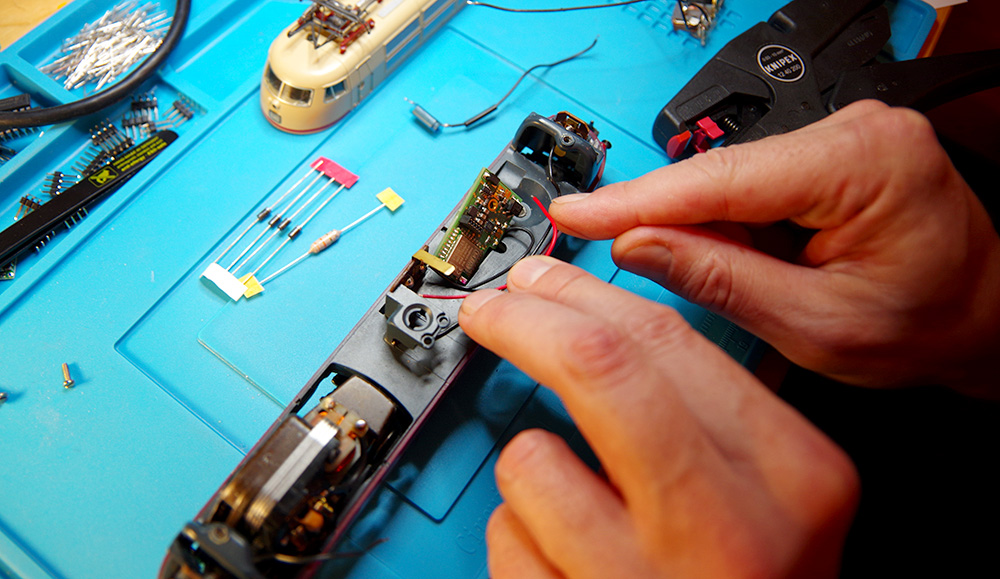
Take the cut wires and solder them to the CTC board.
Note that in the setup as it is done for this locomotive, the connection "Track-A" is implicitly made by the installation in the locomotive housing.
Solder a diode, as shown in the picture, into the supply line for both lights. Pay attention to the "orientation" of the diodes: the "ring marking" must point towards the lighting.
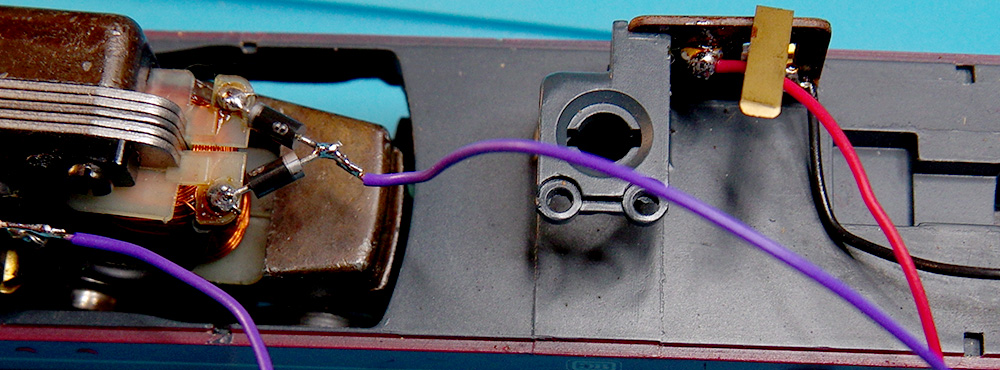
In the next step, solder the two diodes to the motor coil winding. As with the diodes for the lighting, you must also pay attention to the orientation of the diodes:
- one diode with "ring marking" towards the motor
- the other diode with "ring marking" away from the motor
When soldering the diodes to the solder points of the motor coils, great care must be taken not to damage the sensitive wires of the coil. Under no circumstances should solder get onto the coil bodies, as this could destroy them.
One end of a diode is soldered to the solder point of the motor coil, and the two other ends of the diodes are soldered together to form the "motor diode connection." The "MO –" wire of the CTC electronics will be soldered to this motor diode connection later.
Soldering the diodes to the motor:
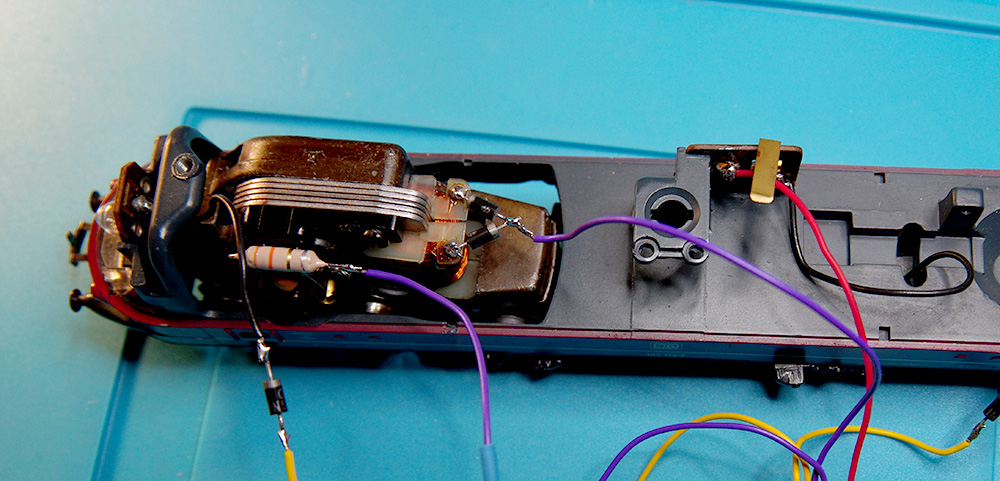
The coil for interference suppression is soldered to the place where the former motor supply line was. The wire from the "MO+" board connection is soldered to the coil. The coil with the wire to the electronics is now ready.
The "MO+" wire is connected to the choke:
Before soldering the wires for the front and rear lights, you can slide a suitable piece of heat shrink tubing over the wires.
Now solder the wire for the interference suppression capacitor to the top of the CTC board and solder the capacitor to the wire.
Caution: This capacitor has a positive and a negative pole Do not mix them up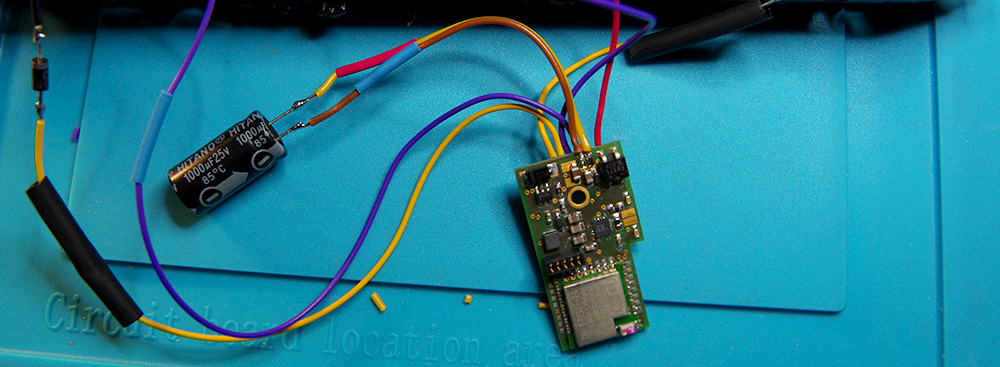
Now solder the remaining wires from the CTC board:
| Wire from Track-B | Power supply from the track or overhead line |
| Wire from MO – | Motor wire 1 to the "motor diode connection" |
| Wire from MO + | Motor wire 2 to the choke |
| Wire from LI-Front | to the front light |
| Wire from LI-Back | to the rear light |
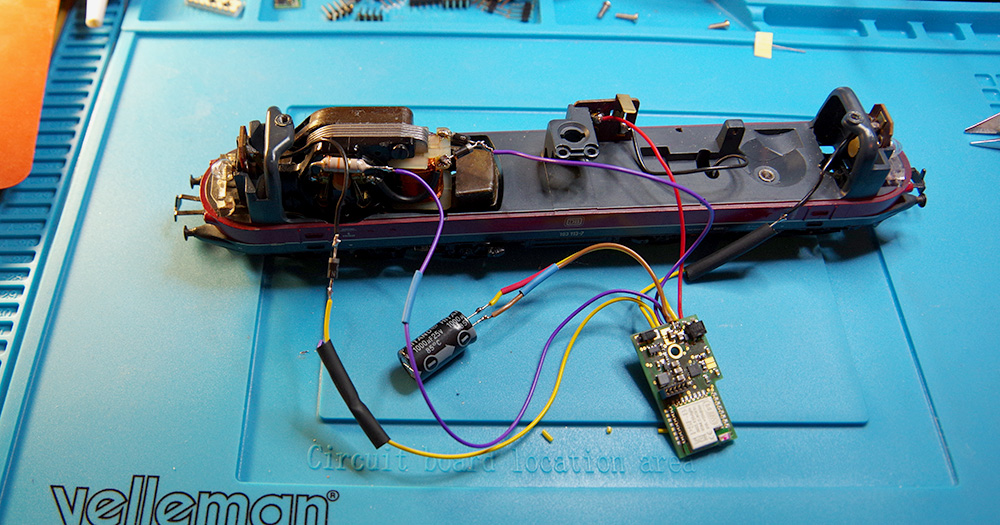
All wire connections of the CTC electronics and the necessary discrete components are installed and connected.
When installing the board in the housing, make sure that the wires are not crushed and that no short circuits occur. Suitable insulation measures must be taken or heat shrink tubing must be used.
The CTC electronics are screwed into the position of the direction switch. The screw also creates the last necessary electrical connection.
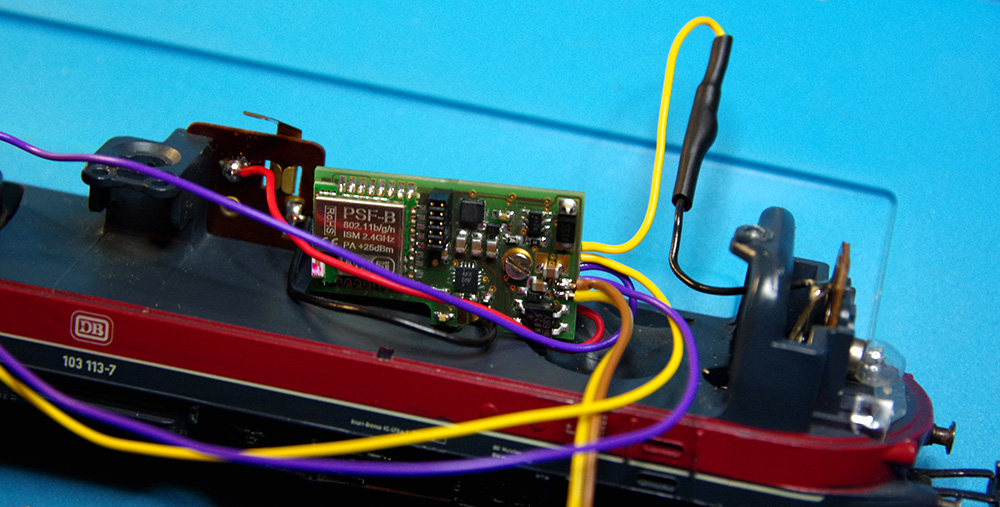
Place the wires and the interference suppression capacitor in the lower part of the locomotive so that no short circuits or crushing of the wires can occur when the upper part of the housing is put back on.
The lower part of the locomotive can now be placed on the tracks, if desired, and a function test can be carried out.
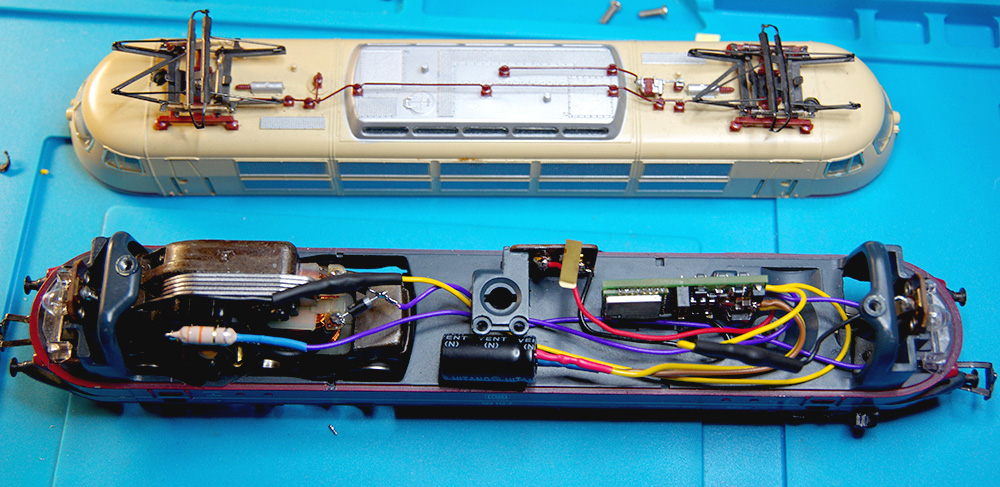
Installation of the Infrared Receiver
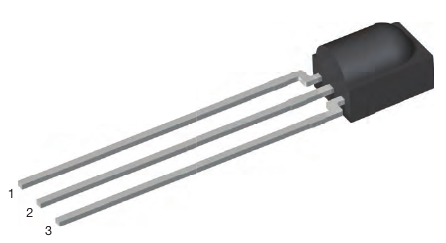
Solder a three-core cable to the infrared receiver and cover the soldered connections with heat shrink tubing. Observe the following pin assignment :
| Pin 1 | Out/TX | white cable |
| Pin 2 | GND | brown cable |
| Pin 3 | Vcc | green cable |
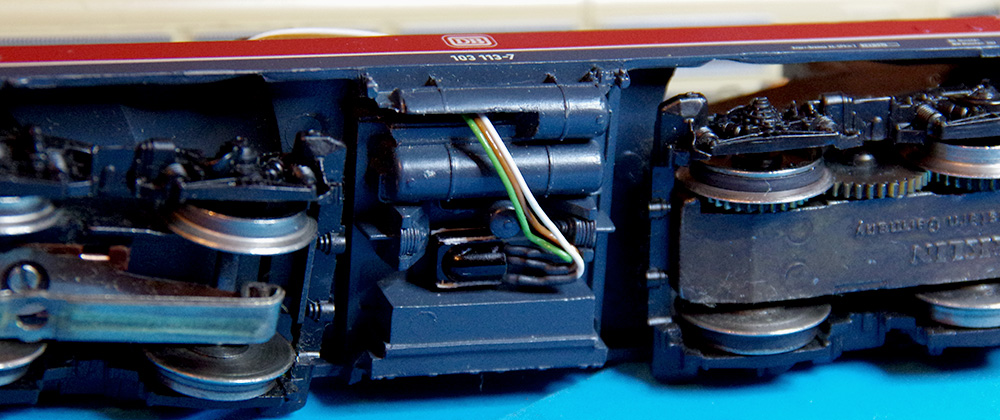
Then route the cable through the hole of the overhead line switch lever and attach the IR receiver to the bottom of the locomotive using double-sided tape or adhesive:
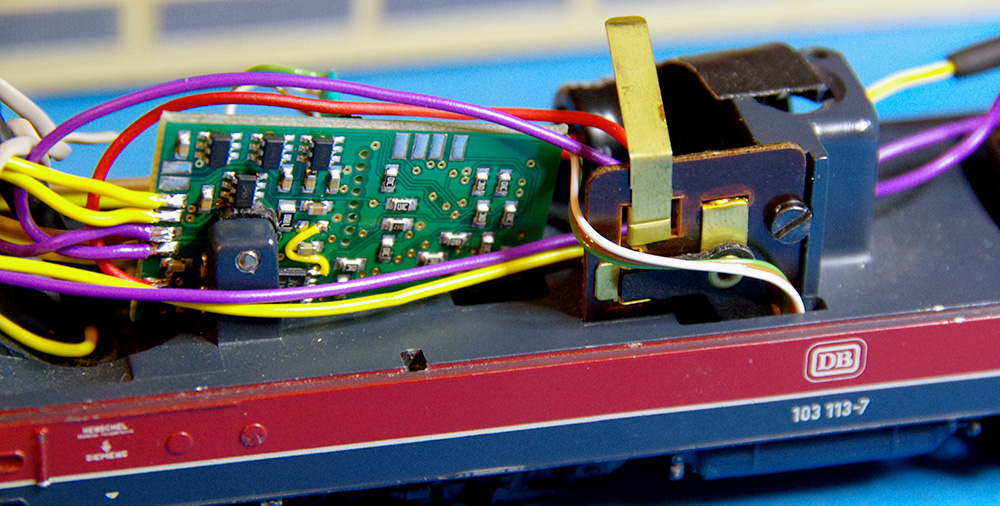
Route the cable to the locomotive module and cut it to the appropriate length:
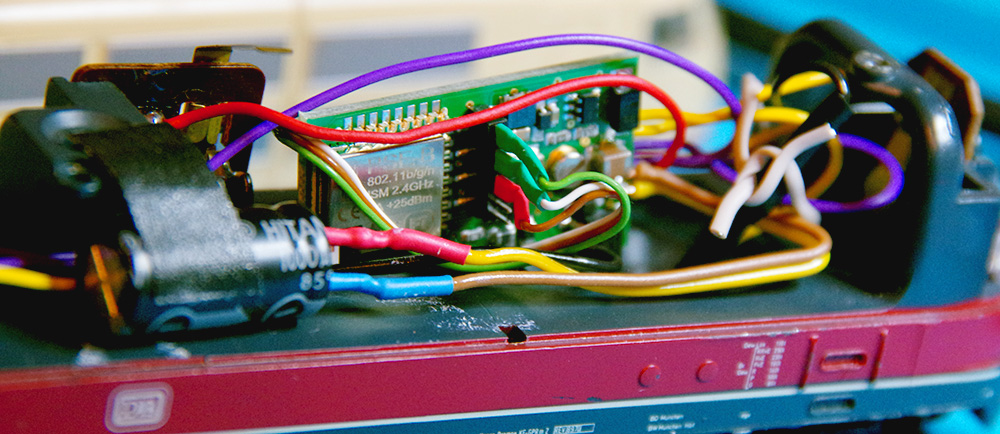
Solder the cable to an 8-pin header with 1.27 mm pitch according to the following table:
| Pin 1 | - | ||
| Pin 2 | - | ||
| Pin 3 | GND | brown cable | red heat shrink tubing |
| Pin 4 | - | ||
| Pin 5 | Out/TX | white cable | green heat shrink tubing |
| Pin 6 | - | ||
| Pin 7 | Vcc | green cable | green heat shrink tubing |
| Pin 8 | - |
Then insert the header into the module so that the red-marked pin points towards the side of the module that has a corner:
Assembling the Housing
Carefully place the top part of the locomotive housing onto the bottom part, ensuring that wires do not shift. Screw the housing together.