This series of articles describes the configuration of automation using the example of a garden railway.
In the third part, we will add stop signs to our station.
Adding a Stop Sign
We select a CTC module nearby, for example, the one that switches the turnout to the corresponding siding. There, we go to the config and click on the button to Add a Product. We choose the catalog “universal-signs.xml” and select the “Stop Sign” in the appropriate direction:
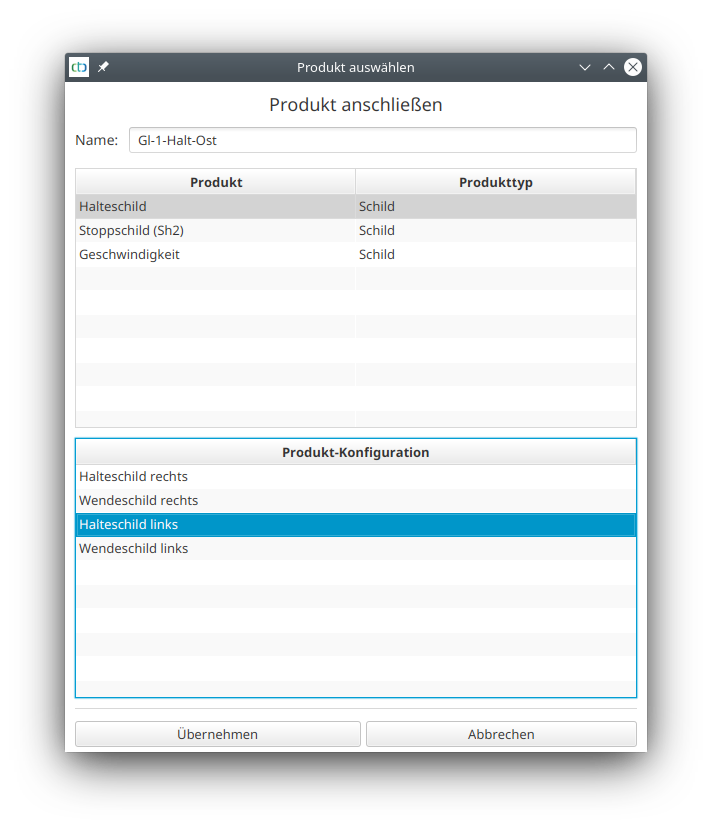
Then we click on “Apply.”
In the config dialog, we click on “Upload.”
Placing the Stop Sign in the Track Plan
In the corresponding track plan, we place a traffic light track piece in the appropriate direction:
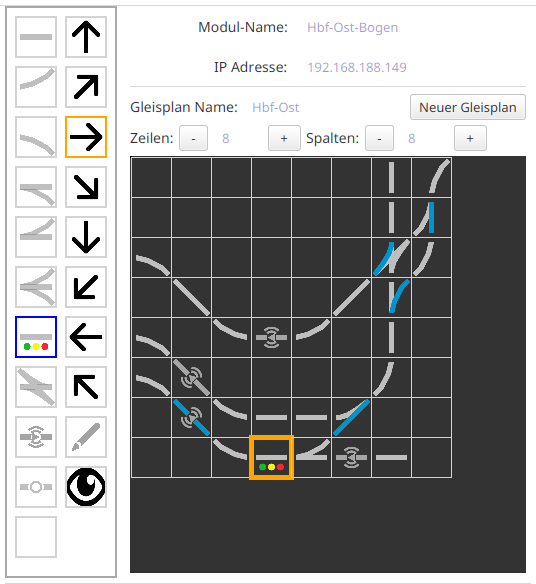
Then we select the newly created sign from the “Signal-Tower” action group and click on the traffic light we just placed in the track plan. The traffic light symbol is replaced by the H symbol:
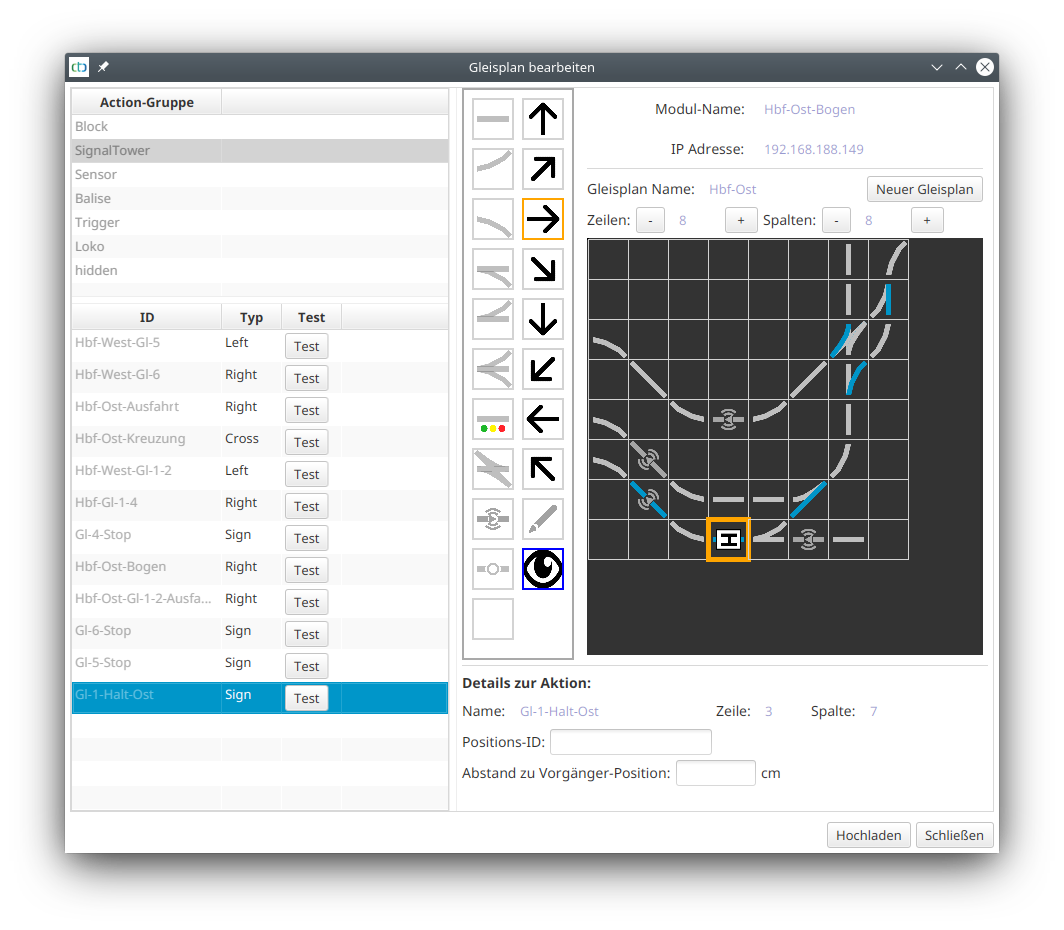
Afterwards, we click on “Upload.”
Linking the Stop Sign with the NFC-Balise
To link the stop sign with the NFC-Balise, we open the “Edit Automation” dialog of the track diagram where we placed the NFC-Balise. Then we search for the NFC-Balise under “Products and Actions” and select the trigger there.
To the right of “Trigger,” we click the “Select” button. The “SignalTower” action group should already be selected. In the lower list, we click on our stop sign:
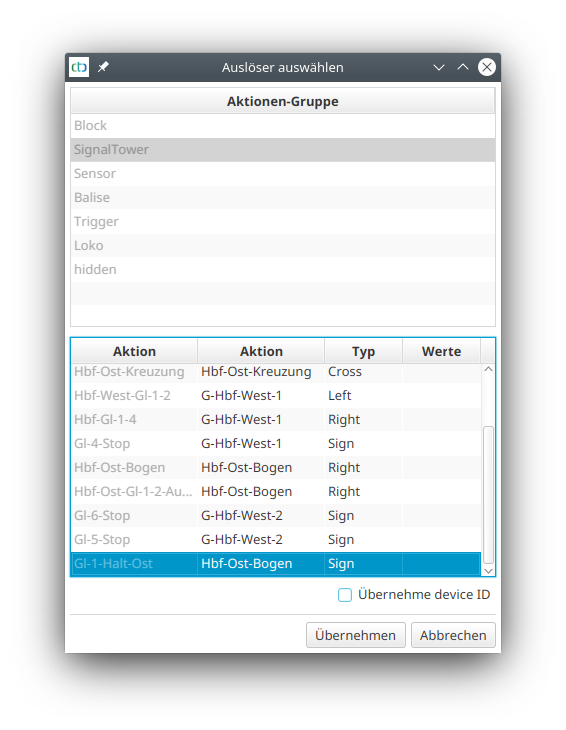
Then we click on Apply and our automation config looks as follows:
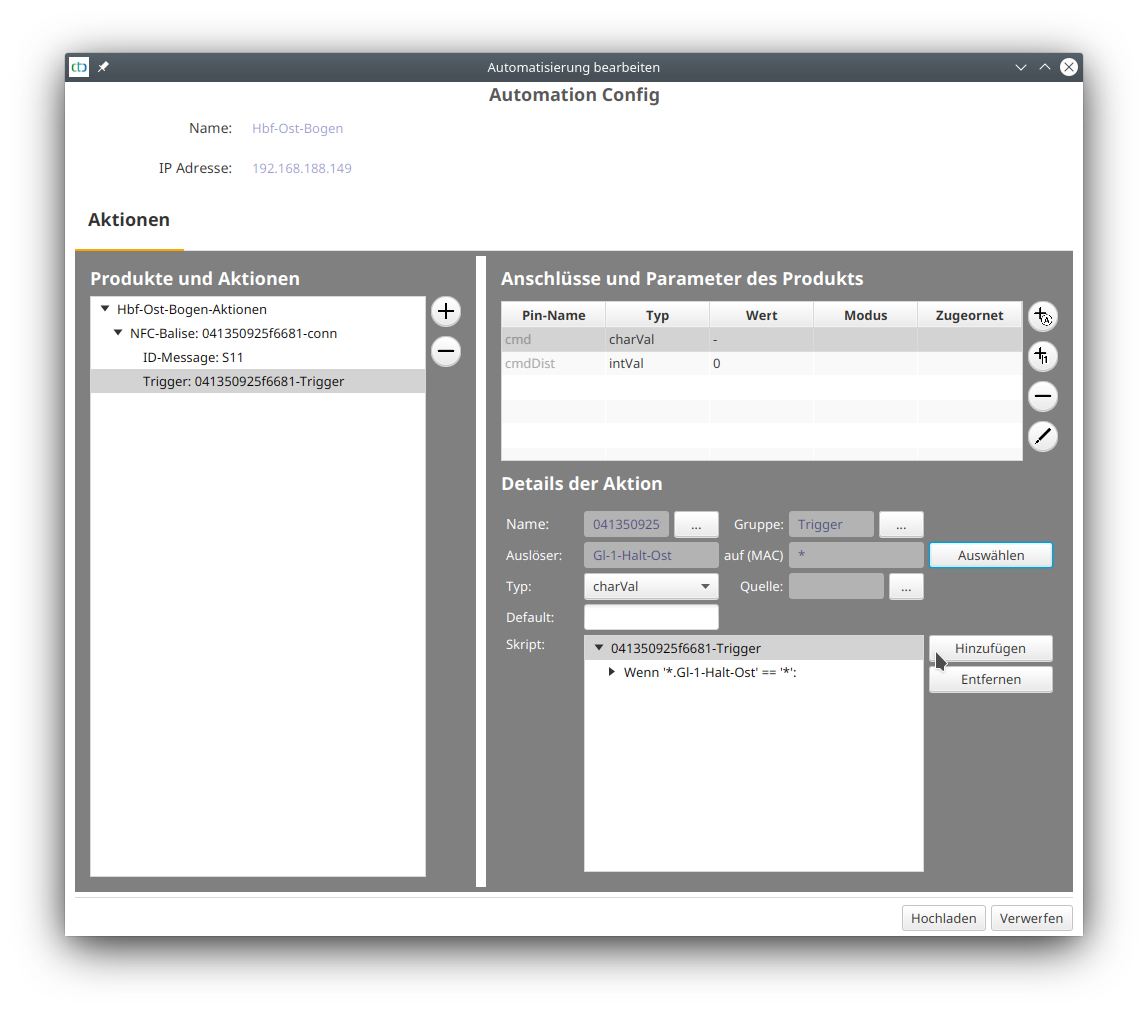
Finally, we click on “Upload.”
Shortly thereafter, our stop sign appears in the track diagram.
Whenever a locomotive in automatic mode passes over the balise linked to the stop sign, it stops. A manually controlled locomotive ignores the stop sign.
| Back to Part 1 | Back to Part 2 | Part 3 | Continue to Part 4 | Forward to Part 5 |
- Categories:
- Automatisierung (8)


