





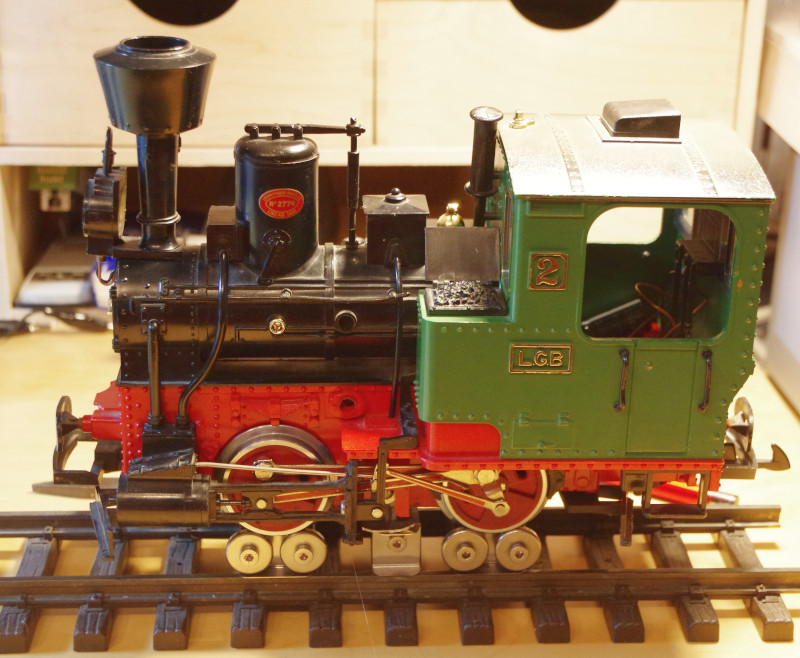
This documentation describes the conversion of an old LGB locomotive from analog to CTC. Specifically, two Stainz models (2020 and 2021) were converted. For this, I (Peter Rudolph) met with our customer Gregor Denndörfer via video conference and we converted my 2020 and his 2021. At this point, many thanks to him for the pictures of the 2021.
Important: This documentation was created before we finalized the cable colors .
The cable colors in the photos therefore do not correspond to this specification
For these small LGB locos, we don’t need any special garden railway modules yet. The CTC-Loco-Module-H0a is perfectly sufficient.
With old LGB locos, there is a fundamental problem: at least one pole of the motor is permanently connected to the current pickup inside the motor block. This was also the case with our two locos.
First, the loco must be disassembled to the point where you can access the motor block and open it. There are many descriptions online of how to disassemble a Stainz. Unfortunately, there are also many Stainz variants, so we had to do a lot of trial and error before we finally had the motor block in front of us:
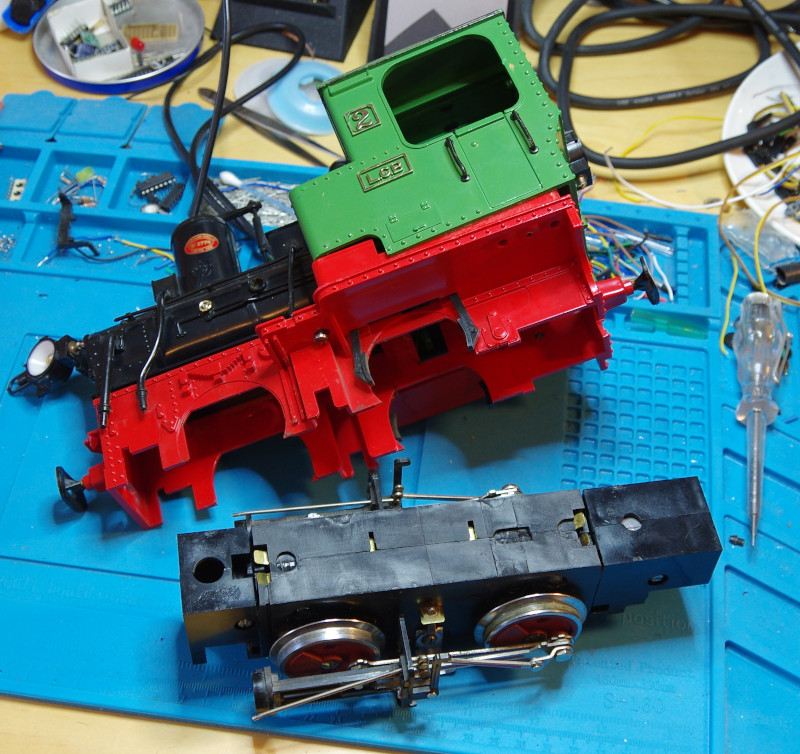
This is what the motor block of the 2021 looks like:
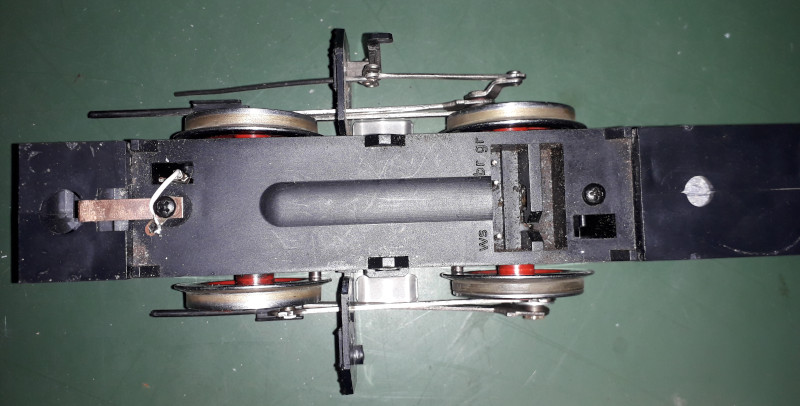
The following links helped us:
These were the key findings:
- The cab and boiler are screwed to the center of the frame from below and can only be removed once the motor block has been removed.
- The motor block is very tight. It can be removed after unscrewing the chimney, removing both couplings, and unscrewing and detaching the rod in front of the cab.
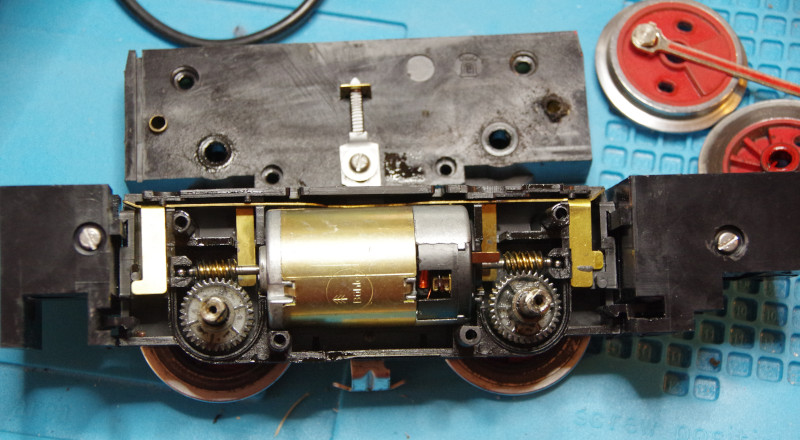
With the 2020, the rod had to be removed and the wheels on one side had to be taken off to open the motor block, which consists of two half-shells:
With the 2021, the motor block has a lid and a base, so the rod does not need to be removed.
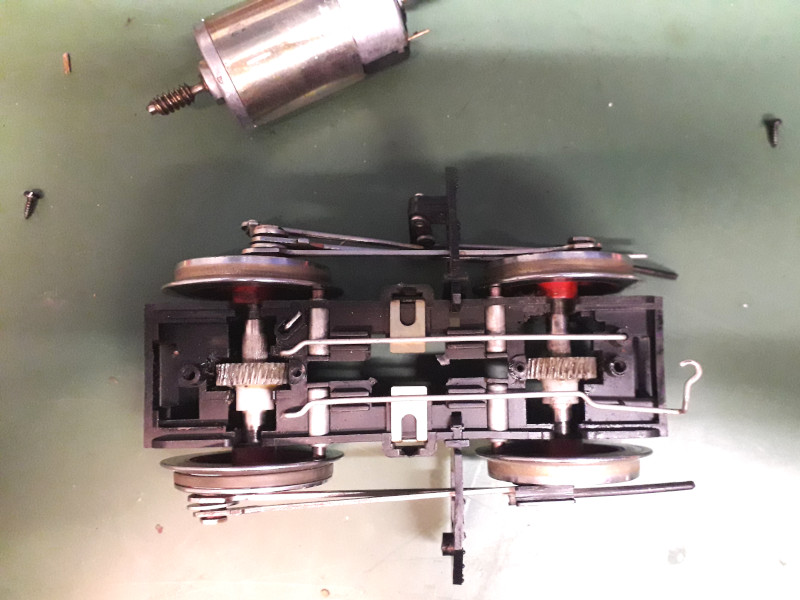
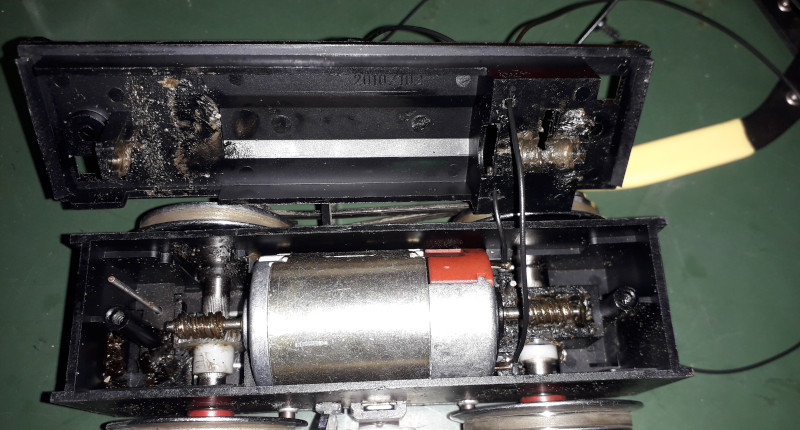
With the 2020, the motor contacts are metal strips in the two half-shells. These were broken out by bending them back and forth. In the following picture, I have already removed the metal strip in the lower half-shell and am just starting to bend it in the upper one:
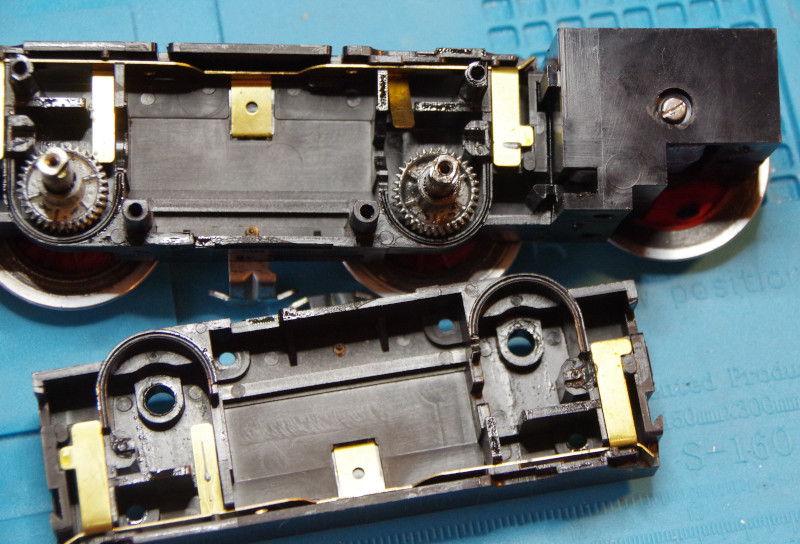
With the 2021, the motor contacts are thick brass pins and only one side was connected to the current pickup. Here, just enough of the brass pins was removed so that they still hold but can no longer make contact with the motor.
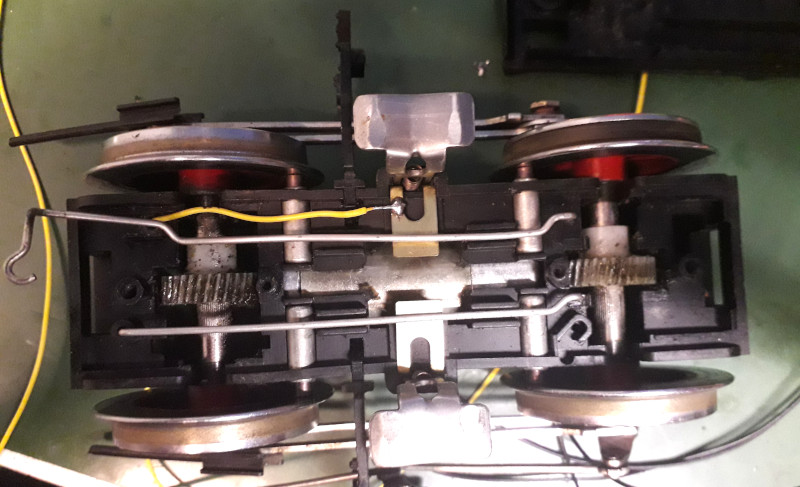
Now, in both variants (the motor itself is identical), cables were soldered to the contact pins. Then holes were drilled in the housing for cable routing upwards. Care must be taken to ensure that the cables emerge at a point where they will not be crushed during later assembly. The following picture shows the 2020 again:
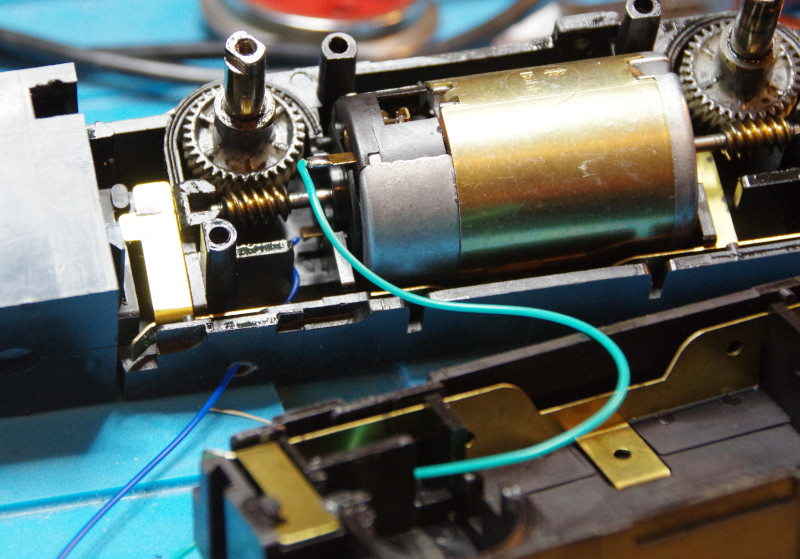
And here is the 2021:
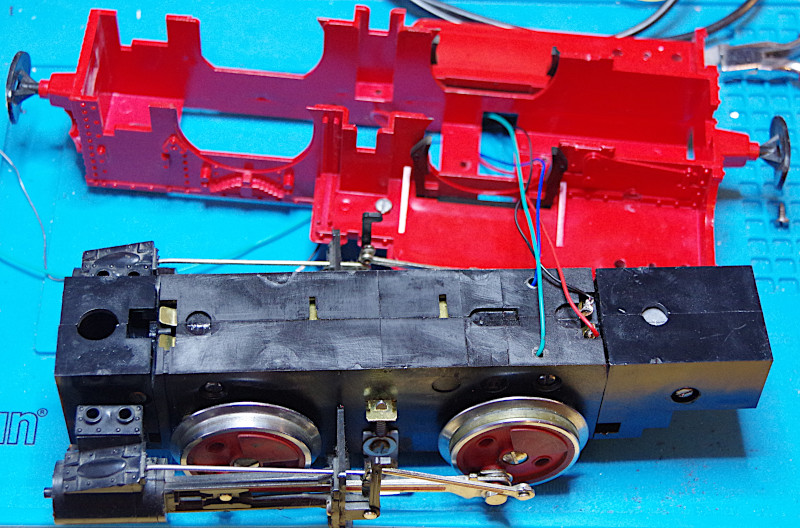
During the following assembly of the 2020, care must be taken to ensure that the pins on the wheels run synchronously. It is best to test with the lowest rod whether the wheels can still turn. I had to take my motor block apart twice before the rod ran properly.
Since I was not convinced by the current connection from the metal strips to screws in the base plate, I also soldered cables here:
At the latest now, you should check whether the motor still runs and all track contacts are functioning.
Now the motor block could be reinserted into the chassis and the CTC-Loco-Module-H0a connected. We deliberately did not use the screw in the center of the housing and boiler.
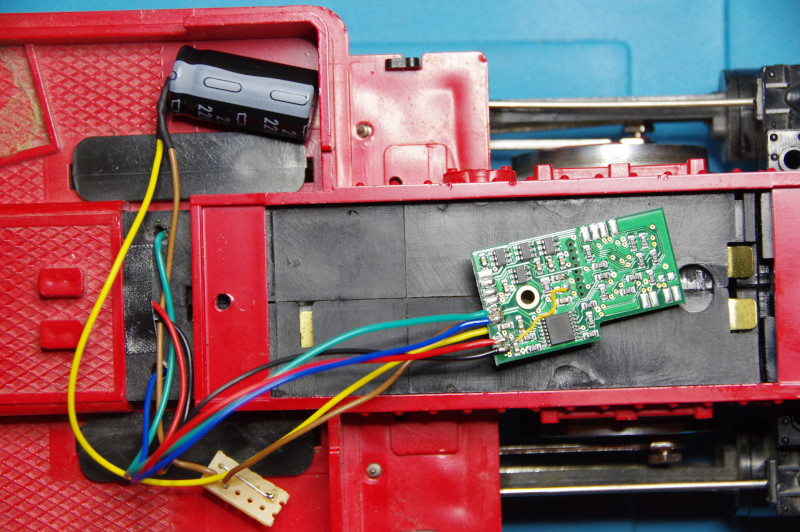
In the following picture, all cables are already connected to the CTC module:
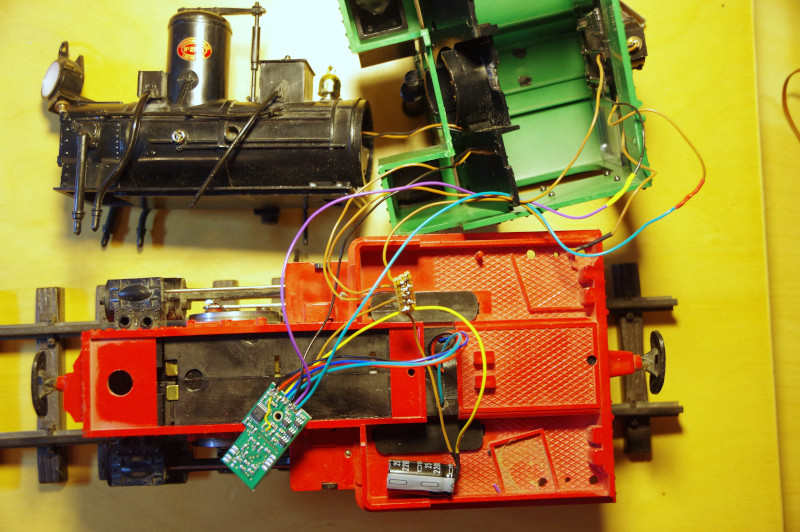
The final challenge was to route the wiring so that nothing gets crushed during assembly. To do this, I cut off a bit of the boiler front in the cab and partially fixed the cables with a hot glue gun:
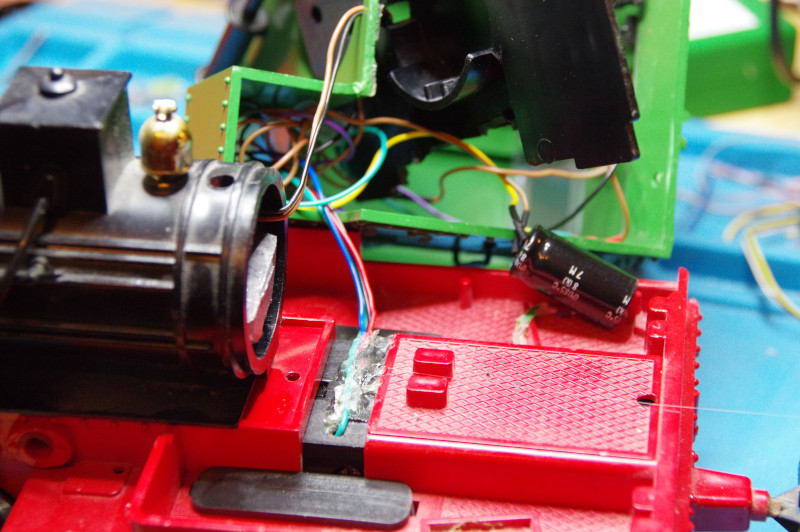
I placed the CTC module in the water tank to the right in front of the cab. When assembling the housing, I removed the lid of the water tank and pulled the CTC module upwards to prevent the cables from getting crushed.
After 8 hours of conversion, it was finally done: The introductory image of this article shows the finished converted Stainz, now working with CTC, on the test bench. If you look closely into the cab, you can see the support capacitor, which was actually supposed to go in the coal bunker. Unfortunately, I had made the cables a bit too short and it was already late in the evening – maybe I’ll fix that another time?