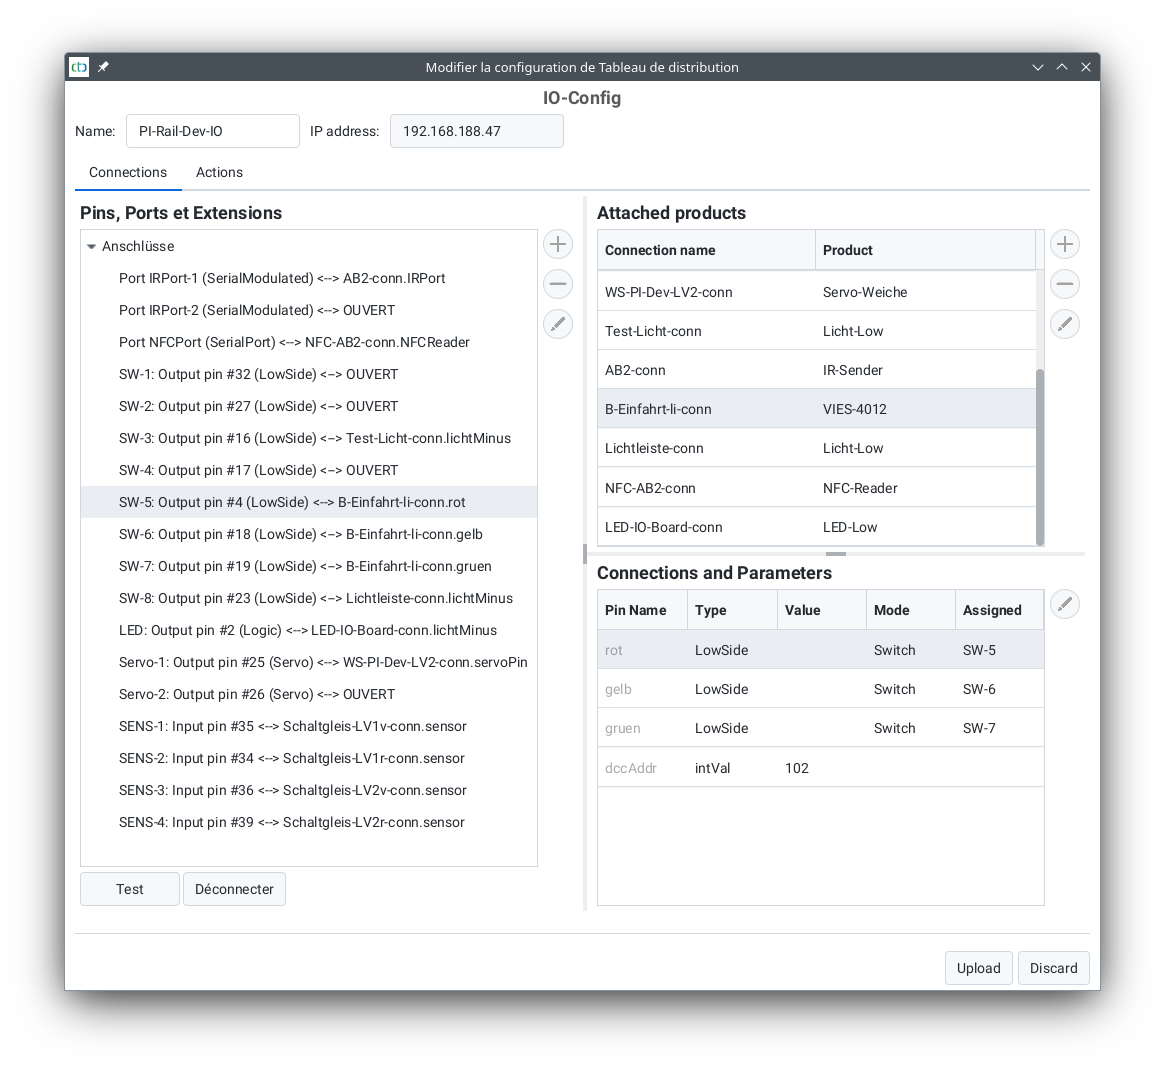
The simplest way to get CTC modules up and running is via the “Connect Product” function.
You can access this through the “Change Config” button in the locomotive or switchboard configuration (see previous page).
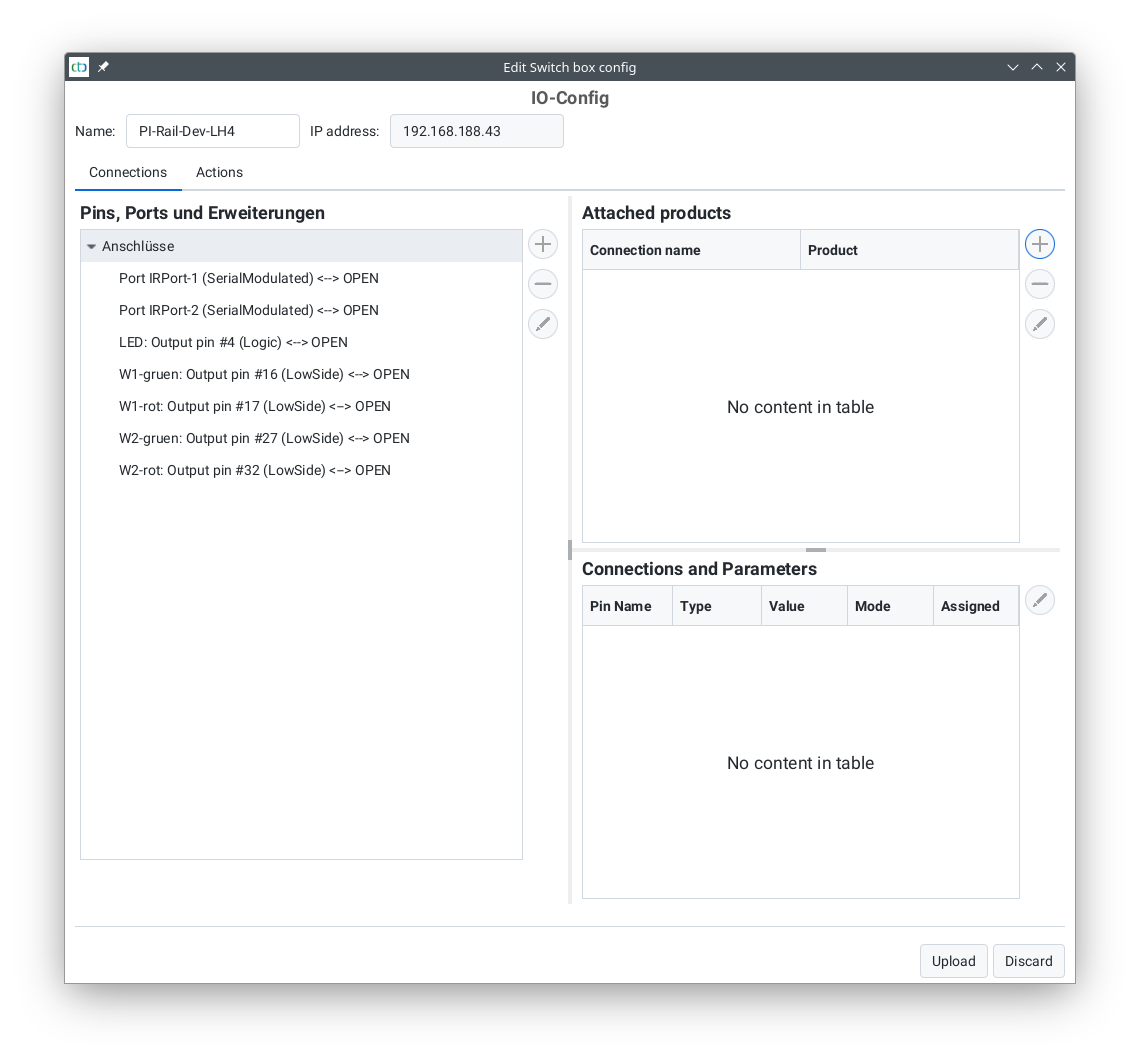
The configuration shown here is stored on the CTC module in two files:
-
In the Config (cfg.xml), the functions controllable via the app such as lights, uncouplers, switches, signals, etc., are defined.
-
In the IO Config (ioCfg.xml), the input & output pins and interfaces configured for the CTC module are defined.
Since these describe parts that are permanently installed on the CTC module, they cannot be changed via the dialog in the app.
The content of the IO Config is displayed under the heading “CTC Module: Pins, Ports, Chips”.
All other displayed data comes from the Config.
Adding a Product
To add a product, click on the plus symbol to the right of the “Connected Products” table. A list of product catalogs included with the CTC-App will open.
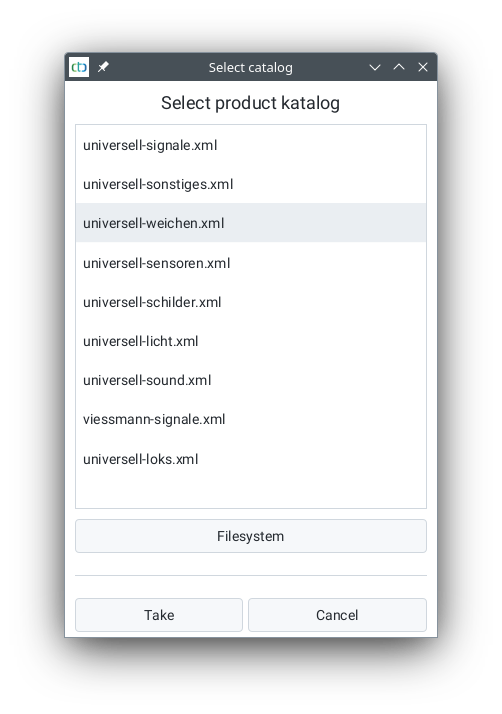
You can select one of the included catalogs or load a product catalog from the file system by clicking on the “Select from File System” button. Here, the included catalog “universell-weichen.xml” was selected and then “Apply” was clicked:
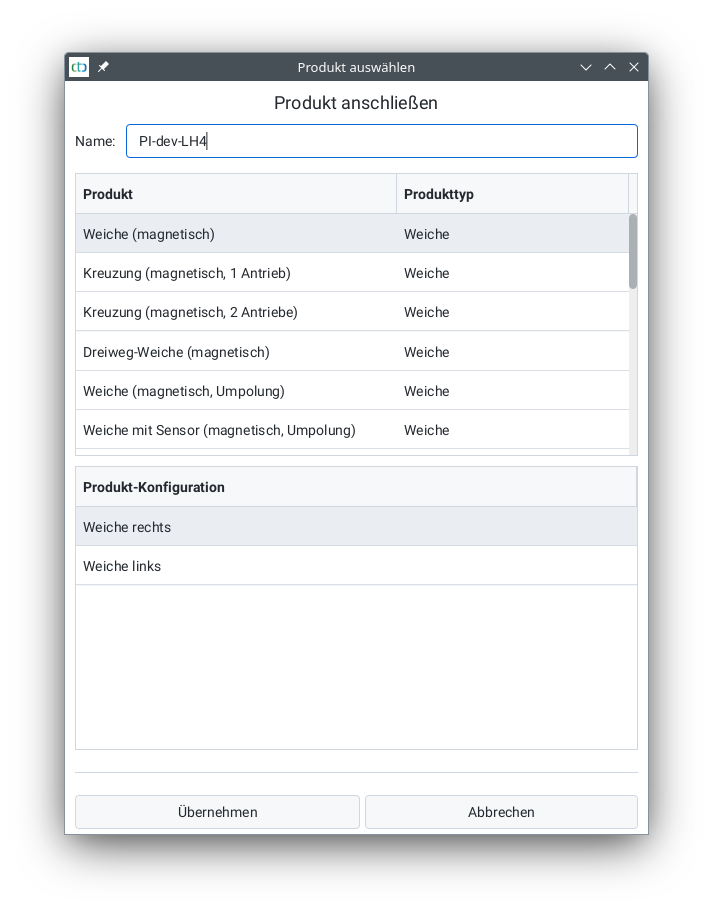
Now select the appropriate product. For some products, you can also choose from different configurations.
Then, enter a name for the connected product and click on “Apply”.
Now you only need to specify which connections of the product are connected to which pins or ports of the CTC module:
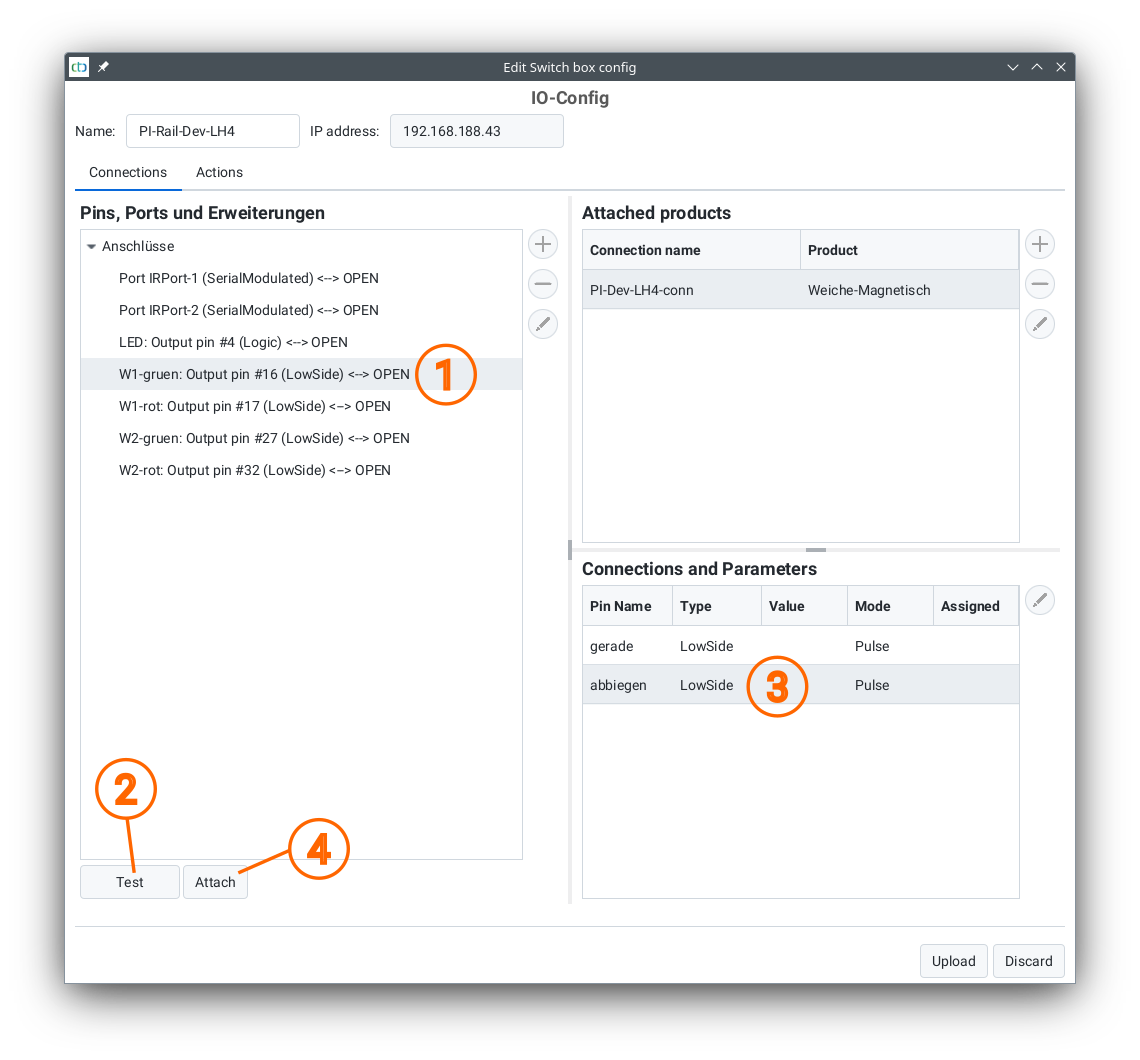
- The newly added product must be selected in the “Connected Products” table. Then select the corresponding port of the CTC module in the “Pins, Port, and Extensions” table.
- With the “Test” button, you can check which pin of the connected product is attached to the selected port of the CTC module.
- Then select the pin determined by the test in the “Connections and Parameters” table.
- By clicking the “Connect” button, the product’s pin is logically connected to the port of the CTC module.
Now you can see the established connection in the two tables “Pins, Port, and Extensions” and “Connections and Parameters”:
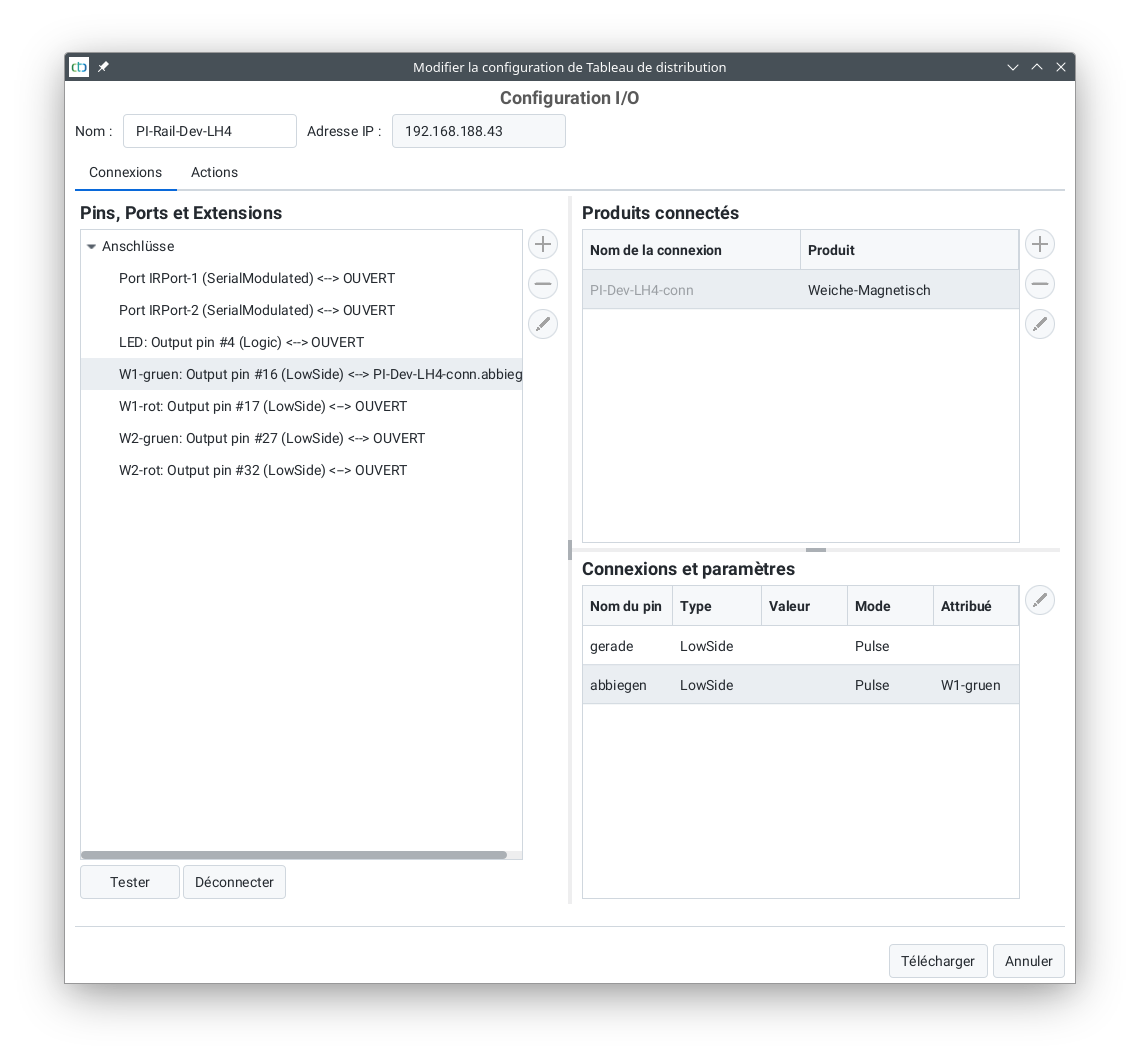
Repeat the above four steps until all connections of the product are linked.
WARNING: The CTC-App ensures that the connections of the product can only be linked with matching pins or ports. However, if you have selected an incorrect product, this can indeed lead to damage to the CTC module and/or the product. Particularly noteworthy here are the electromagnetic drives, as used, for example, in Märklin turnouts (whose end switches do not function). If these are connected not as pulses but as switches, they will be destroyed after a few seconds.
Example Configuration of a CTC Multi I/O Board
This is what the configuration of the CTC Multi I/O Board of our demo system looks like:
