Actions are at the heart of CTC’s control functions. They determine both which buttons and sliders appear where in the CTC app, and what should happen automatically.
Note: If you have connected a product, as described in the previous chapter, matching actions have already been created. However, some of these need to be finished configuring, e.g. an IR balise already has a trigger for linking with a signal, but the signal still needs to be chosen as the “trigger”.
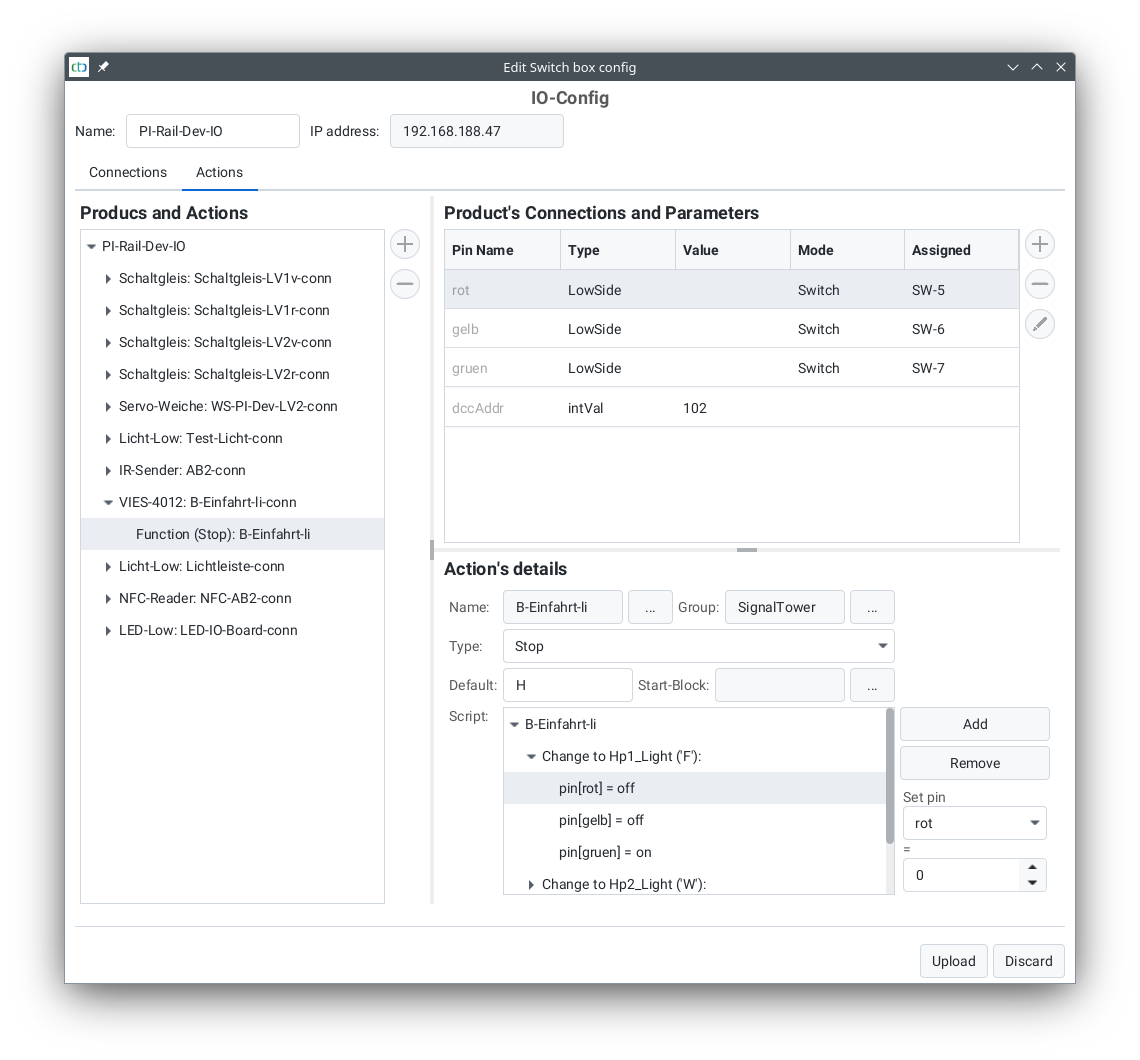
There are the following types of actions:
- Function: Appears as buttons in the CTC app, e.g. to control turnouts and signals or to activate locomotive functions.
- Value slider: Appears as plus/minus buttons and sliders in the CTC app to adjust a numerical value.
- Trigger: This allows the CTC app or the CTC module to respond to the change of any other action, e.g. a signal can turn red after a turnout has been activated.
- Sensor: This action is connected in the CTC module with a sensor, e.g. a contact track. The value of the sensor is displayed in the CTC app and can (like all actions) trigger a trigger.
- Timer: This action serves to do things regularly or after a certain time, e.g. our IR balise is a timer that cyclically sends an infrared message.
Each action has a state in the form of a letter or a number. This state can be used in the trigger to react to specific state changes.
By the way, when you add a product, matching actions are also created straight away.
Note: Actions that cannot be assigned to a CTC module are edited via the “Change Automation” button. These are for example the triggers of an NFC balise.
Function
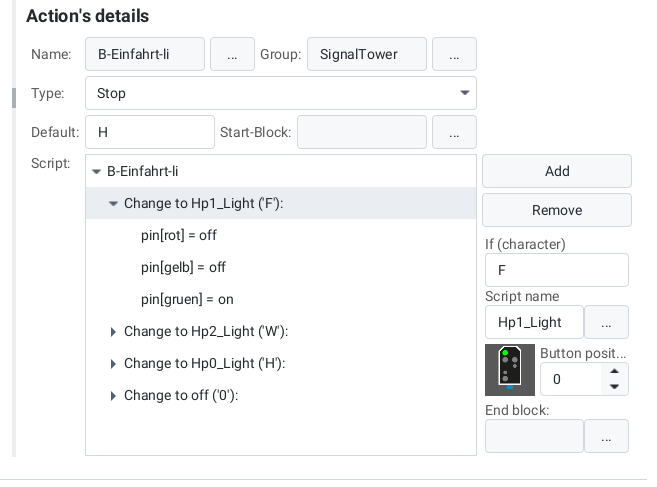
A function is a collection of related buttons or switches. Each of these buttons is associated with a script (see Chapter 4.5 - Editing Scripts) that is executed when the button is pressed.
For example, a turnout has two buttons, one for “straight ahead” and one for “turn”. Pressing the button triggers the corresponding CTC module to execute the associated script. In the case of our turnout, for example, a 250ms long pulse is given to the turnout drive, thus setting the turnout.
The function always reports its last triggered button as the state. This then provides the basis for triggering subsequent actions using a trigger.
In contrast to most model railway controls, our function may also consist of more than two buttons.
Value Controller
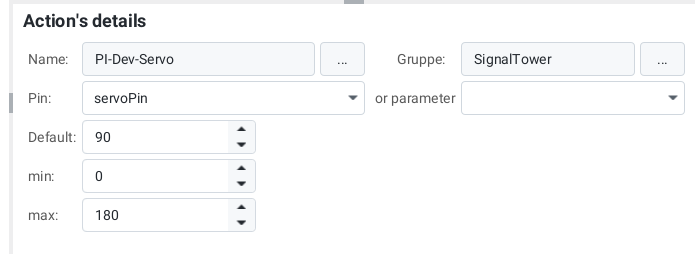
With a value controller, a numerical value can be adjusted, for example, a servo can be set to a specific angle. The most obvious value controller is the speed controller of a locomotive.
The status of a value controller is the last set value.
Trigger
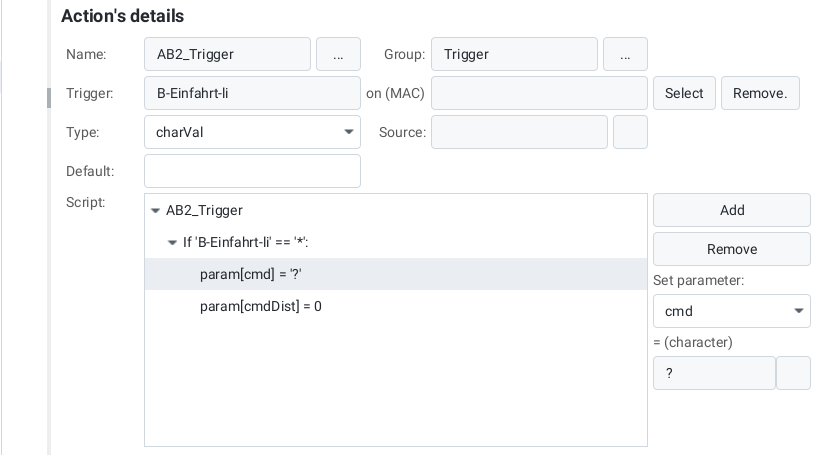
A Trigger is very similar to a function, but it is not triggered by a button, but by the state change of another action.
Like the function, the trigger consists of multiple scripts (refer to Chapter 4.5 - Edit script) which are executed depending on the new state of the triggering action.
If the trigger is stored on the same CTC module as the triggering action, then this trigger is initiated directly by the CTC module. Otherwise, the CTC-App takes care of triggering it.
Timer
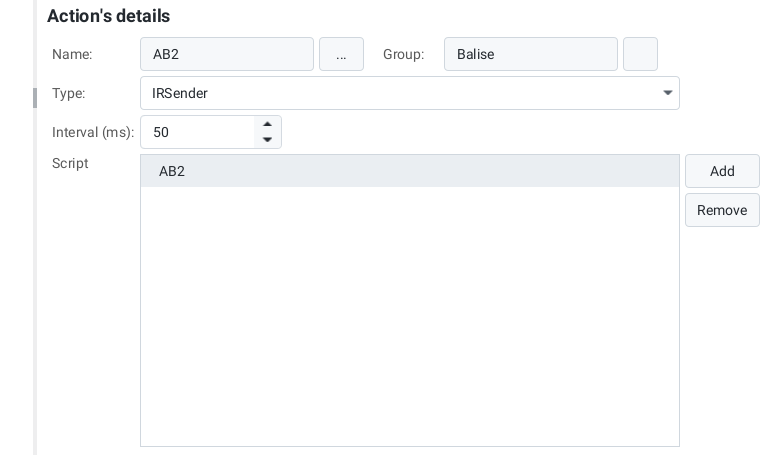
A timer can either be executed regularly (cyclically) or only once.
After its time has elapsed, the timer executes its script (see Chapter 4.5 - Editing script). This way, you can, for example, control motorized turnouts by turning on the motor in the script of a function and calling a timer that then turns off the motor after a predetermined time (e.g. 5 seconds).
The IR sender is a special case: It has no script and (hard-coded) regularly sends a message via infrared. The message is composed of the name of the IR transmitter and the predefined parameters dist, cmd and cmdDist. Here we recommend adding the product “IR-balise” from the product catalog “universal-sensors.xml”.
Sensor

A sensor is linked to an input pin of the CTC module (currently only Multi-I/O-Board). The sensor then passes on the state of the input pin as its state.
With the help of a trigger, a follow-up action can now be started.


