


A trigger can be linked with another action to respond to a state change of this action.
Apart from the examples mentioned below, you will find an ever increasing number of instructions in “Appendix B: Examples”. You will receive a very detailed step-by-step guide in the separate document “CTC-Starter-Sets”.
Linking IR-Balise (IR-Transmitter) with Signal
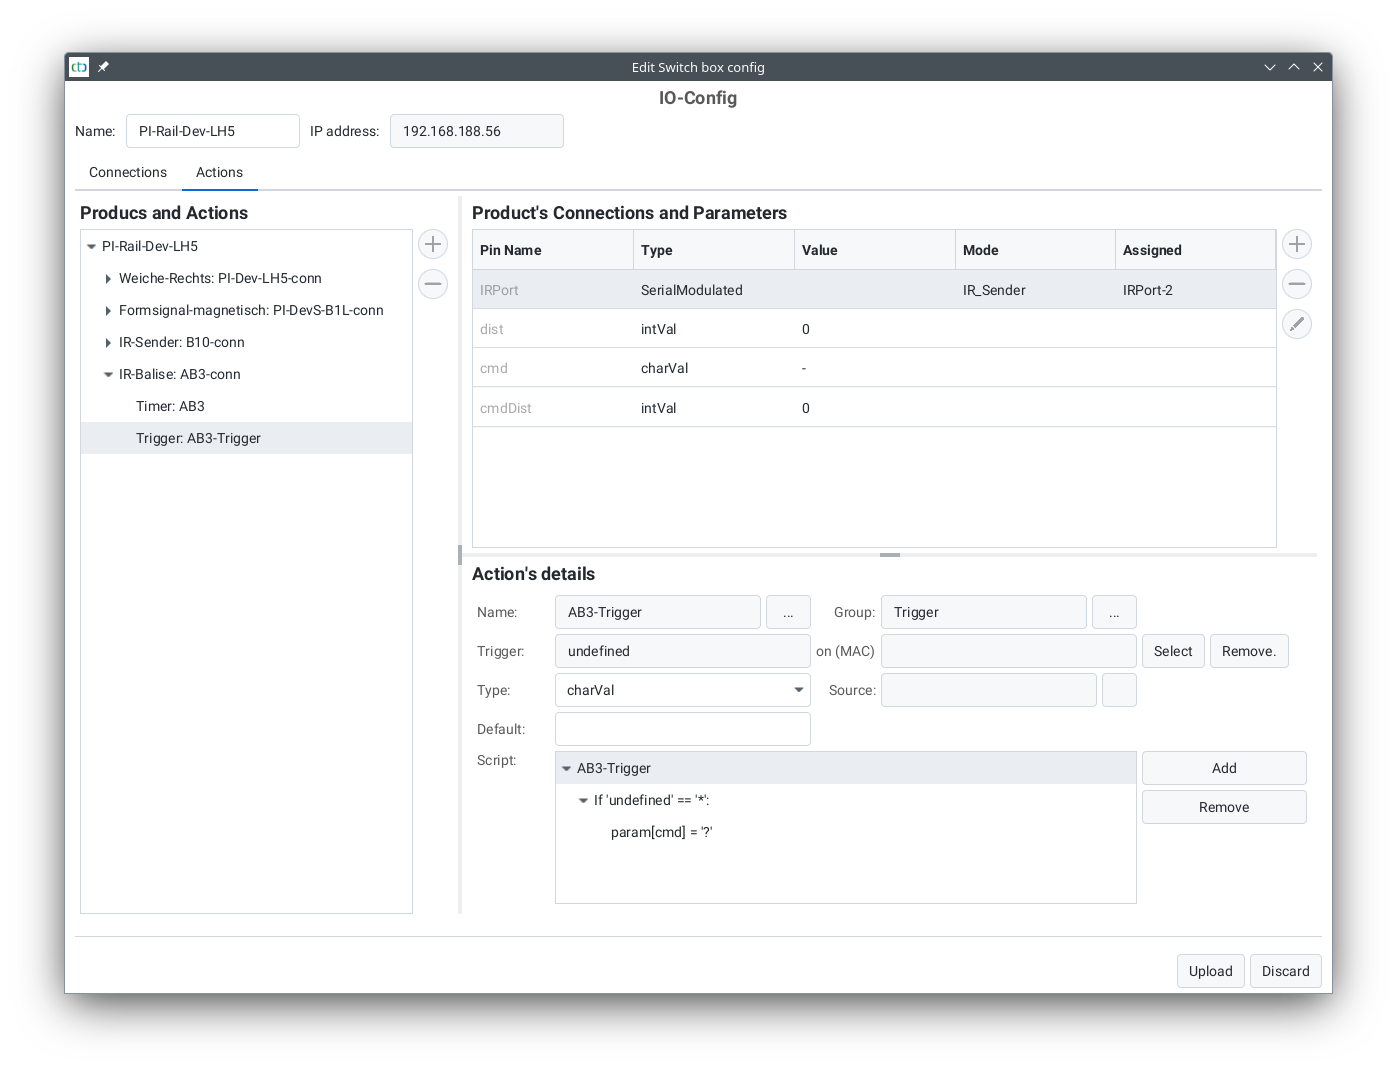
The simplest form of linking is triggering an IR balise. It’s already created while selecting the IR balise from the product catalogue “universal-sensors.xml”. You just need to specify which signal it should respond to and enter the distance to the signal.
Select the trigger of the IR balise (here AB3-Trigger):
Then click on “Select” to the right of the trigger. The following dialogue box will open:
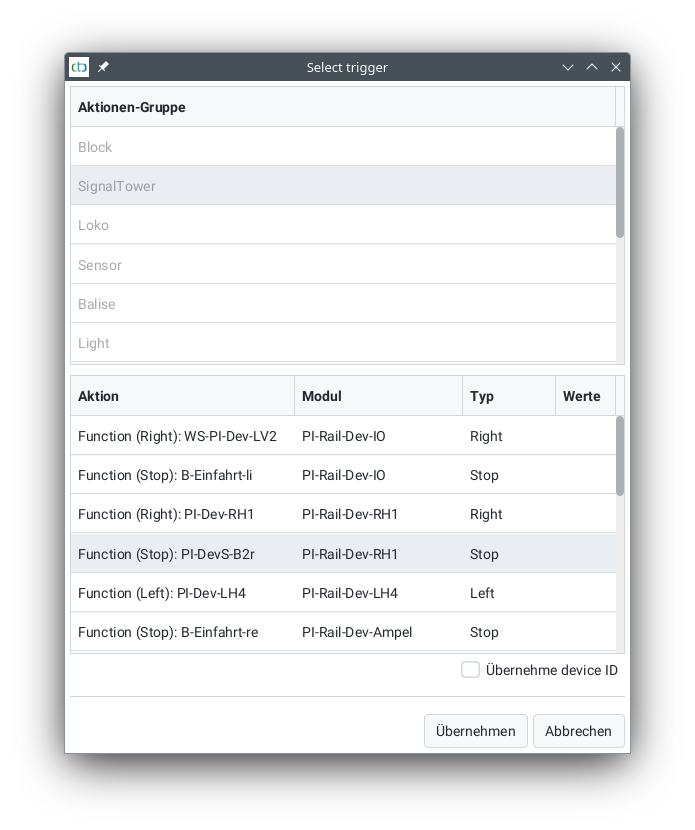
Choose the signal to link (usually in the “SignalTower” group) or sign, and then click on apply.
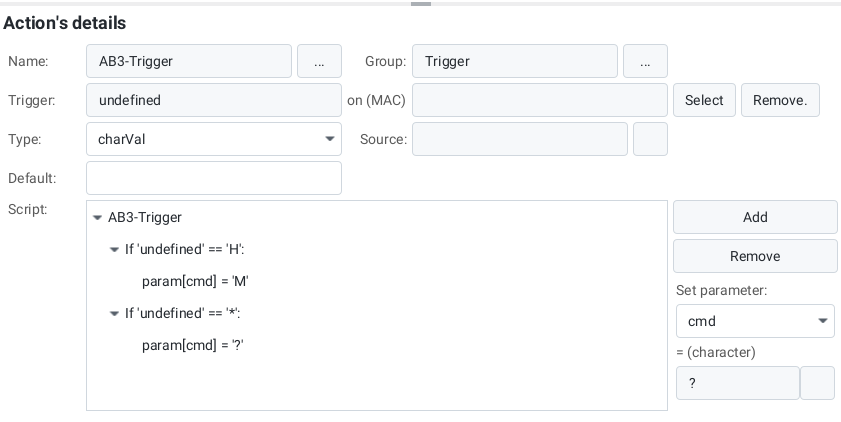
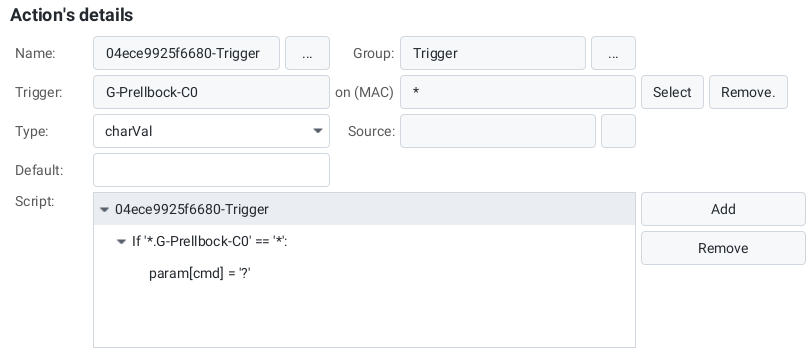
The name of the selected signal will now be displayed under “Trigger”. A star should appear in the “on (MAC)” field.
In the simplest case, the pre-made script should be left unchanged. It takes over the distance (cmdDist) from the parameters and the value of the signal as a command.
In the following example, for the ‘H’ (stop) state of the signal, the ‘M’ command is sent out. In all other cases (‘*’), the state of the signal is taken as the command (‘?’). Also, the distance (in cm) between the IR balise and the point from where the command should apply is specified.
Linking NFC Balise with Actions
To be able to link an NFC balise with actions, a balise must be created. Since an NFC balise is not connected to a CTC module, the balise is stored in the track diagram. You can find out how to do this in the chapter “Balises (ID Transmitters) in the Track Plan”
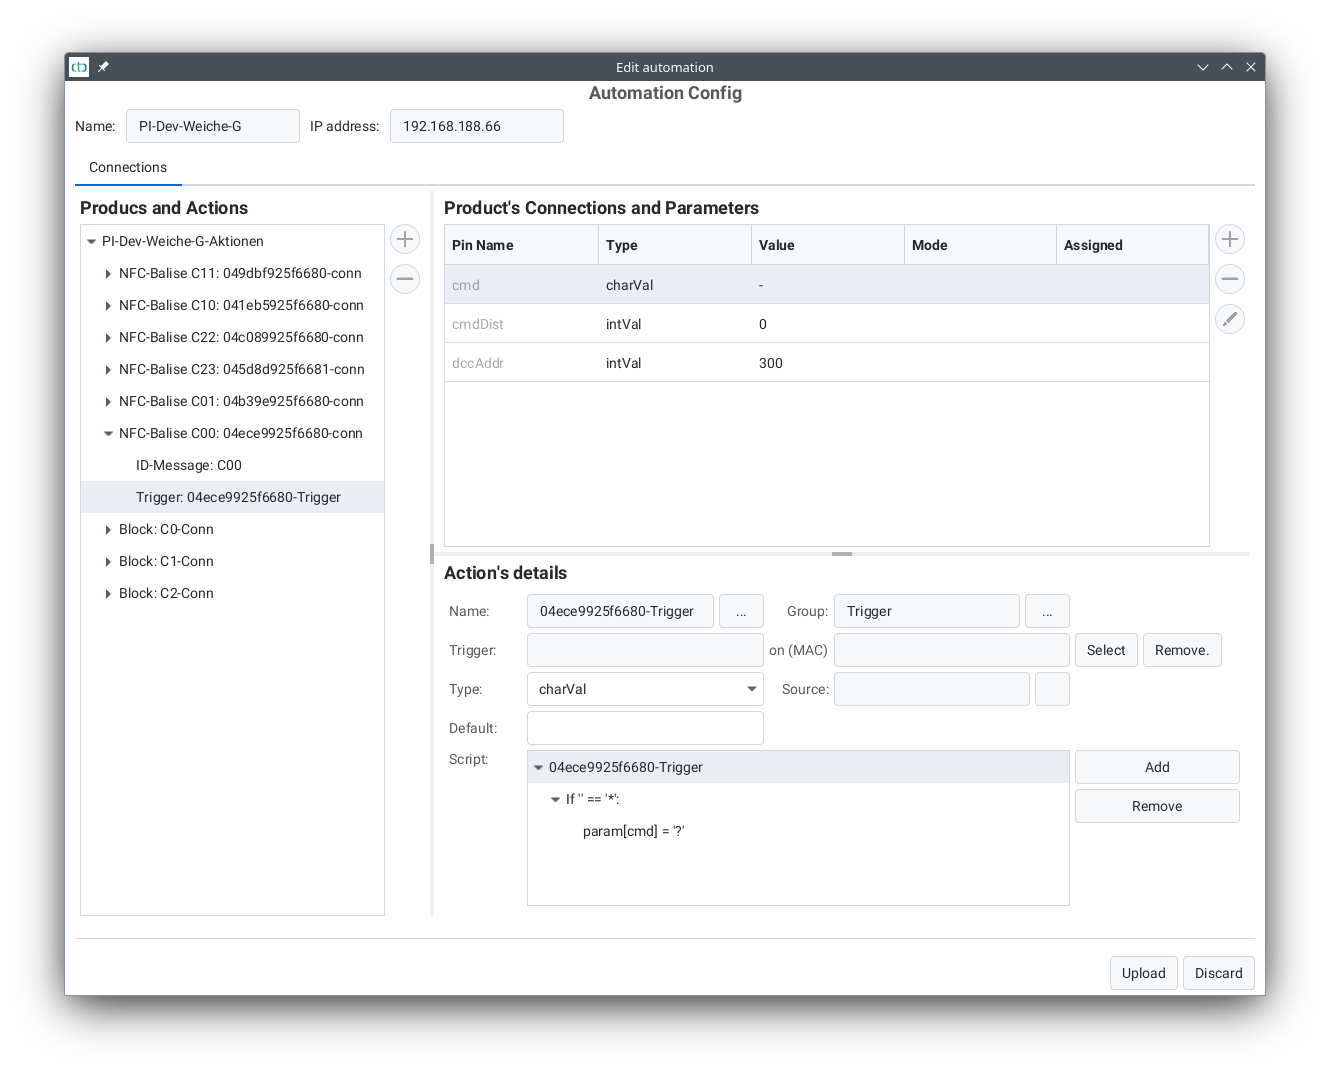
Once the balise is created, the already established trigger for the NFC balise can be edited via the “Change automation” button, similar to the IR balise:
Then click on “Select” to the right of the trigger. The following dialog will open:
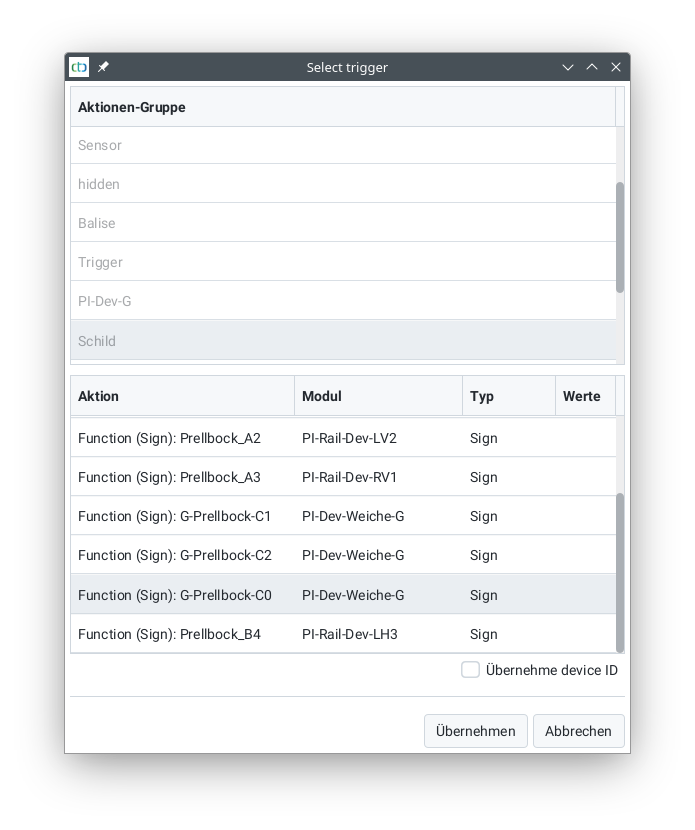
Select the signal or sign to be linked (here a sign) and then click on apply.
The name of the selected sign is now displayed at “Trigger”. In the field “on (MAC)” a star should be displayed.
In the simplest case, leave the pre-made script unchanged. It takes the distance (cmdDist) from the parameters and uses the value of the sign as the command.
Note: If the trigger for a trigger is located on the same CTC module as the trigger itself, the CTC module itself deals with executing the trigger. Otherwise, the CTC app takes care of triggering the corresponding trigger.
The editing of scripts is dedicated to its own chapter.