

Basics
A track plan is initially just a grid with track symbols without any further meaning. The functionality of a track control panel results from the assignment of turnouts, signals, balises, and blocks.
The track plan is stored on the CTC module, from whose configuration dialog the track plan editor is opened (see below). The assignment of turnouts, signals, balises, and blocks is stored in their respective modules. This means, in particular, that changes to a track plan can only be fully saved if the CTC modules of all assigned actions (turnouts, signals, balises, blocks) are reachable via Wi-Fi.
When clicking the “Upload” button, all affected CTC modules (if reachable) are updated based on your changes. The final dialog that appears lists which modules were modified.
Creating a Track Plan
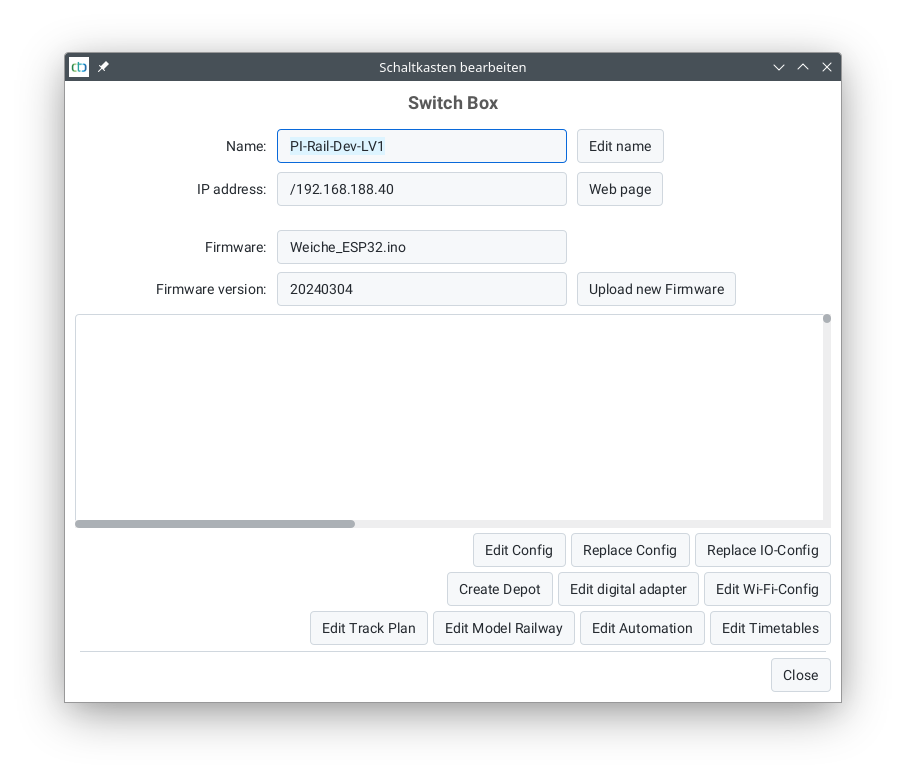
To create a track plan, first select the CTC control module where the track plan should be saved. Open its configuration dialog:
There, select Edit track plan. The following dialog will open:
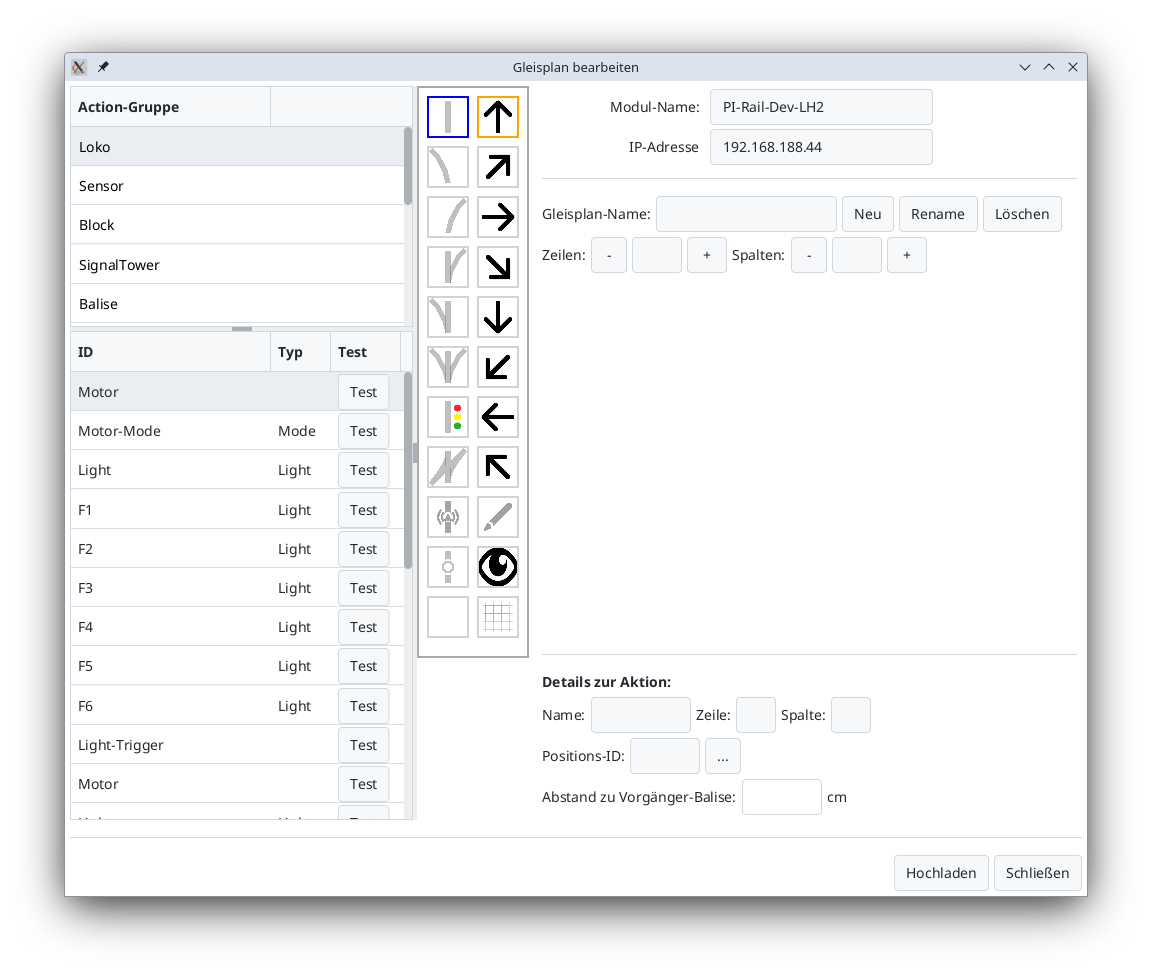
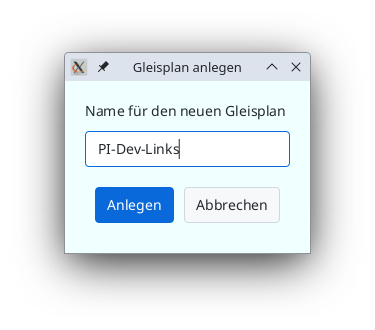
Use the New button to create a new track plan. Ensure the name is unique.
Afterward, a grid will appear where you can place track symbols and later link them with turnouts, signals, etc.
Using the buttons to the right of Rows and Columns, you can adjust the size of the grid.
Placing Track Symbols
To place a track symbol, first select the desired track symbol (1) from the left symbol column (in this example, a right-hand turnout). Then, use the arrow symbols (2) to choose the orientation (here, diagonal at 45 degrees). Finally, place the track symbol in the desired position by clicking on the grid (3).
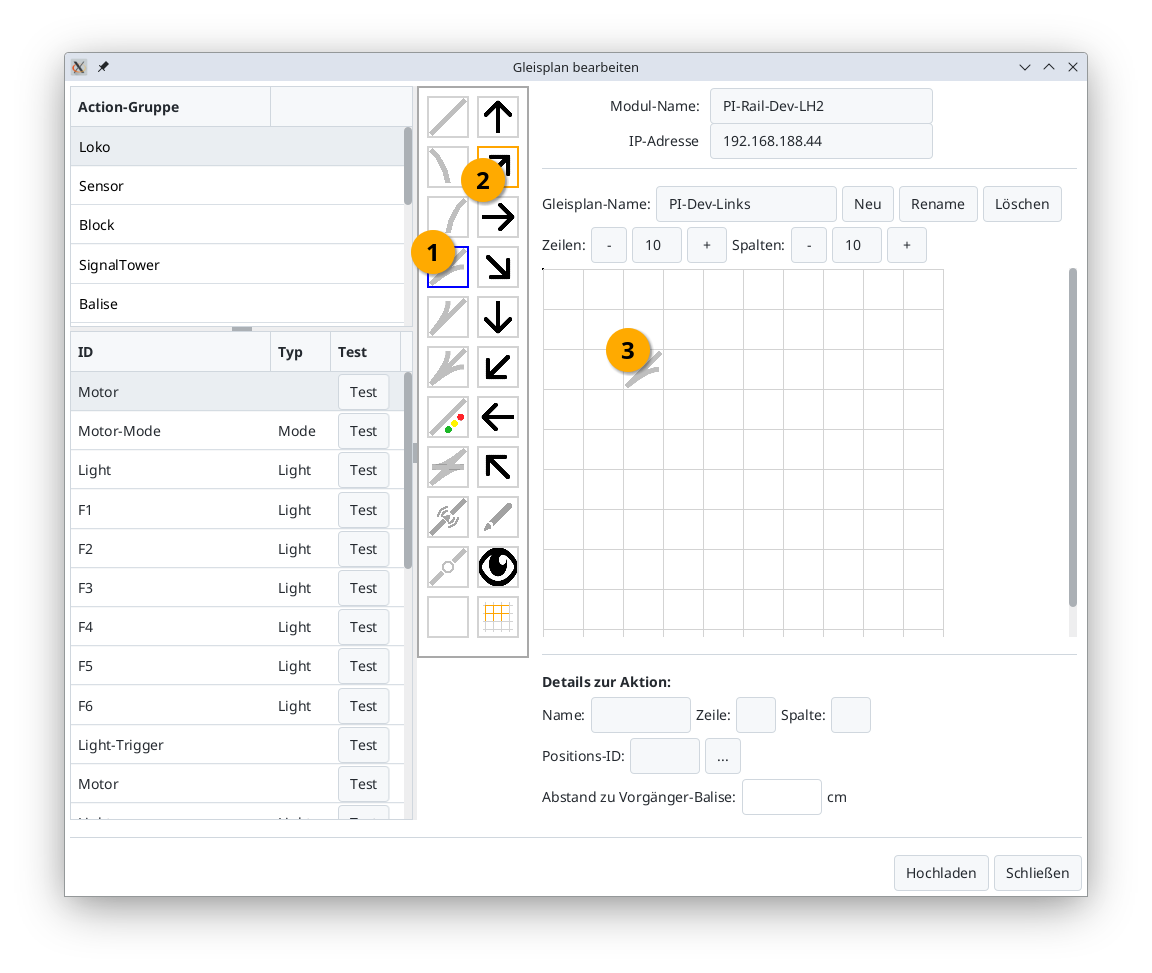
You can now assign a turnout, signal, balise, etc., to the track symbol.
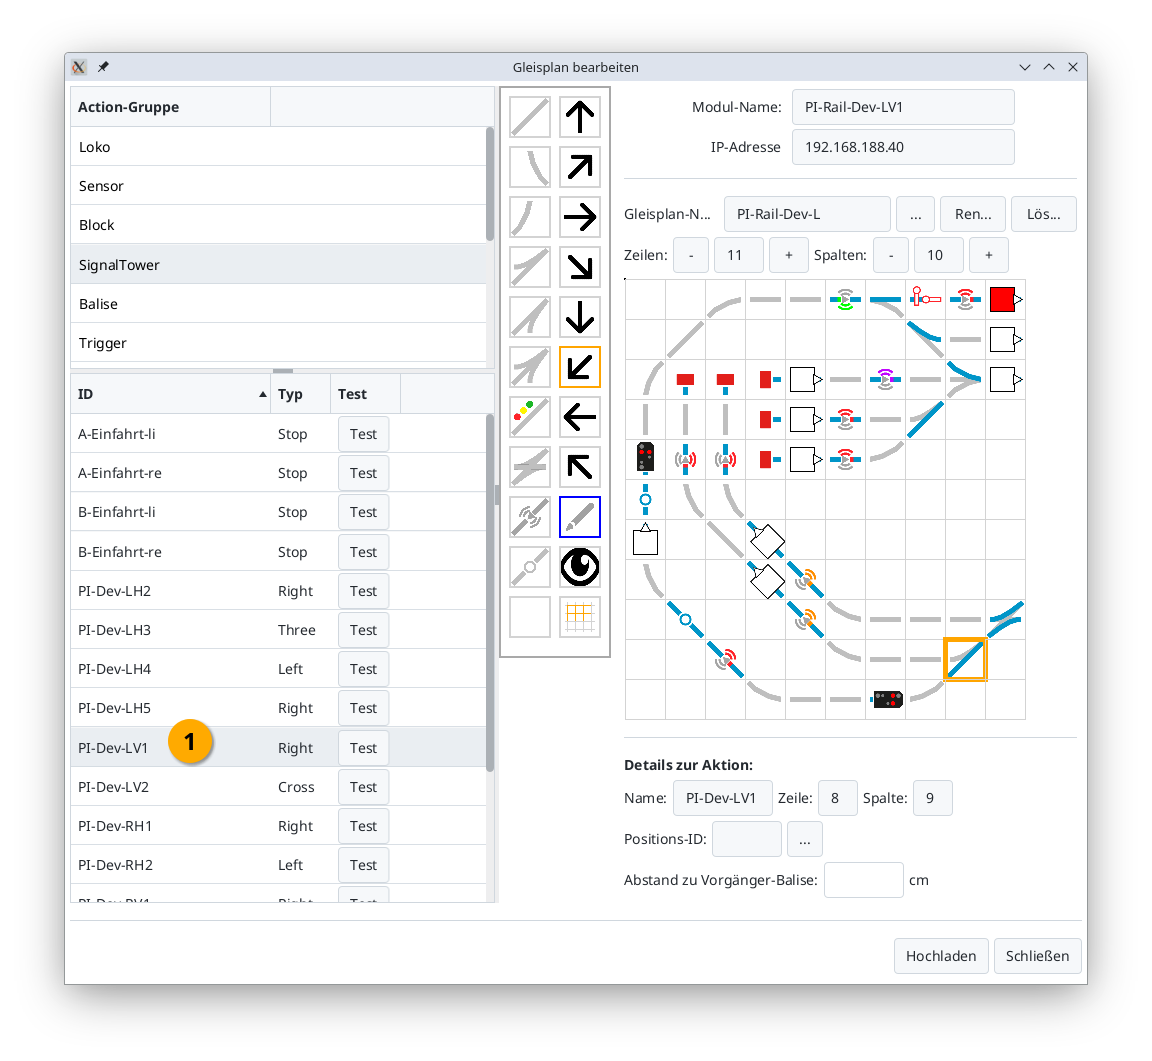
Assigning Turnouts, Signals, etc.
To assign a turnout to a track symbol, first select the action group (1) of the turnout (usually “SignalTower”) in the top-left corner. The list in the bottom-left will now display all actions in the “SignalTower” group (typically all turnouts and signals). Then, click the desired turnout (2). In the tool palette, the pencil icon will automatically activate (highlighted with a thick orange border in the image).
Finally, click the previously placed turnout in the track diagram (3). You’ll know it worked when an orange border appears around the turnout in the track diagram, and the turnout’s current position is displayed in blue.

Notes:
- The action group is predefined when selecting from the CTC product catalog but can be changed at any time in the Config Dialog.
- If the turnout in step (2) is already assigned to a location in the track plan, its position will be outlined in orange.
To locate a turnout in the track plan from the list, click the turnout in the list (1). The corresponding turnout symbol in the grid will then be highlighted with an orange border:
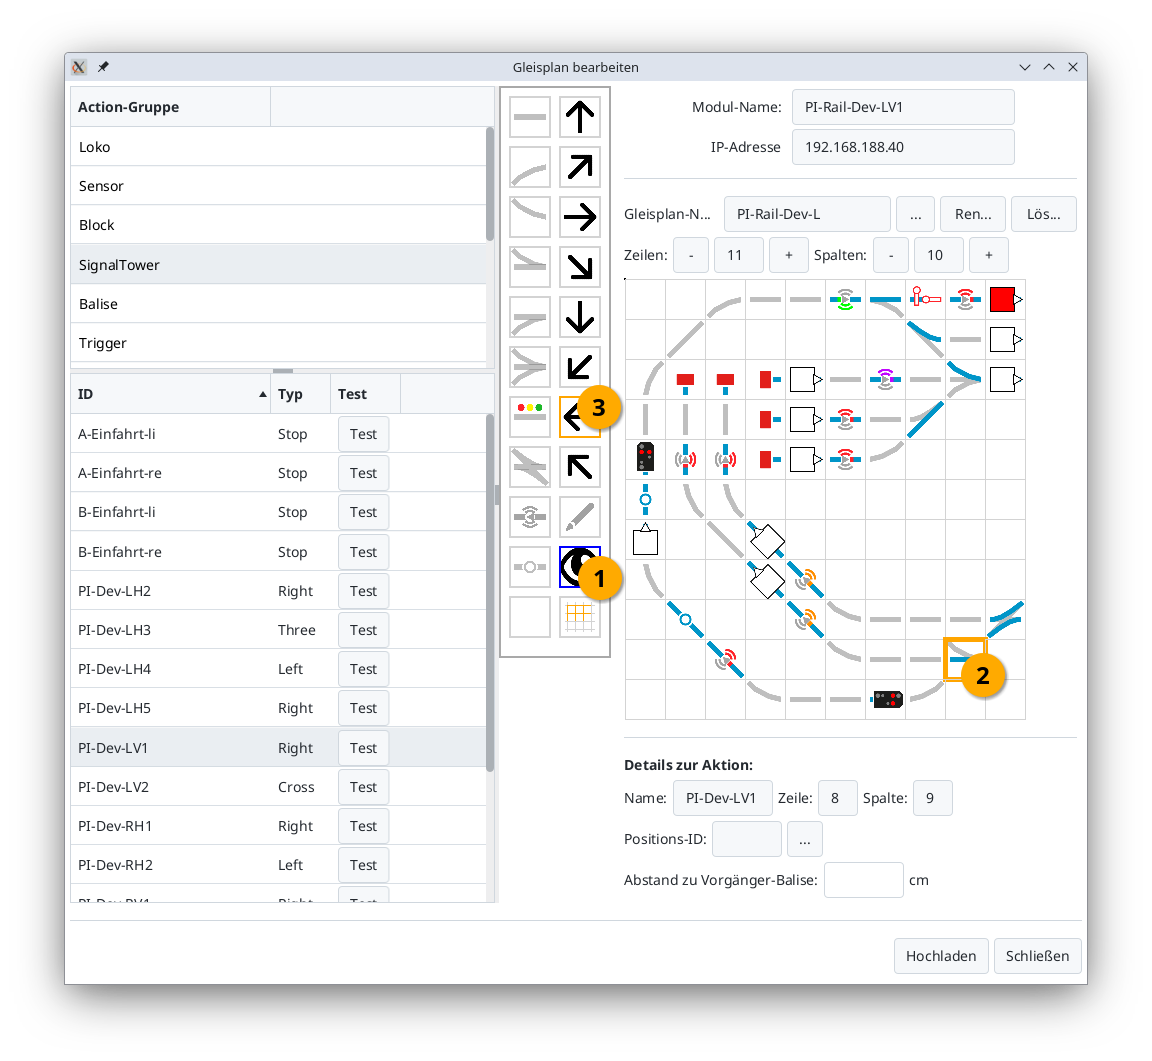
Rotating Track Symbols (from CTC App 4.39 onwards)
If a track symbol has the wrong orientation, you can rotate it by selecting the display symbol (1) (eye). Then click on the track symbol (2) so that it is outlined in orange. Finally, choose the orientation by clicking on the appropriate arrow symbol (3).
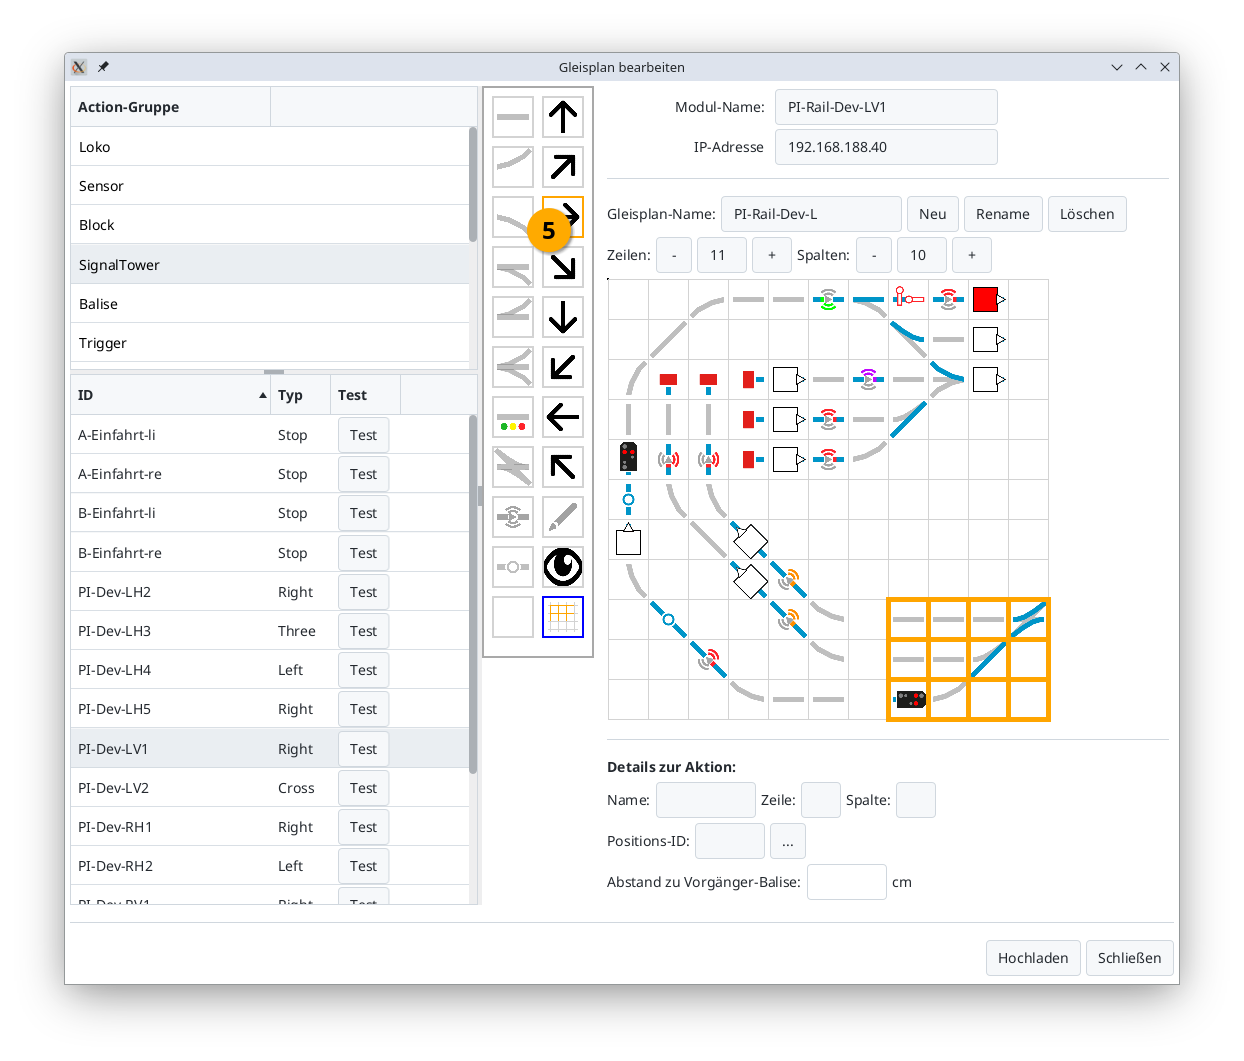
Moving a Section (from CTC App 4.39 onwards)
If you want to move part of your track layout, proceed as follows: First, mark the top-left corner of the section you wish to move by selecting the Display symbol (1) (eye) and then clicking the cell in the track plan (2).
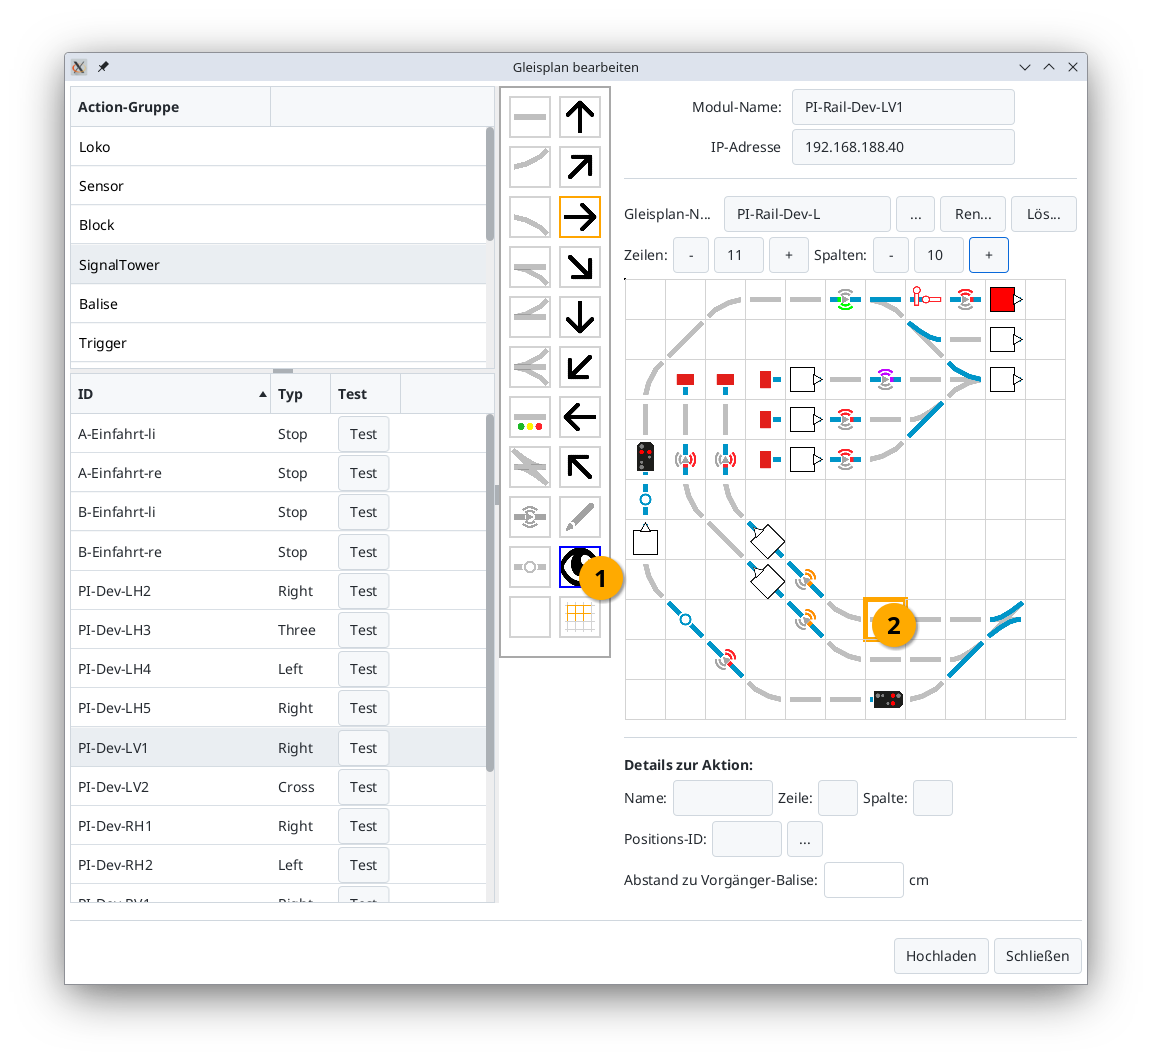
Next, mark the bottom-right corner of the section by selecting the Area tool (3) (grid) and clicking the cell in the track plan (4).
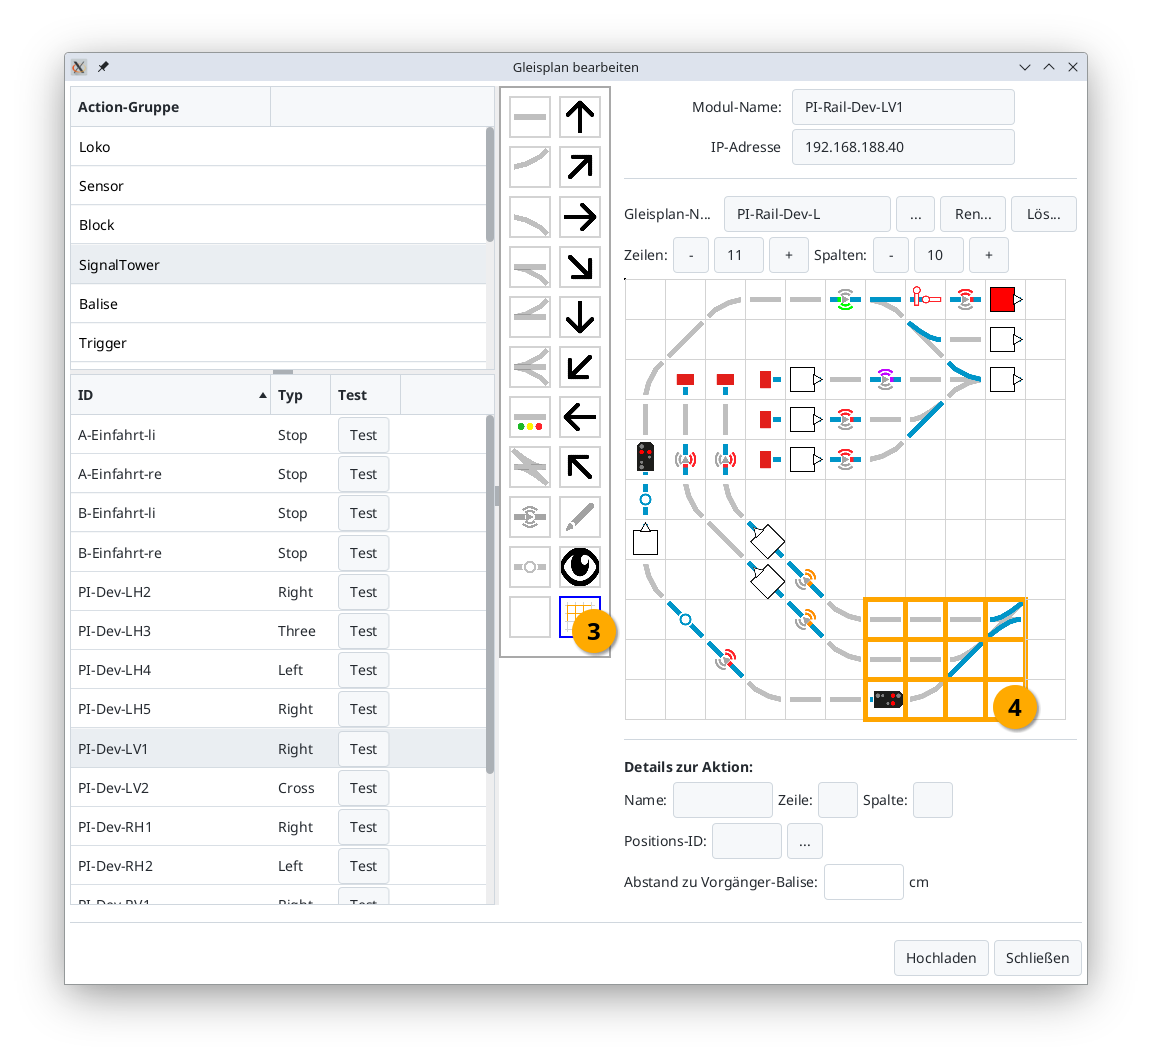
Now you can move the selected section using the arrow symbols in the direction of the arrow. In the example, the right arrow (5) was clicked:
Notes:
- When moving, the assigned actions (turnouts, signals, balises, etc.) are also moved.
- If you move into a non-empty area, the existing content in that area will be overwritten, meaning track symbols and assignments will be replaced. Previous assignments may be lost as a result.
Rename Track Plan (from CTC App 4.39)
Using the “Umbenennen” (Rename) button, you can change the name of the track diagram.
Notes:
- The assignments of turnouts, signals, etc., are automatically adjusted.
- If the track plan is already displayed in a track section, it will not be updated. An error symbol will then appear in the track section.
Delete Track Plan (from CTC App 4.39)
Using the “Löschen” (Delete) button, you can delete a track diagram, including all assignments of turnouts, signals, etc.
Note:
- If the track plan is already displayed in a track section, it will not be updated. An error symbol will then appear in the track section.