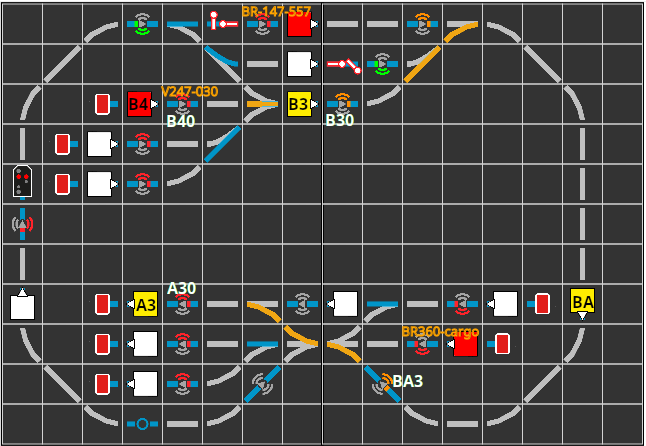
Typically, a driving order (Job) is the journey from one station to another. In the following example, the drive order was set from block B4 via B3 and BA to A3. The reserved turnouts are colored orange and the reserved blocks are colored yellow (block and balise IDs were manually painted into the track diagram):

Now, the locomotive V247-030, which is in block B4, can be set in the correct direction and dispatched on its journey by clicking the automatic button.
In our example, only a sequence of routes was defined in the job, but no balises. This works well if all the balises on the route provide suitable information. In our case:
- The balise BA3 was set to the command M;70 (minimum speed in 70 cm) by the route from BA to A4.
- The balise A30 constantly displays the command H;0 (stop immediately).
- The buffer at the end of A3 is assigned as the (clockwise) right exit signal to block A3. This prevents the locomotive from starting off again after reaching block A3.
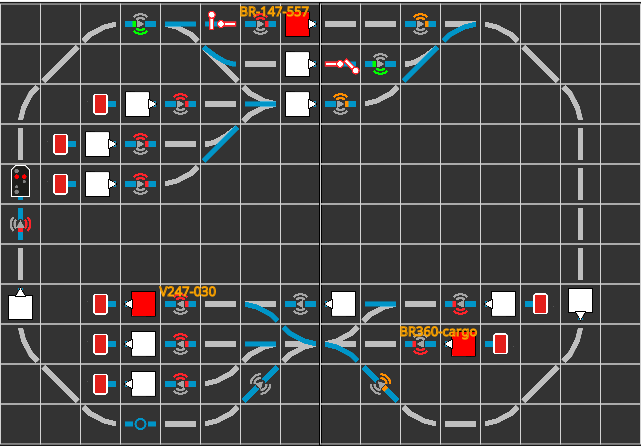
Upon arrival of V247-030 in block A3, all reservations are withdrawn. The track diagram then looks as follows:

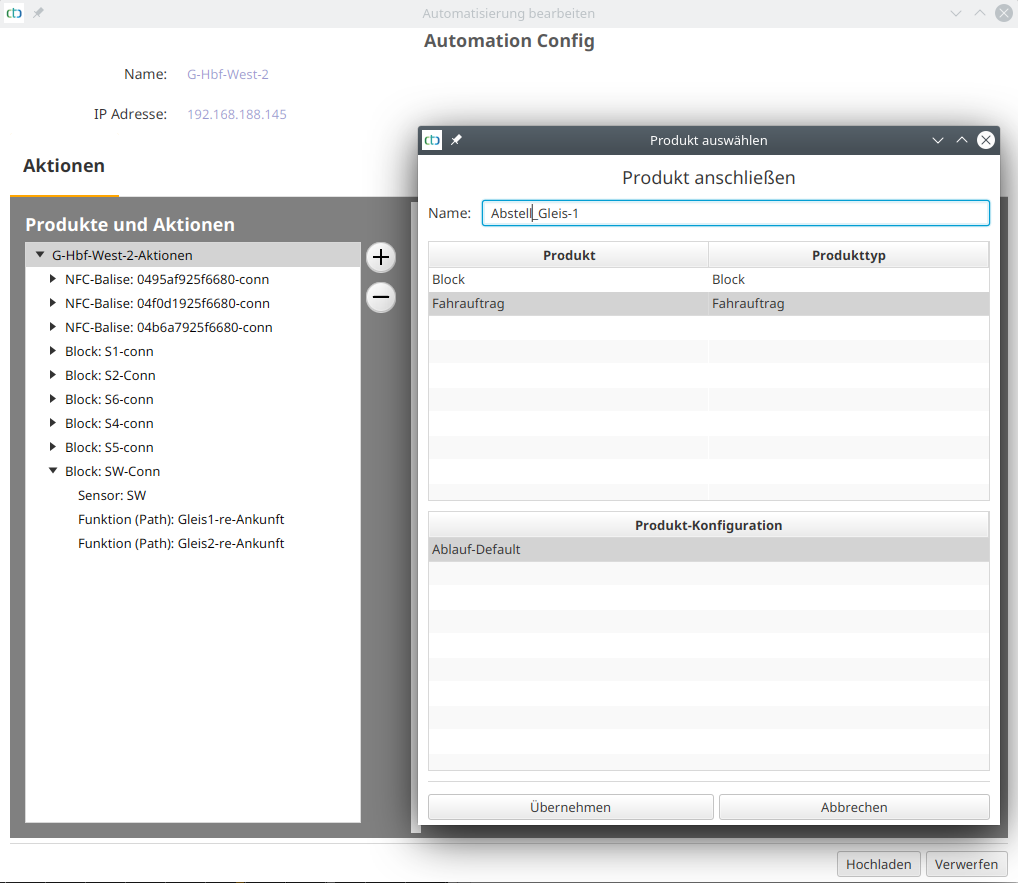
Creating a Drive Order
To create a drive order, we open the “Automation Config”, select the top entry from “Products and Actions”. Then we click on the plus button right next to it:

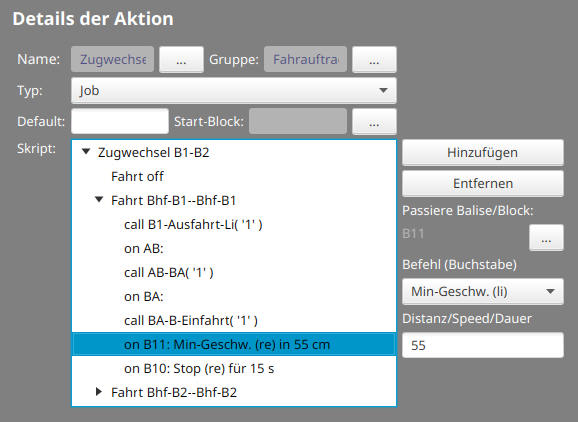
Driving Order with Balise Commands
The following image shows the script for a driving order, in which the balises to be passed are also listed:

When passing balise B11, the locomotive will slow down to reach the minimum speed after 55 cm. At B10, it will then finally stop for 15 seconds, even if the exit signal clears the way.


