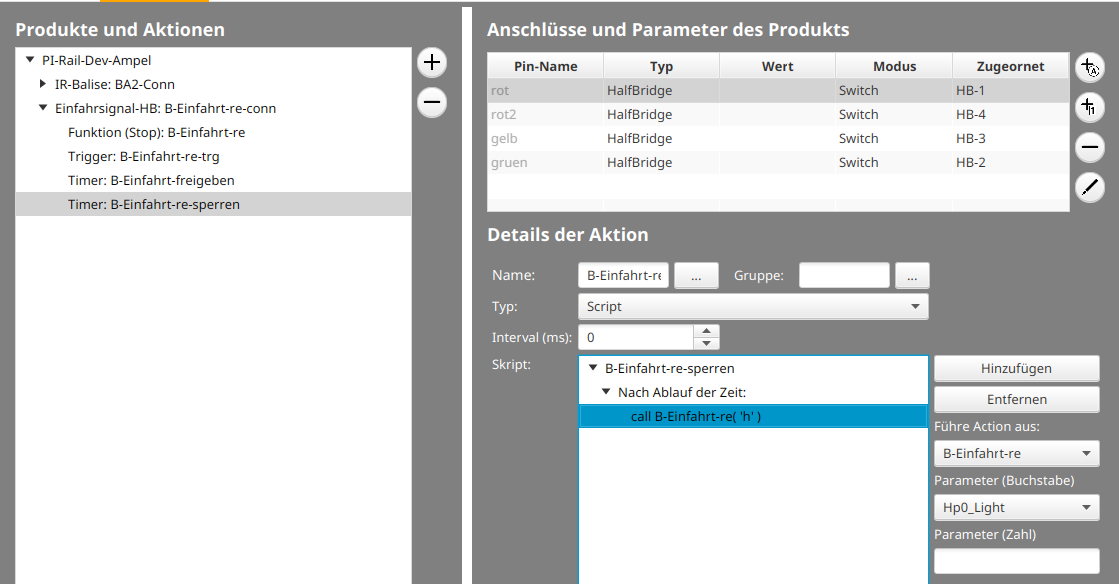
In this example, a timer is used to make a train stop for a certain period of time with the help of a light signal, e.g., at a station.
The starting point for this example is a signal linked to two balises: one for slowing down and a second for precise stopping. How this works is described in Chapter 4.3 “Config - Linking Actions” for both IR balises and NFC balises.
For the timed stop, you add two timers and a trigger to the signal.
The trigger should activate when any locomotive reaches the balise directly in front of the signal and stops there. To do this, open the signal’s config, click on the signal under “Actions,” and then click the plus button to the right of “Products and Actions”:
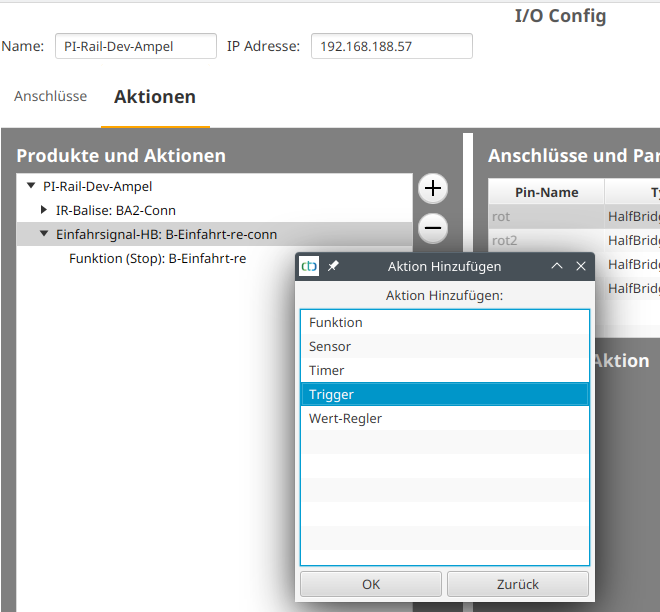
Then select “Trigger” and click “OK.” In the example, the new trigger is called “B-Entry-re-trg.”
In the same way, create the two timers “B-Entry-release” and “B-Entry-block.” After creating them, give the new action a suitable name by clicking the “…” button next to Name in “Action Details.” Only then do you edit the individual scripts.
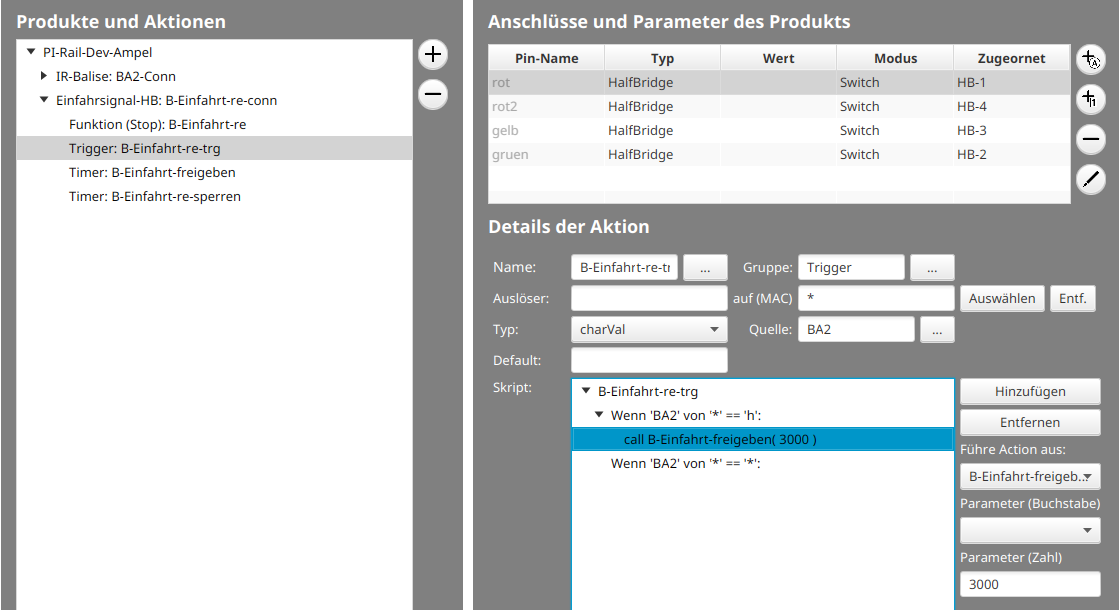
For the trigger, click the “Source” button to select the balise as the source of the event. The actual trigger for the event is the locomotive. Since the timing should work for any locomotive, nothing is selected under “Trigger.” The star next to “on (MAC)” appears automatically after selecting the source.
The letter passed to the script is the command that the locomotive received from the balise. You use this to start the timer for changing the signal to green only when the locomotive was stopped (‘h’). The second “if” responds to all other commands and does nothing except reset the trigger so it can react again on the next stop.
To start the timer in the script for stop (‘h’), click the line “If ‘BA2’ from * == ‘h’” and then click “Add.” In the popup, select the command “call.” You can then choose the previously created timer “B-Entry-release” from the list under “Execute action”.
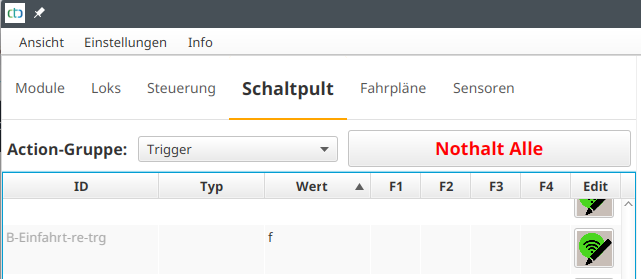
Note: A trigger only activates if the value passed to it differs from its own value. For this, the trigger stores the last received value. You can see the value of a trigger on the control panel by selecting the appropriate action group (usually “Trigger”):
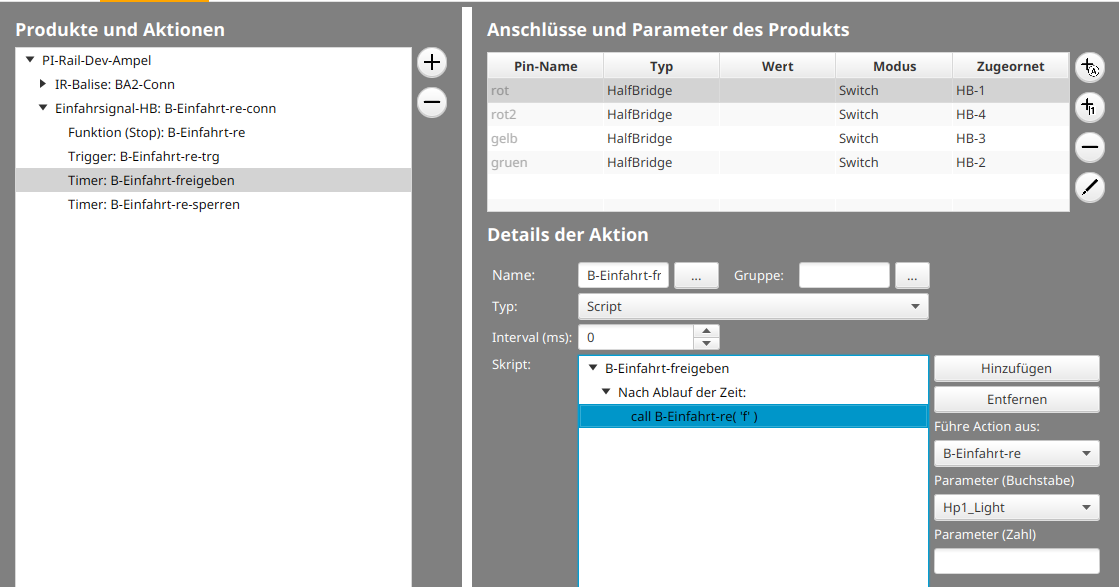
The timer for opening the signal (“B-Entry-release”) only receives a single command. Namely, a call to the green function (Hp1_Light) of the light signal:
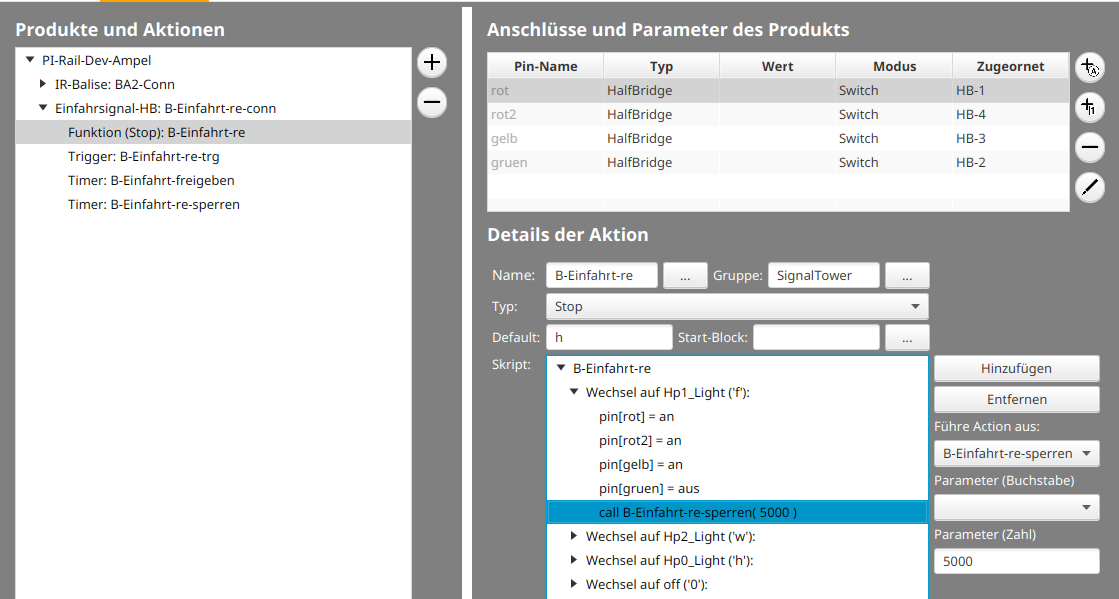
To ensure the light signal returns to red after the locomotive passes, add the call to the timer for closing the signal (“B-Entry-block”) to the function “Hp1_Light (‘f’)”:
The timer for closing the signal (“B-Entry-block”) also receives a single command. Namely, a call to the red function (Hp0_Light) of the light signal:
