




For installation in locomotives that do not already have a suitable plug or socket, we have created an adapter with a PluX22 interface.
| Property | Description |
| Optimized for | Locomotives without digital interface |
| Dimensions | 30 x 14.5 mm |
| Interfaces | PluX22 socket, optionally SUSI3-Classic socket |
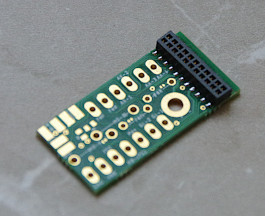
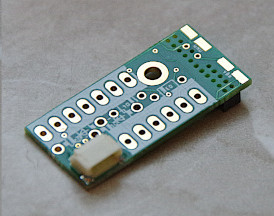
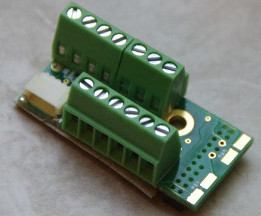
We offer the adapter in three variants:
| PluX22 socket only | PluX22 socket and SUSI3-Classic | PluX22 socket, SUSI3-Classic and screw terminals |
|
|
|
| Buy now | Buy now | Buy now |
The circuit board also provides space for:
- 2 diodes for connecting motors with field coils (e.g., old Märklin locomotives).
- one diode each for front and rear lights for connecting lighting with only one wire (second pole on the housing).
Notes:
- For IR receivers and NFC readers, there are no suitable connections in the standard PluX22. Therefore, these are connected via the separate socket on the CTC-Loco-Module.
- In the Loco-Module-PluX22, the headlight is configured as a switch against minus (LowSide). If it should switch against the plus pole (HighSide), the light must be removed in the config dialog and replaced with a HighSide light. See the conversion of the Märklin BR53 (Borsig I) for this.
- The diodes (Loco conversion kit analog ) must be ordered separately and soldered in yourself. The PluX22 socket is always soldered on.
Wiring
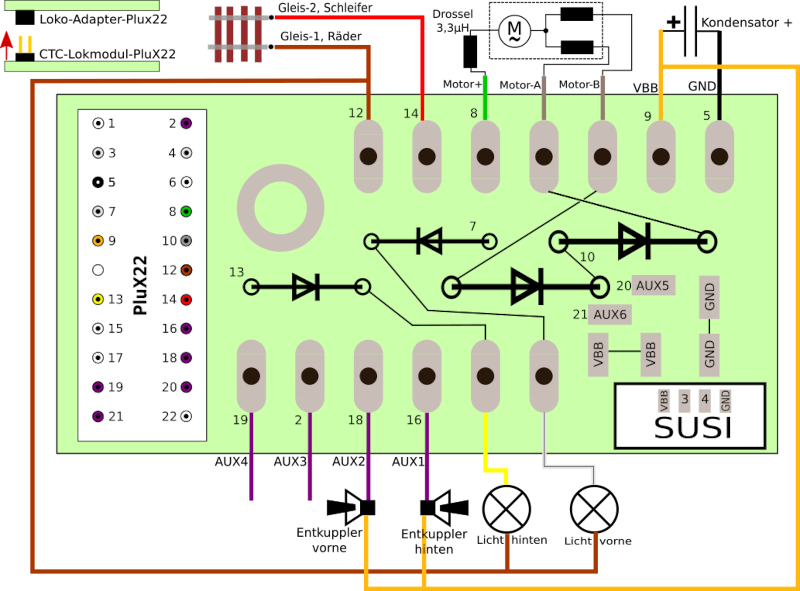
The example shows the wiring of an old analog locomotive with a field coil and electric uncoupler at the front and rear:
Here is the rear view, as it might look in the variant with screw terminals:
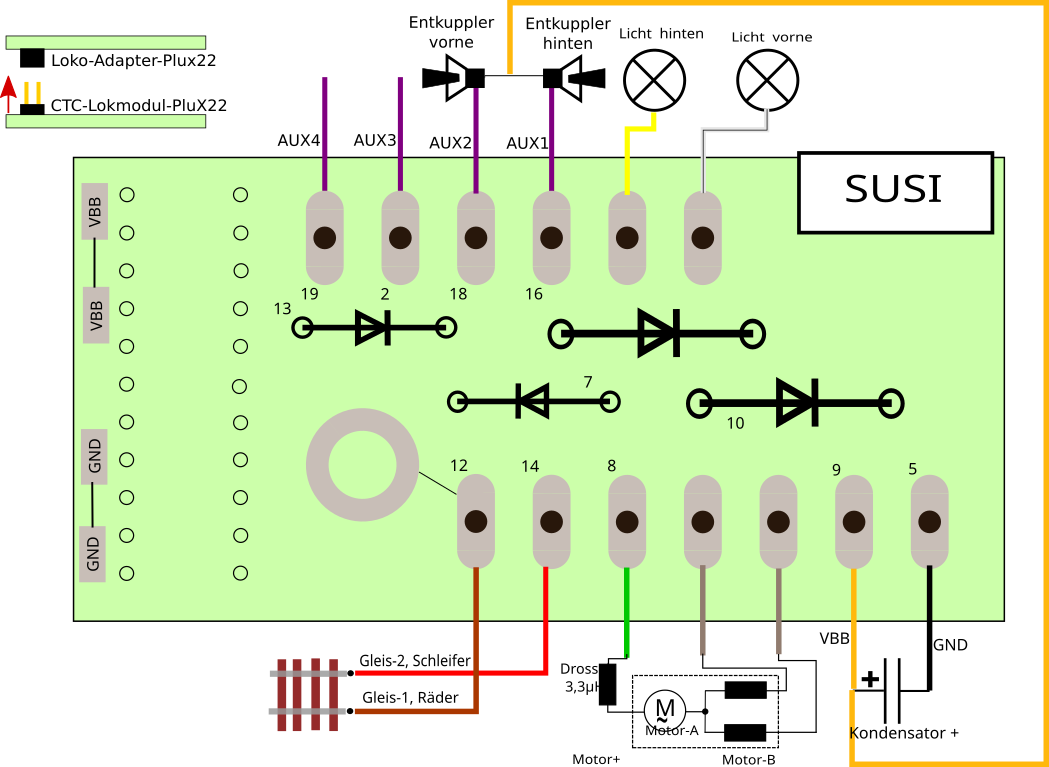
The hole in the circuit board is electrically connected to track-1, so this connection can alternatively be made by screwing it to the housing. In old Märklin locomotives, the circuit board can be screwed in where the changeover switch was previously attached. A cable to the wheels/housing is then not necessary.
The following image shows the adapter with all diodes soldered in:
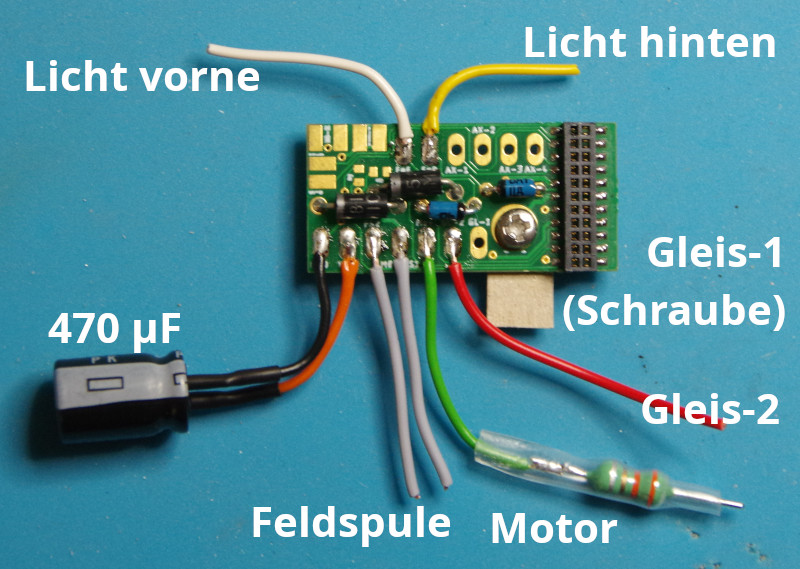
Note: When screwing on, please ensure that no short circuit to the locomotive housing occurs , especially at the rear. In the image, this was solved by placing a piece of cardboard behind the adapter.
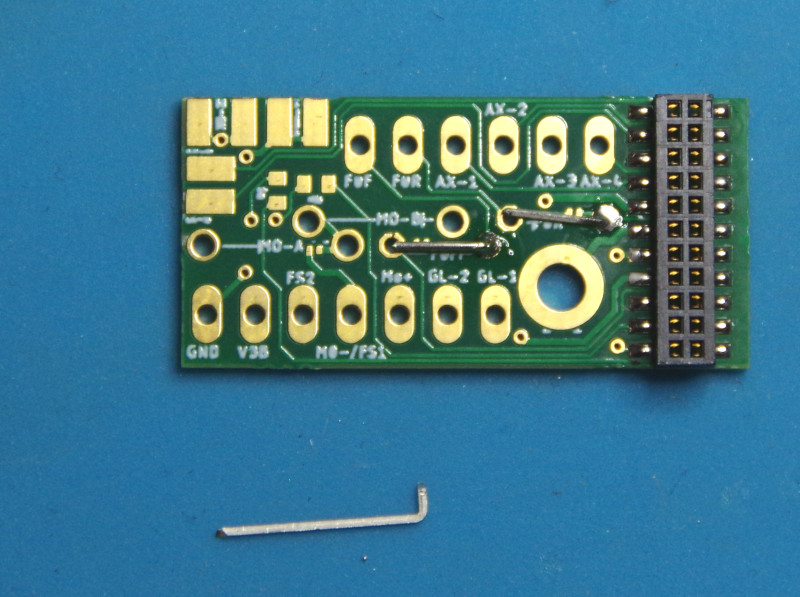
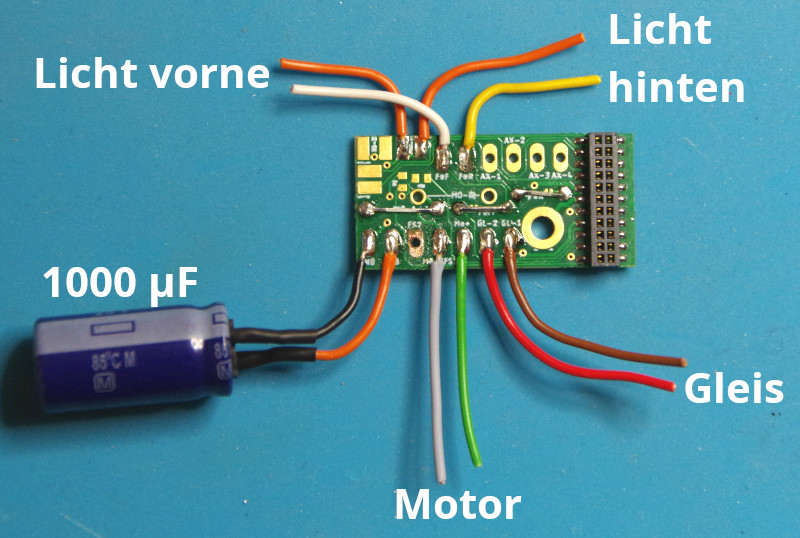
If the locomotive has a permanent magnet, the two right diodes are omitted and the top one is replaced by a wire piece. The motor is then connected to Motor+ and Motor-A. Motor-B remains unconnected.
If the front and rear lights have two wires (i.e., no connection to the locomotive housing), the small blue diodes can be replaced by wire pieces.
The following image shows all bridges soldered in:
Tip for soldering the bridges: Bend one side of the wire pieces with pliers. Then insert the bent side into the circuit board and solder it. Only then cut the wire to the appropriate length and finally solder the other end: