





| Feature | Description |
| -------------------- | ----------------------------------------------------------------------------------- |
| Processor | Espressif ESP-32 |
| Dimensions | 53 x 31 mm (incl. screw terminals) |
| Input Voltage | approx. 9V to 24V DC (smoothed DC), digital current, AC with support capacitor |
| Power Outputs | 4x 2 A half-bridge (Version G1: 1 A) |
| Servos | 2x (only Version G2, require external power supply) |
| Total Current max. | 3 A (Version G1: 2 A) |
| Sensor Inputs | 4x digital via optocoupler with 2 kOhm (before 2023: 2x) |
| Interfaces | 2 CTC IR-Balise (each max. 12mA), I2C bus |
| Current online passive | TODO |
| Current boot | TODO plus switching current for initializing outputs |
The CTC-Turnout-Module-G is available in three versions:
- With screw terminals and holder for mounting under or on the model railway baseboard (on request).
- With screw terminals and housing optimized for LGB turnouts and PIKO-G turnouts.
- As an outdoor version with electronics potted inside the housing.
In the overview "Switching with CTC " you will find further modules and links to installation instructions.
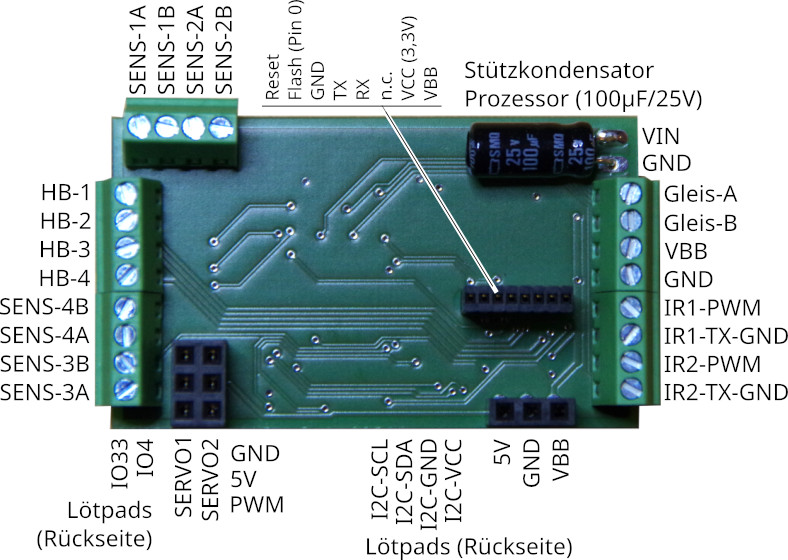
Version G2 with screw terminals (from 2023)
Old version (G1) with screw terminals (until 2022)
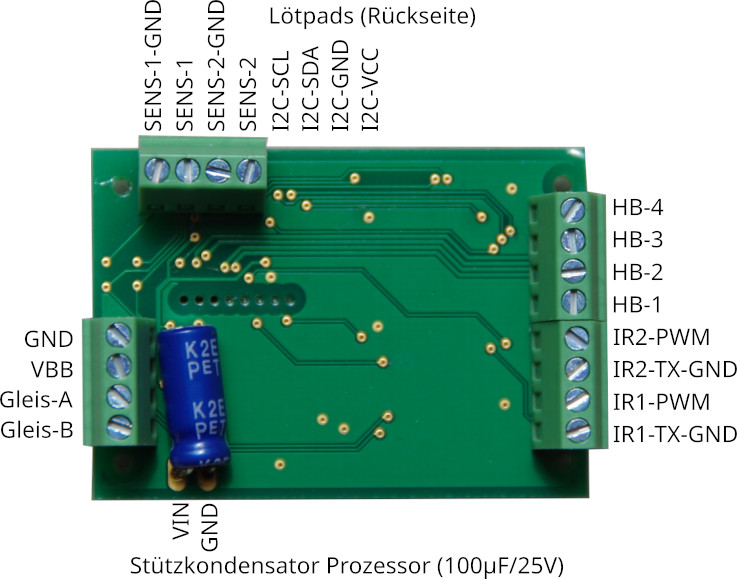
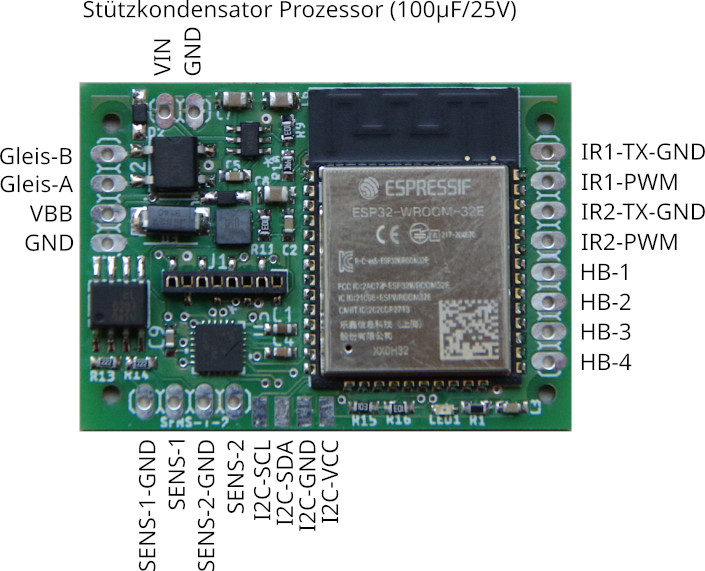
Connection
Notes:
- When selecting the input voltage, please remember that motors, lamps, etc. connected to the CTC module must also be compatible with this voltage
Standard configuration
- Connect contacts Rail-A and Rail-B to the track or power supply. It does not matter whether it is a digital control unit or a power supply, as long as the maximum voltage of 24 V is not exceeded. Since there is a rectifier at the input, it does not matter which pole you connect to Rail-A and Rail-B.
- Connect the switching connections of the turnout drive to HB-1 and HB-2 (or HB-3 and HB-4).
- Connect the CTC IR-Balise to IR1-GND (negative pole, green) and IR1-VCC (positive pole, red) or IR2-GND and IR2-VCC. Please also refer to the datasheet of the CTC-IR-Transmitter . Under no circumstances forget the resistor (typically 1 kOhm, min. 330 Ohm) in the IR-Balise, otherwise the CTC-Turnout-Module-G will be damaged.
- Connect sensors (e.g. track switches) to the 4 sensor inputs. From version 2023 (G2) onwards, polarity does not need to be observed. The current is limited by a 2 kOhm resistor, so no additional current limiting is required up to 24 V.
- Connect the NFC reader for wagon identification to the solder pads I2-SCL (TX, green), I2-SDA (RX, blue), GND (black) and VCC (red) (from firmware 20251008). For CTC modules delivered before 08.10.2025, the IO-Config must additionally be replaced.
The assignment of the pins for switching can be configured in the app (Cfg.xml), as well as the duration of the switching pulse.
Further connections
- The I2C bus (I2C-SCL and I2C-SDA) and the pins IO4 and IO33 are not supported by the current firmware. In the outdoor version, these pins are also not accessible due to the potting.
NOTE: For AC supply, the (blue in the images) support capacitor is mandatory.
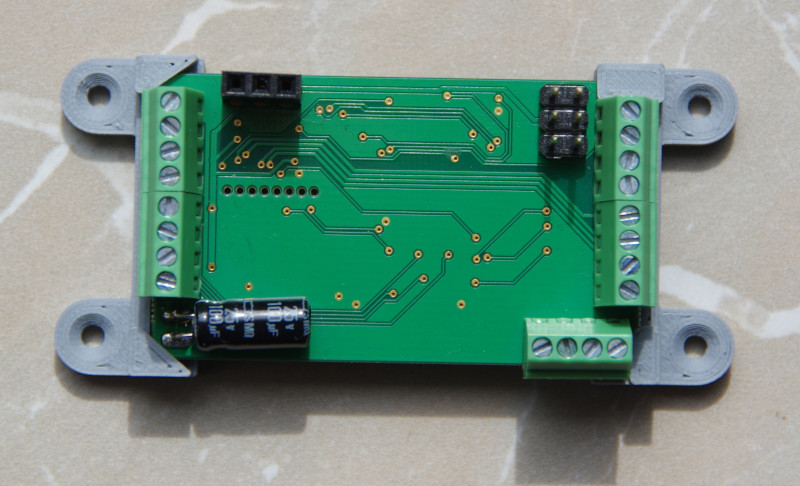
With holder
Here you can see the turnout-G2 with holder:
Universal housing
Here you can see the turnout-G2 in our universal housing:
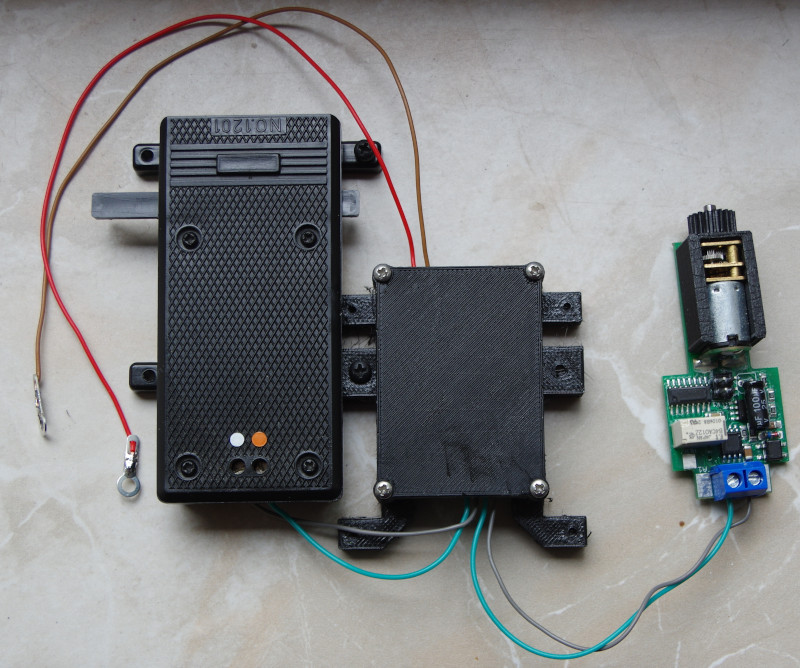
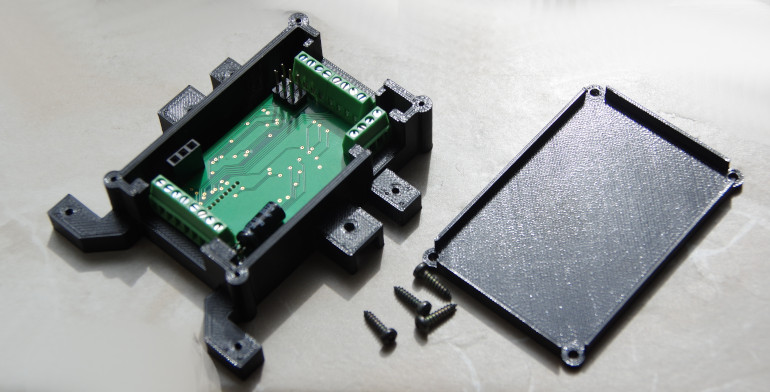 It can be mounted either completely separately (no image) or laterally on an LGB or Piko drive. The image still shows the slightly smaller version G1:
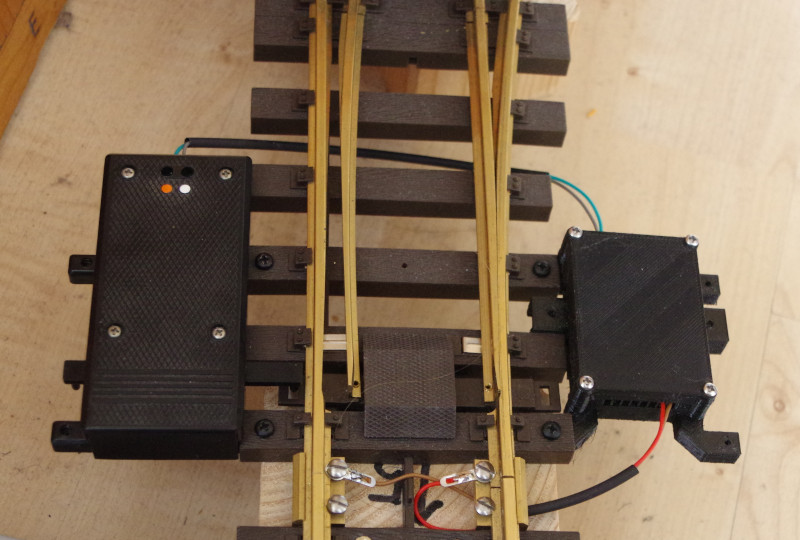
Or on the opposite side of the turnout drive. The image still shows the slightly smaller version G1:
Outdoor version
For outdoor operation in the garden, we have decided, after unsuccessful experiments with spray lacquer, to have the electronics completely potted. This is a bit more expensive, but it still works even when the railway is underwater.
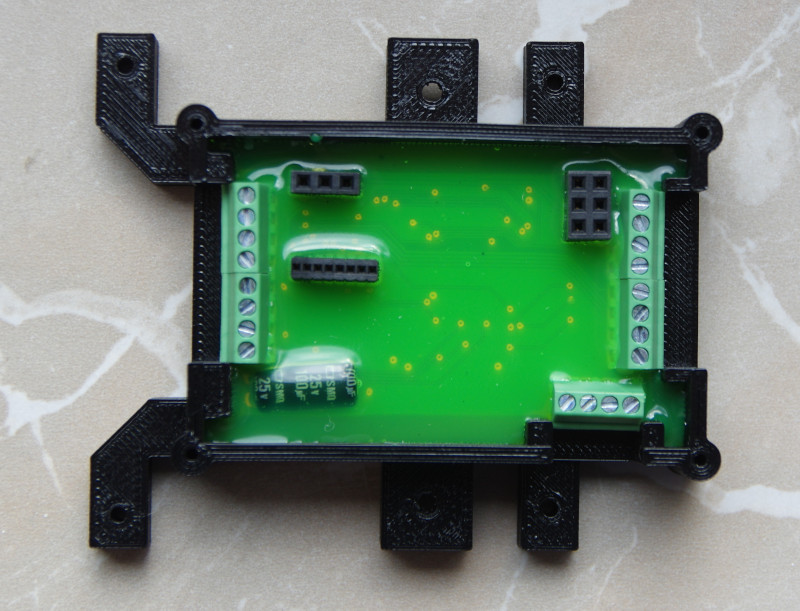
When closed, it looks like this:
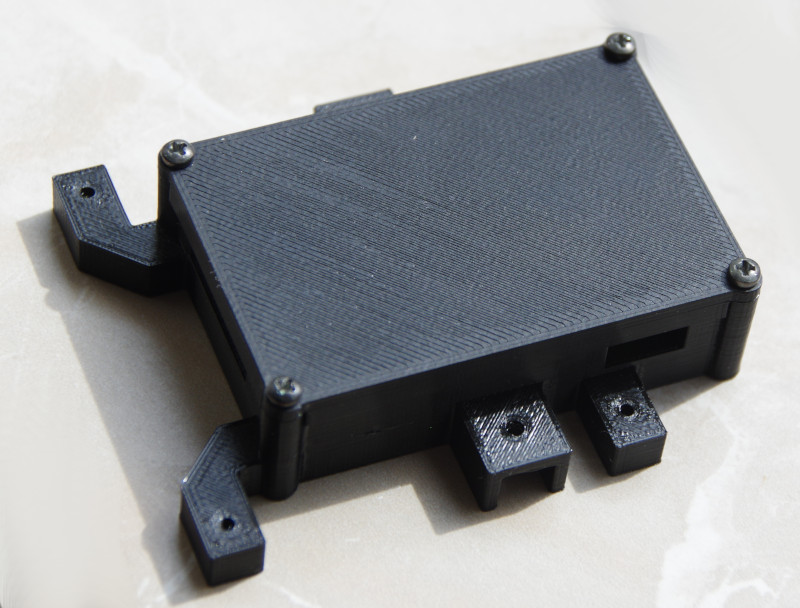
This is how we tested it:
Moisture test
The CTC-Turnout-Module-G was submerged together with the LGB drive while connected (power switched on). Then both were taken out of the water bath and subjected to the frost test.
Frost test
The (still dripping wet) CTC-Turnout-Module-G was stored together with the LGB drive in the freezer for several days and then immediately put back into operation. The turnout module worked straight away, the LGB drive had to be freed mechanically first - it was frozen.
Version G1 without screw terminals
Only available on special request.
Installation version G1 in LGB turnouts
Attention, this installation version increases the LGB drive by approx. 6 mm. Only available on special request.
Unfortunately, there are at least some locomotives (including the LGB rack locomotive HGe 2/2) that get caught on the turnout drive.
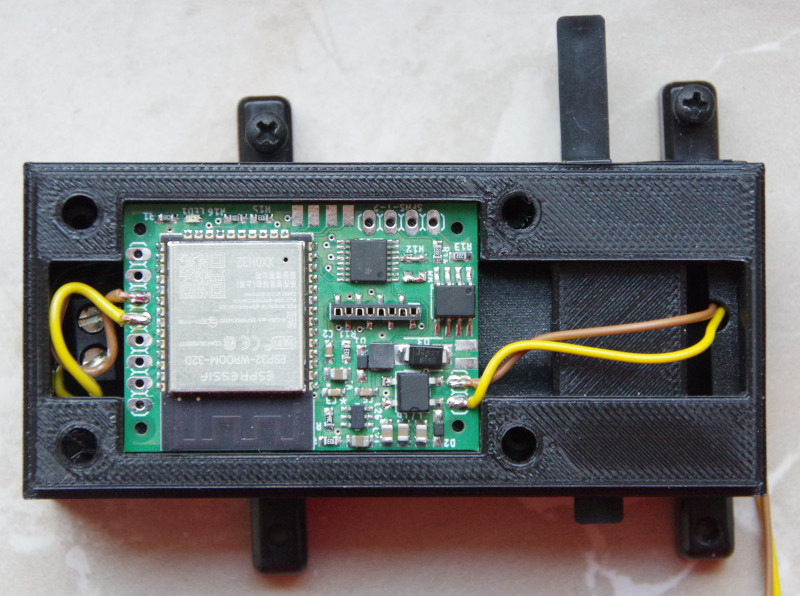
Connection
- Connect the shorter cables (HB-1 and HB-2, on the left in the image) to the screw terminals of the LGB turnout drive.
- Connect the longer cables (Rail-A and Rail-B, on the right in the image) to the track.
- If a turnout lantern is present, connect its negative pole to GND and the positive pole to HB-3.
Further connections
All other connections remain unused in this version.
Installation version G1 in Piko G turnouts
Attention, this installation version increases the PIKO drive by approx. 6 mm. Only available on special request.
Unfortunately, there are at least some locomotives that get caught on the turnout drive.
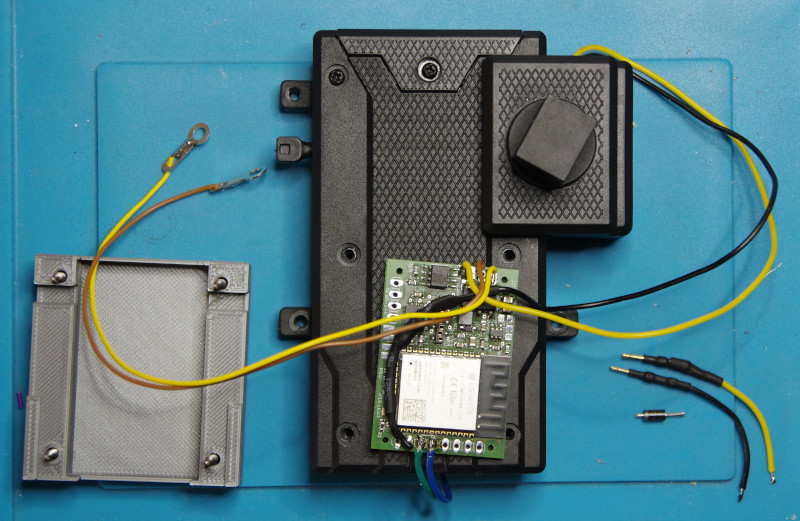
Connection
- Connect the shorter cables (HB-1 and HB-2, at the bottom in the image, green and blue) to the screw terminals of the Piko turnout drive.
- Connect the longer cables (Rail-A and Rail-B, at the top right in the image, yellow and brown) to the track.
- If a turnout lantern is present, connect its negative pole to GND (at the bottom left in the image, yellow) and the positive pole to HB-3 (at the bottom in the image, black).
Further connections
All other connections remain unused in this version.