


Note: The functionality described here requires the CTC-App from version 4.00 and corresponding locomotive firmware as a prerequisite.
Blocks (Track Sections)
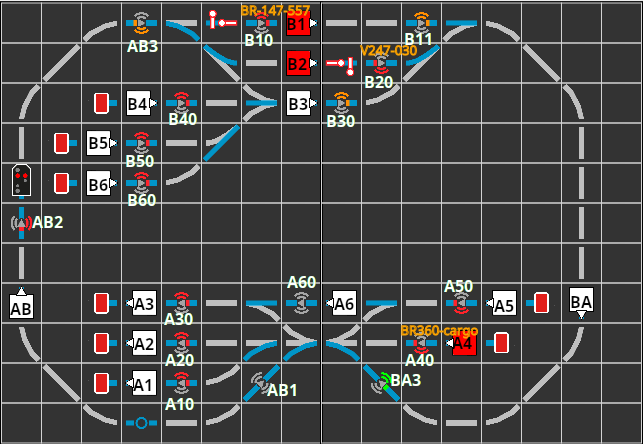
Blocks (track sections) are identified in CTC by two letters/numbers, e.g. “B1”. Uppercase and lowercase letters are considered as different. The first two characters of our balise ID are understood as the name of the block in which the balise is located.
Even if you have not configured a block, there is a suitable block for each balise, namely the one that results from the first two letters of their ID. In order to make a block visible in the track diagram, you must create it. And if you want to create routes, you must create blocks beforehand.
Direction (Clockwise)
Balises in the same block are numbered ascending clockwise at the third position of their ID, for example “AB1”, “AB2”, “AB3” for the three balises in block “AB”. With this numbering, the locomotive can determine the direction (clockwise) in which it is moving.
When placing balises and blocks in the track diagram, you should make sure that the little arrow in the symbol is pointing in a clockwise direction.
Naming Rules
For position IDs, you may only use digits (0 to 9) and letters (A to Z as well as a to z), no special characters and no umlauts. The name of a block must be exactly two characters long. Otherwise, there are no special rules for naming blocks.
On my systems (here the test system), I proceed as follows (block and balise IDs were hand-painted into the track diagram):
- I start by naming my stations with a single letter, e.g., “A” and “B”.
- Then I assign numbers for the tracks (platforms) of the stations, for example, “A1”, “A2”, “A3”.
- Long connecting routes, consisting of several blocks, are given a separate first letter.
- By using the appropriate lowercase letters, I can, if necessary, name an additional 10 tracks in the station (e.g., “a1”, “a2”).
- For shunting areas and sidings, I might use a new initial letter.
- A track that connects Station “A” with Station “B”, I name “AB”, if it runs clockwise from A to B, otherwise “BA”. Here as well, I have the lowercase letters available if necessary.
Since I have multiple systems (H0-, garden, and several test systems) in the house, I make sure that there are no duplicates - several systems may be active at the same time.
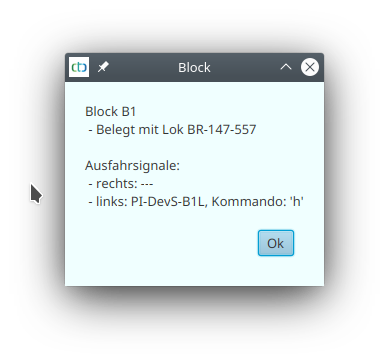
The IDs and further information about blocks and balises are obtained when you click the relevant block:
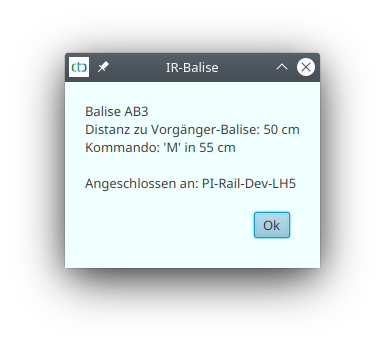
or balise in the track diagram:
Create / configure block
First, to create a block, select a CTC-turnout module or CTC-Multi-I/O-Board, where the overall plan will be stored. Open its configuration dialogue:
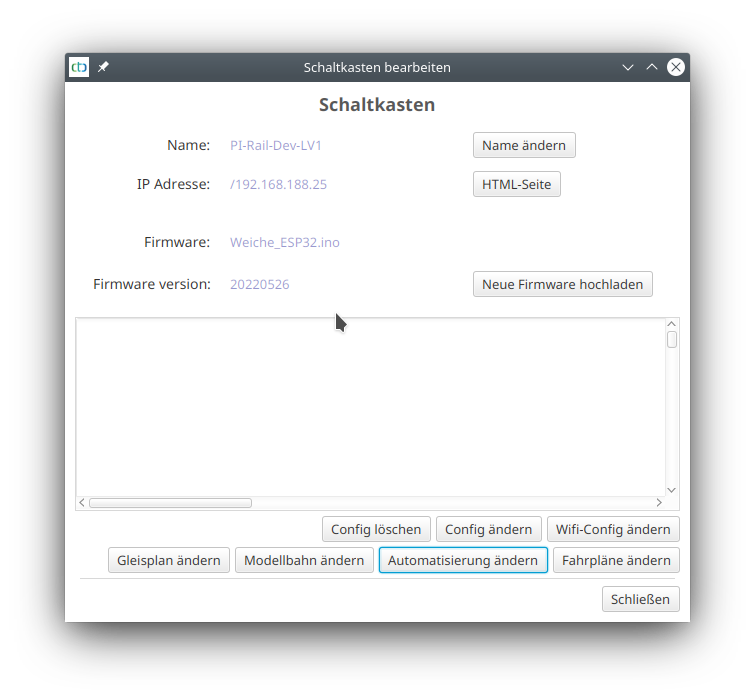
There, click on “Change automation”, then on the plus-button next to “Products and actions”:

Signals in the Block
For both ends of a block, an exit signal can be defined. This is assigned a position ID, which is the name of the block followed by a plus (‘+’), if it is located at the end of the section in a clockwise direction (right). If the signal is at the other end of the block, it is given a minus (‘-‘).
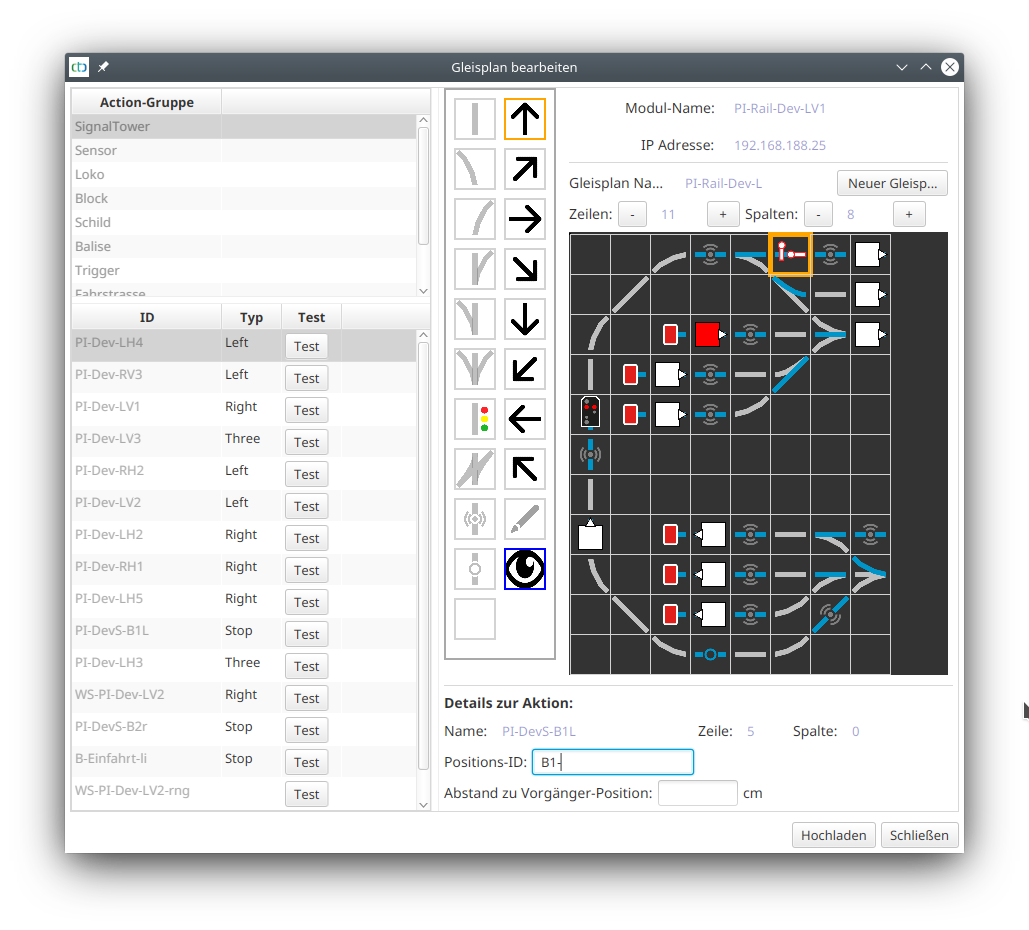
You can assign a signal to a block by giving the signal a position ID in the track plan editor:
Thus, the CTC app is capable of informing a locomotive which has been brought to a halt in a block due to a red signal, when the signal releases the path again.
Note: To prevent a locomotive from being released by the wrong signal, a maximum of one signal per direction of travel may be assigned to a block.