


This BR 03.10 conversion demonstrates the upgrade of an analog Märklin locomotive using our own PluX22 adapter and the CTC locomotive module M3.
Note: A YouTube video of this conversion is also available.
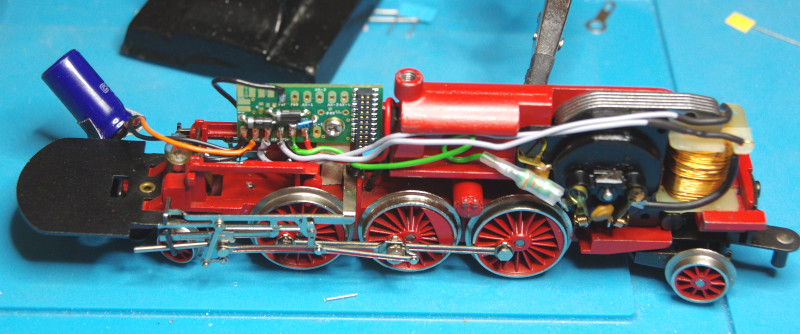
The locomotive body is opened by removing the screw on the top center of the boiler. The tender is non-functional, meaning there is also no rear light.

For this conversion, we use the “Adapterplatine_PluX22” and the “Umbausatz-Analog”. The CTC-Lokmodul-M3 with PluX22 connector is used as the locomotive module.
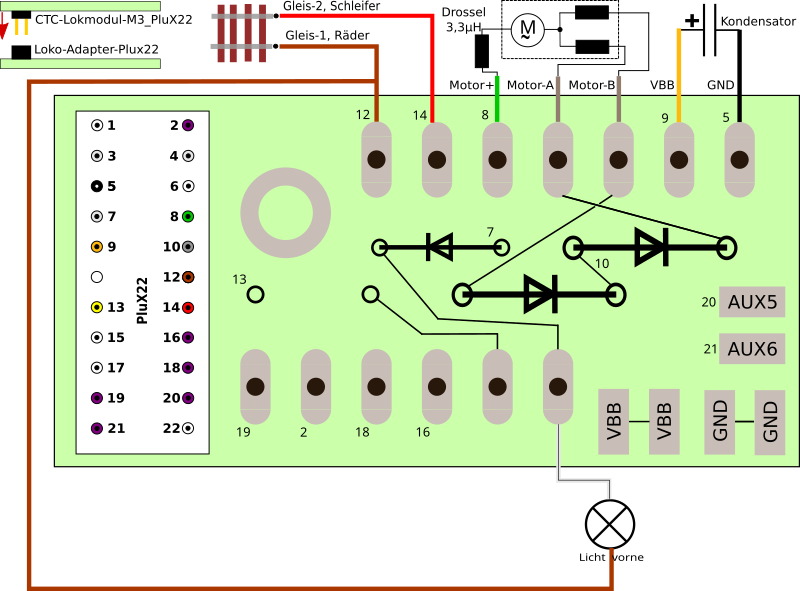
The wiring diagram looks like this:
From the locomotive analog conversion kit, you will need the two black diodes for the field coil and one of the two blue diodes for the headlight. They are inserted into the adapter board and then soldered. Be sure to pay attention to the position of the marking ring (see image).
On the side of the motor not connected to the field coil, we attach the choke.
Next, we solder the headlight cable to the adapter board.
Finally, the buffer capacitor is soldered (plus: orange, minus: black).
The cables are:
- Center rail: red
- Field coil (left/right): gray
- Choke on motor: green
- Capacitor: orange (positive) and black (negative)
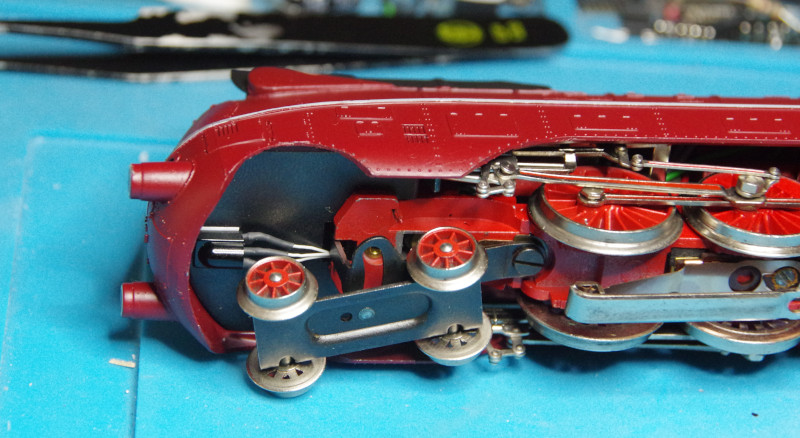
We place the IR receiver at the very front of the locomotive body. The hole in the housing is large enough, meaning we can solder the IR receiver to the cable before threading it through.
Now, the CTC-Lokmodul-PluX22 can be plugged onto the adapter, and then the IR receiver can be plugged onto the locomotive module:
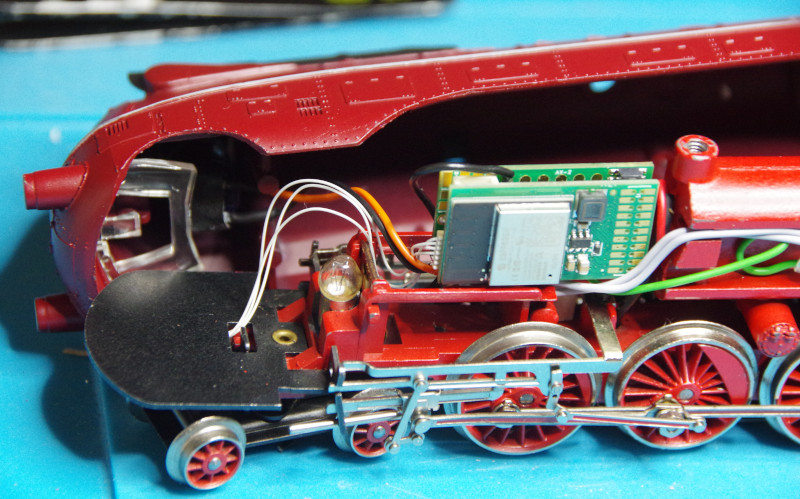
Before reassembling the locomotive, we place it on a roller test stand. There, we configure the locomotive module and test whether everything is functioning.
Light Configuration
Unlike the standard PluX22, the positive pole is switched for the light.
Therefore, we now need to remove the light (Light-conn) from the locomotive’s configuration and instead add and connect “Driving light on 2x HalfBridge high (1 lamp each)” from universell-loks.xml.
For more details, see the “Light Configuration” section in the BR53 Conversion.