At CTC, a hierarchy of model railway and track plan is assumed: A model railway consists of one or more track plans.
Both track plan (or track plans) and model railway are stored in one of the modules. This means that the track plan can be considered part of the configuration stored in a module. Here in the starter set, the track plan and model railway are stored in the turnout module “Demo-W-right”. To create and edit the track plan in this starter set, the module’s configuration is opened. There are two ways to do this:
- Select “Settings” - “Configurator” in the main menu. The new window “List of all modules” opens. In the row with the ID “Demo-W-right”, click on the pencil in the “Edit” column, the “Edit switch box” window opens.
- In the main menu, select the “Modules” tab. In the row with the ID “Demo-W-right”, click on the pencil in the “Edit” column, the “Edit switch box” window opens.
Clicking on the “Change track plan” button opens the “Edit track plan” window. Clicking on the “New track plan” button allows you to enter the name of the new track plan and confirm it with “Create”. Enter “Starterkit” as the name for the new track plan.
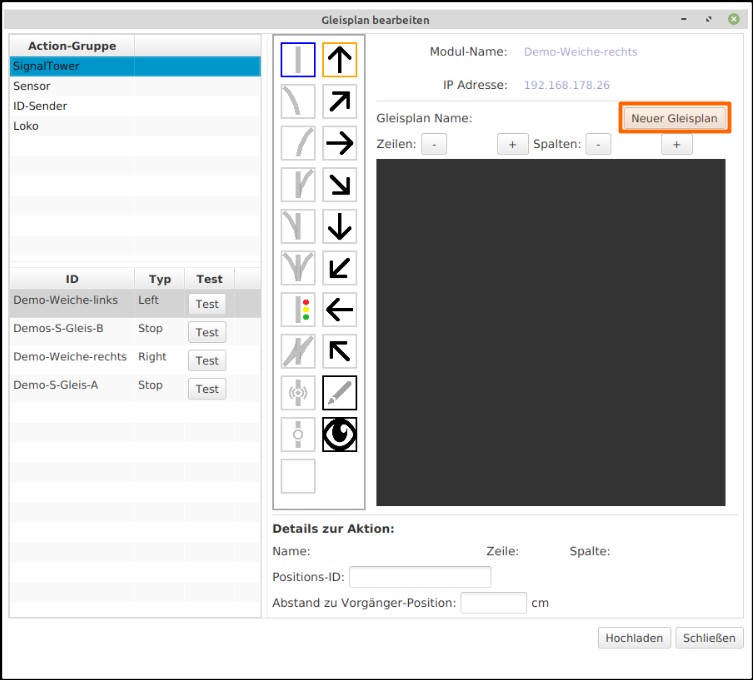
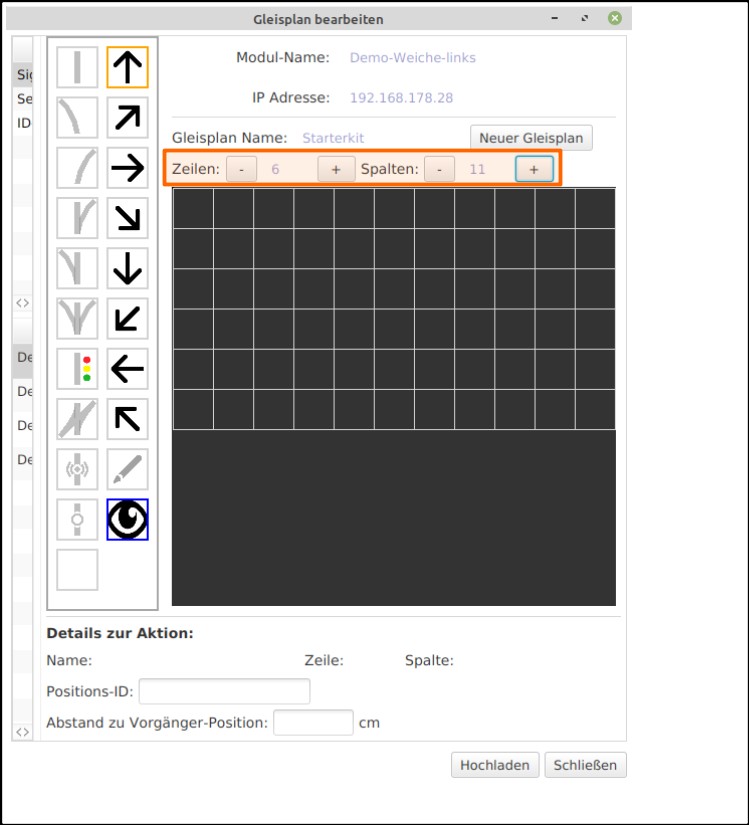
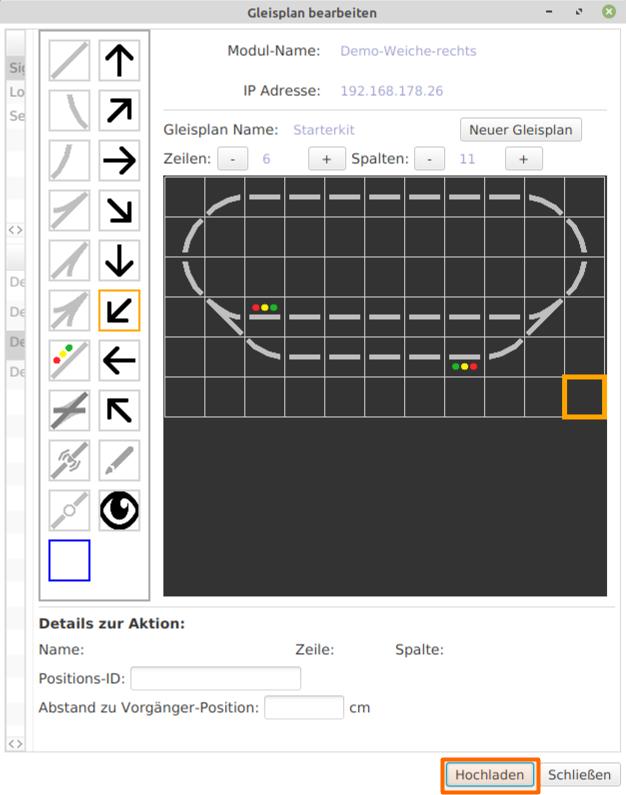
The track plan now has the new name “Starterkit”. The track plan has a “default size” of 10 x 10 elements. For the starter kit track plan, 6 x 11 elements are needed. The values for “columns” and “rows” need to be adjusted accordingly.
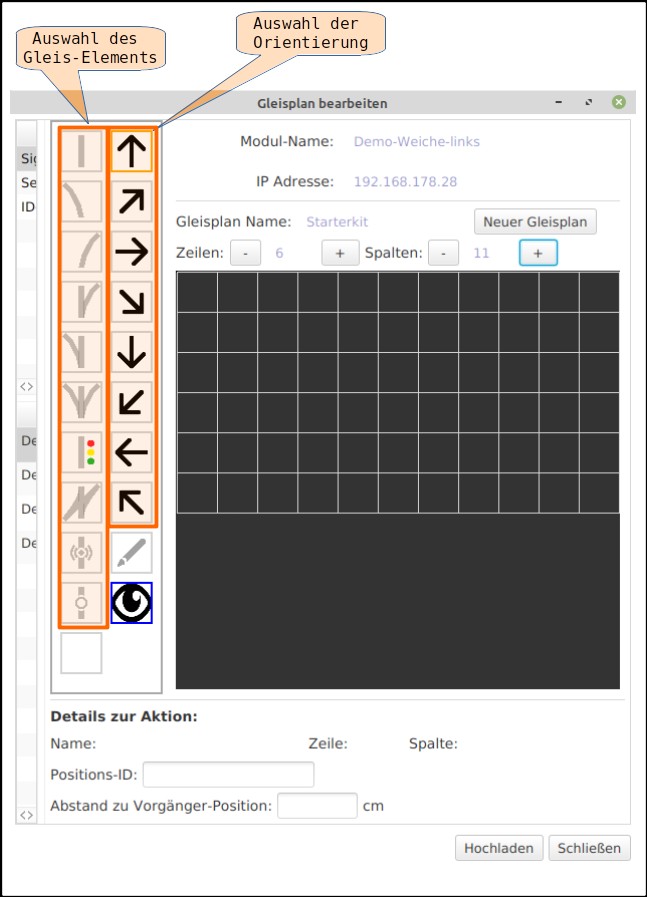
Individual track elements and their orientation are selected.
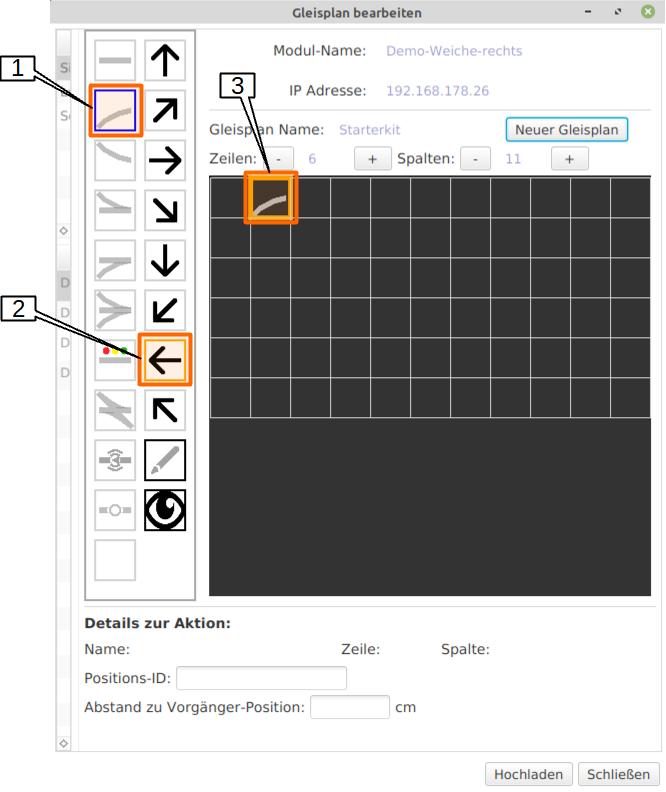
In this example, a track curve is positioned:
- Select “to the left” as the orientation,
- select “track curve” as the track, and
- position it on the track plan with a mouse click.
In this way, the track plan is created with additional track elements, turnouts, and semaphore signals. The IR-balises are not inserted into the track plan; this will be done later. A mouse click on “Upload” saves the created track plan in the module “Demo-turnout-right”.
Assigning Turnouts and Semaphore Signals in the Track Plan
The track plan is created; next, the turnouts and semaphore signals are assigned according to the following table:
| ID | Element in the Track Plan |
|---|---|
| Demo-W-left | left turnout in the track diagram (Demo-W-left) |
| Demo-W-right | right turnout in the track diagram (Demo-W-right) |
| Demo-S-Track-B | signal left in the track diagram (Demo_S_Track_B) |
| Demo-S-Track-A | signal right in the track diagram (Demo_S_Track_A) |
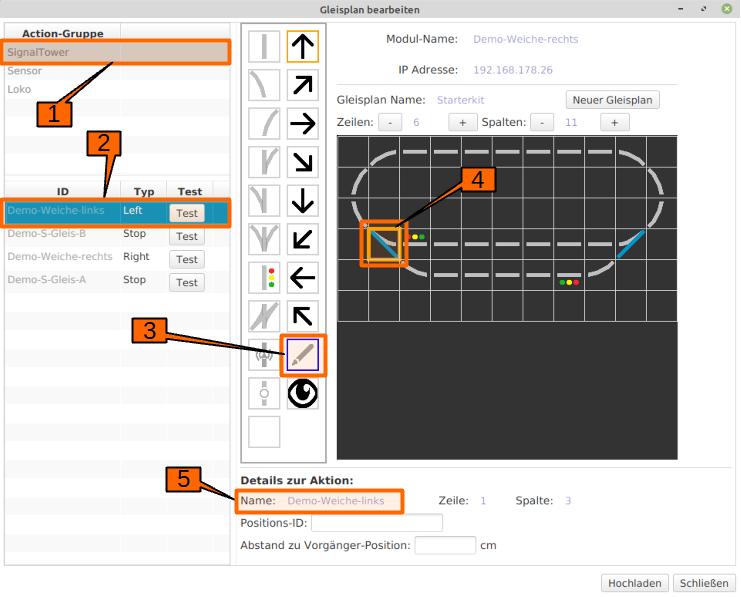
“Demo-W-left” is assigned as follows:
- Select “SignalTower” in the “Action Group” field.
- Select “Demo-W-left” in the “ID” column.
- Select the pencil.
- Select the left turnout in the track diagram.
- In “Action Details”, you can see that the turnout name “Demo-W-left” has been entered in the “Name” field.
The same procedure is followed for the right turnout:
- Select “SignalTower” in the “Action Group” field.
- Select “Demo-W-right” in the “ID” column.
- Select the pencil.
- Select the right turnout in the track diagram.
- In “Action Details”, you can see that the turnout name “Demo-W-right” has been entered in the “Name” field.
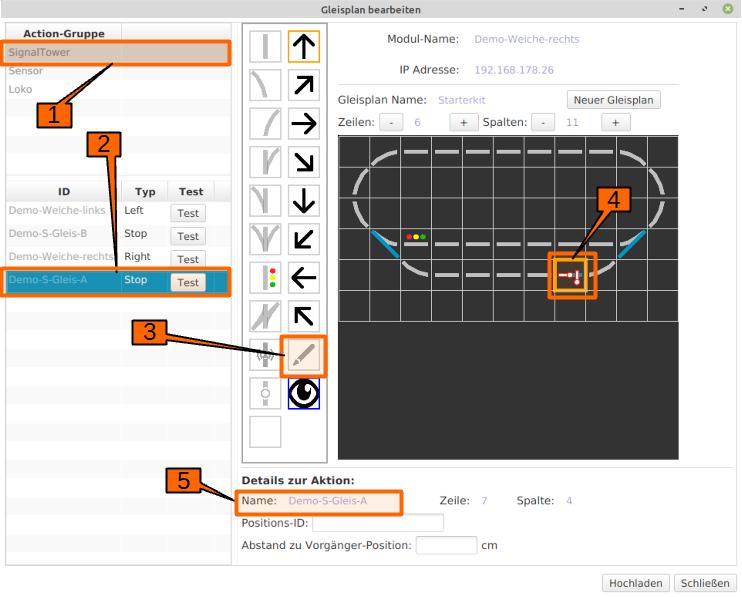
The right signal “Demo-S-Track-A” in track section “Block-A” is assigned very similarly to the turnouts as follows:
- Select “SignalTower” in the “Action Group” field.
- Select “Demo-S-Track-A” in the “ID” column.
- Select the pencil.
- Select the right signal in the track diagram.
- You can see in the track diagram how the symbol has changed.
- In “Action Details”, you can see that the semaphore signal name “Demo-S-Track-A” has been entered in the “Name” field.
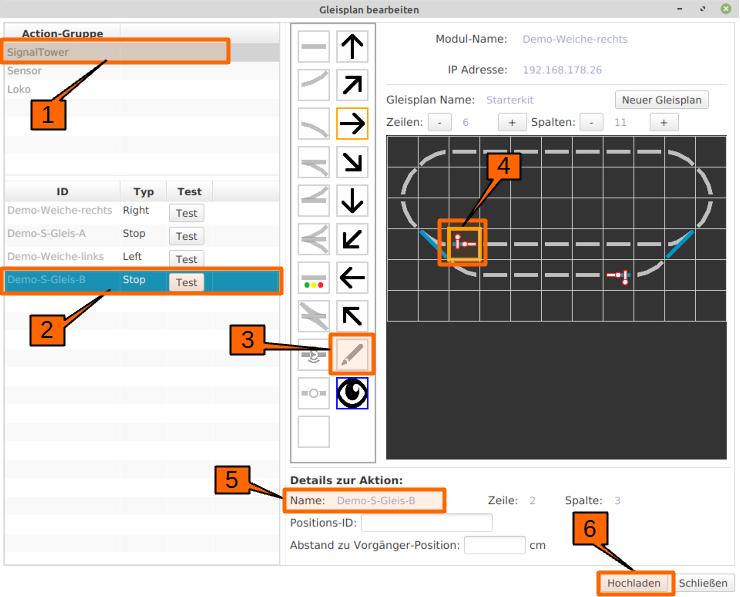
The same procedure is followed for the left signal “Demo-S-Track-B” in track section “Block-B”:
- Select “SignalTower” in the “Action Group” field.
- Select “Demo-S-Track-B” in the “ID” column.
- Select the pencil.
- Select the left signal in the track diagram. You can see in the track diagram how the symbol has changed.
- In “Action Details”, you can see that the semaphore signal name “Demo-S-Track-B” has been entered in the “Name” field.
- The track plan is now configured for the first test runs and is saved in the turnout module “Demo-turnout-right” with a click on “Upload”.
The last step is to integrate the track plan into the model railway. To do this, open the configuration of “Demo-turnout-right” again. Clicking on the “Change model railway” button opens the “Edit model railway” window. Clicking on “New track section” allows you to assign a new name. In “Available Panels,” the panel named Starterkit is selected and positioned by clicking on the “Arrow” button. Clicking on the “Upload” button saves the new model railway in the track module.


