Driving

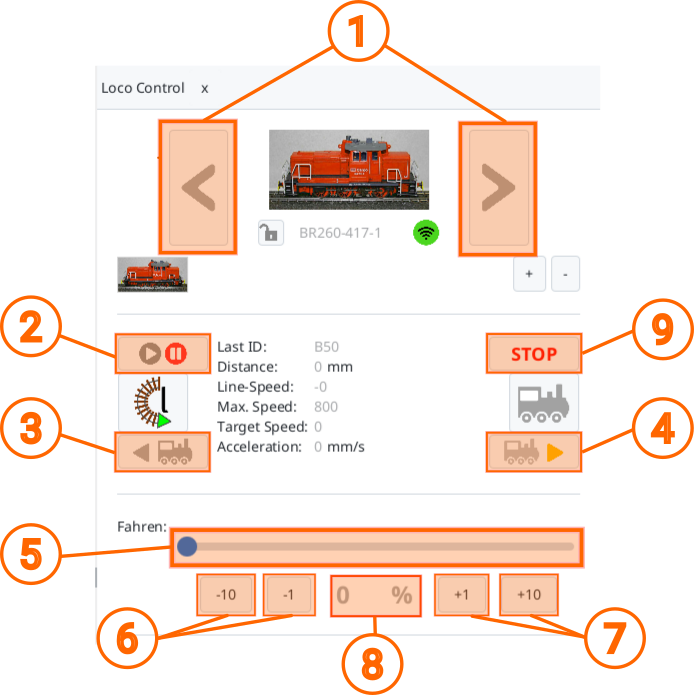
With the following buttons and displays, you can control the displayed locomotive:
- With (1) you can switch between the available locomotives, i.e. select a different locomotive.
- With (2) the locomotive is activated (blue) and paused again (red). When activated, the set direction of travel (3)/(4) and speed (5) are set, i.e. if the slider (5) is on a value greater than zero, the locomotive starts moving.
- With (4) you activate the forwards driving direction, with (5) backwards. In both cases, clicking on the button also sets (2) to active (blue). The set direction of travel can be identified by the coloured arrow in the button: yellow for forwards, red for backwards.
- With (5) you set the speed. The set value is displayed as a number (8) underneath.
- With (6) the speed is gradually decreased and with (7) increased.
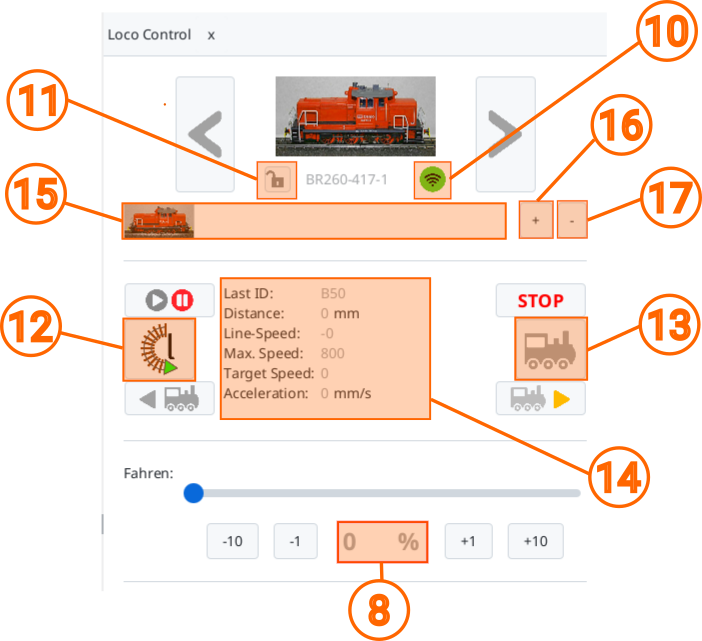
The picture and name of the locomotive can be changed via their configuration. Both are stored in the locomotive.
Additional Features and Displays

- The Wi-Fi symbol (10) indicates whether the locomotive is currently reachable (green), has not responded for more than 3 seconds (yellow), or for more than 10 seconds (red). In addition, the green Wi-Fi symbol shows the signal strength, see also Chapter 3 “WiFi”.
- To the left of the locomotive name, the locomotive status (11) is displayed, the individual symbols are described in Chapter 1.3 “Autopilot”.
- If your locomotive has an IR receiver, you can adjust the orientation of the locomotive with (12): r = clockwise, l = counter clockwise. This is important so that the locomotive only stops in front of a red signal when approaching from the front. After crossing two balises of the same block, the locomotive sets its orientation itself and the symbol on the button may be adjusted.
- (13) toggles the automatic operation on and off. An “A” on the button indicates activated automatic operation. When a locomotive is forced to decelerate/stop in front of a red signal by a balise, the automatic operation activates itself, which can then be seen from the symbol on the button.
- In the middle (14), there are some additional status information about the locomotive, which will be addressed at the appropriate point in this documentation.


